Overview
The Offline Payments extension in EventPrime lets you offer an additional payment method to your attendees who prefer to pay manually instead of using online gateways. This method allows users to confirm their Booking and pay later while giving admins control to confirm or cancel the Booking based on actual payment status.
Prerequisite
Before using the Offline Payment option, ensure that EventPrime and its Offline Payments extension are installed and activated.
If the extension is not yet installed, you can get it here: Get Your Offline Payments Extension
Steps to Enable and Use the Offline Payment Extension in EventPrime
1. Open the Extensions Settings in EventPrime to Access the Offline Payments Option
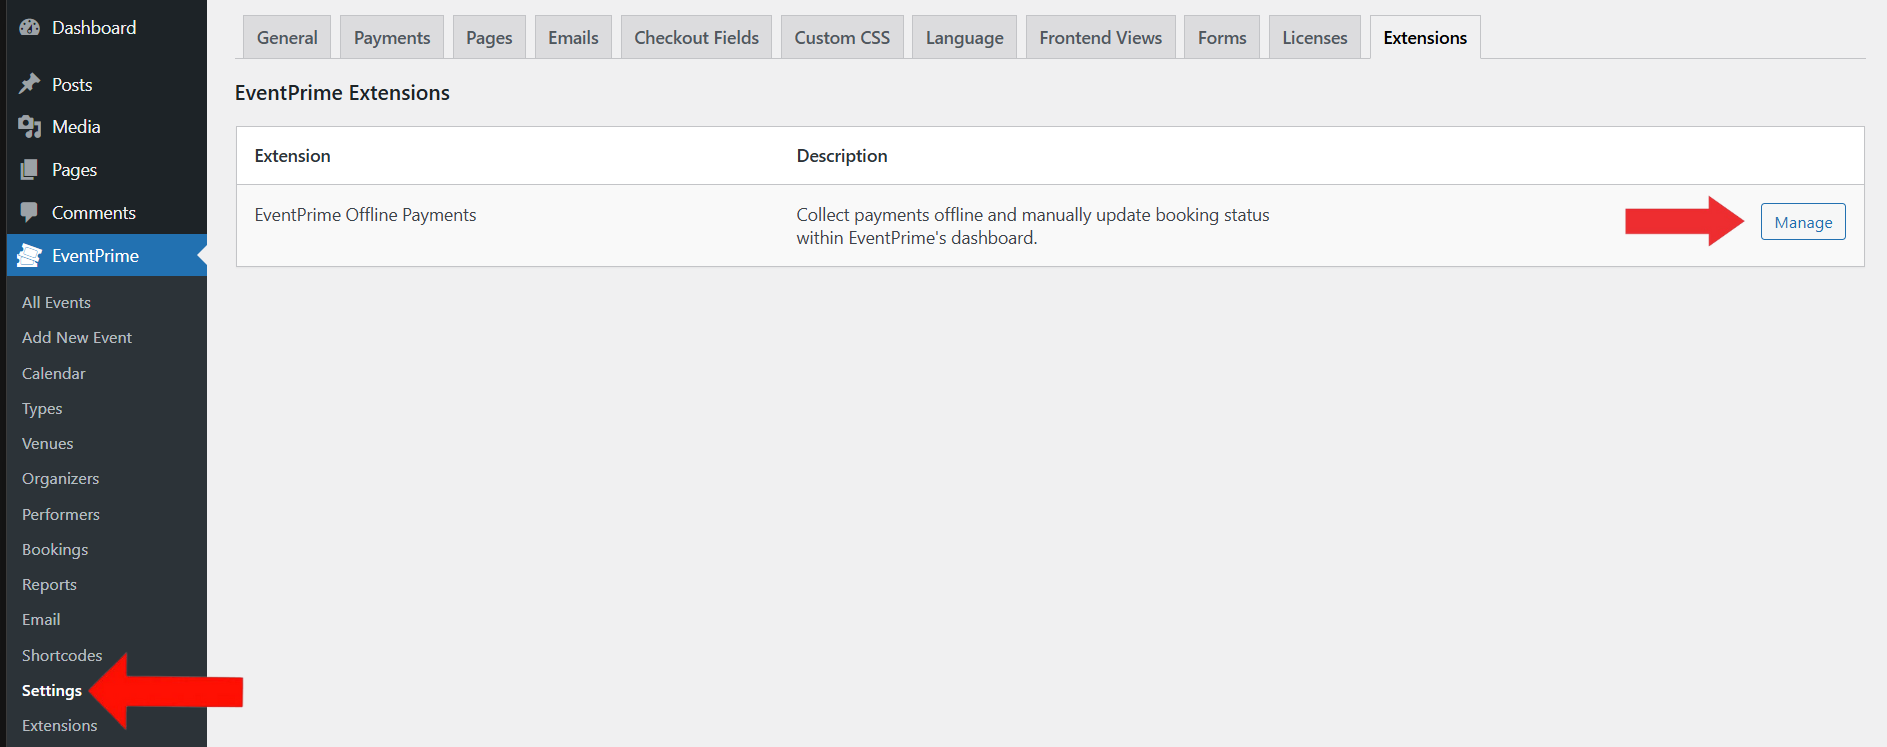
- Navigate to the EventPrime menu, click on the Settings submenu, then go to the Extensions tab.
- Locate the EventPrime Offline Payments extension and click the Manage button.
2. Configure the Offline Payments Settings Based on Your Needs
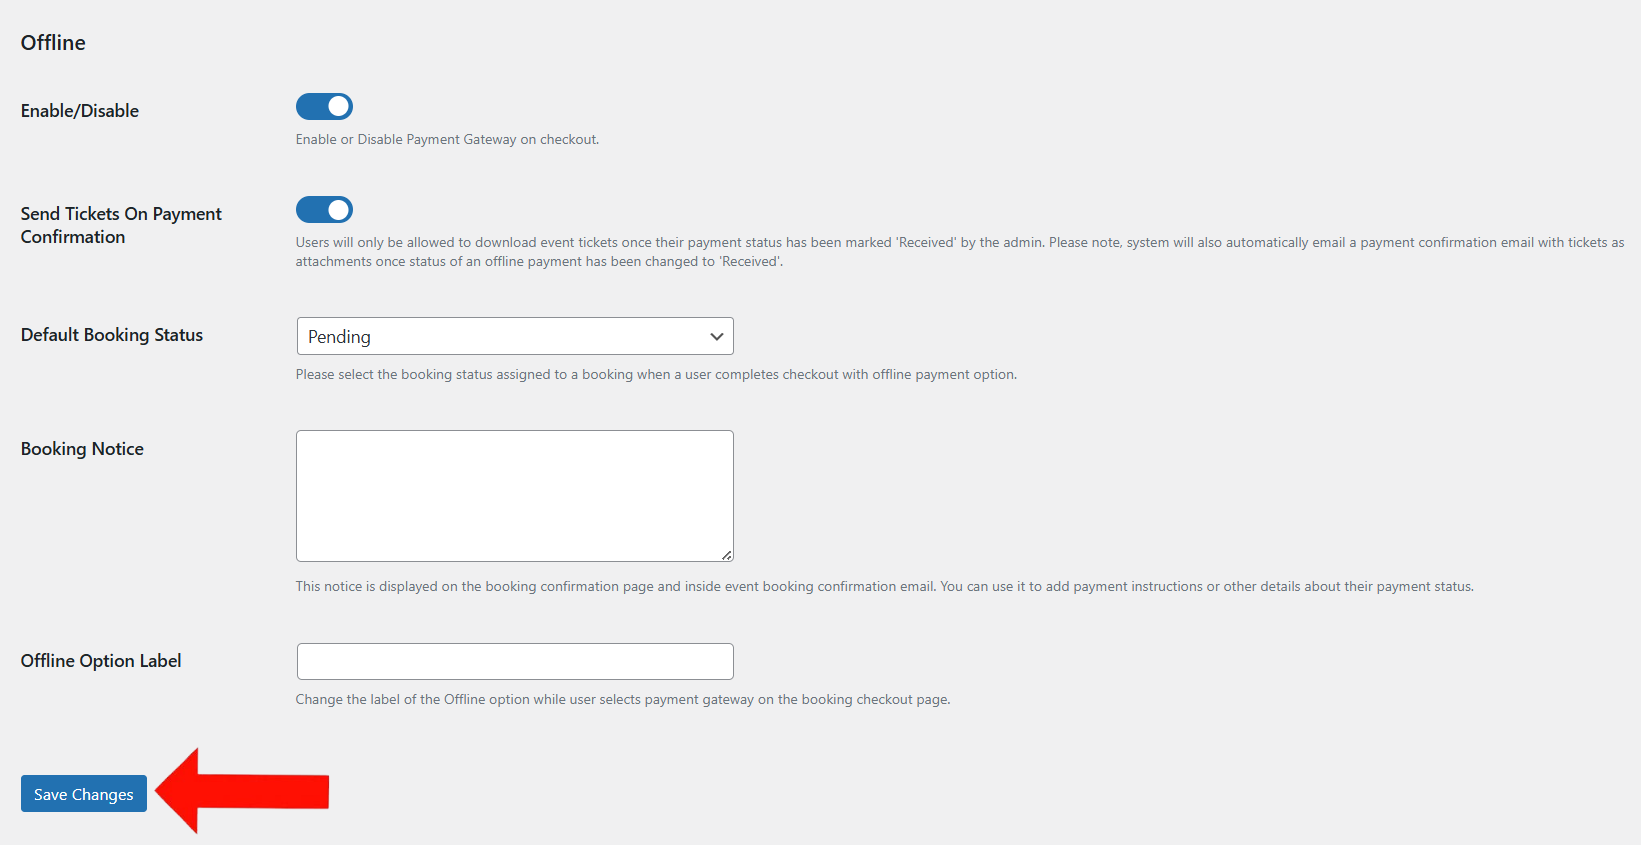
On the Offline Payments settings screen, toggle the Enable/Disable switch to enable the payment option.
You can also:
- Enable Send Tickets on Payment Confirmation to allow ticket access only after payment is confirmed.
- Set the Default Booking Status either Pending or Completed .
- Add a Booking Notice with instructions for users on how to pay offline.
- Customize the Offline Option Label shown during checkout (e.g., “Pay Locally”).
- Click Save Changes to save your settings.
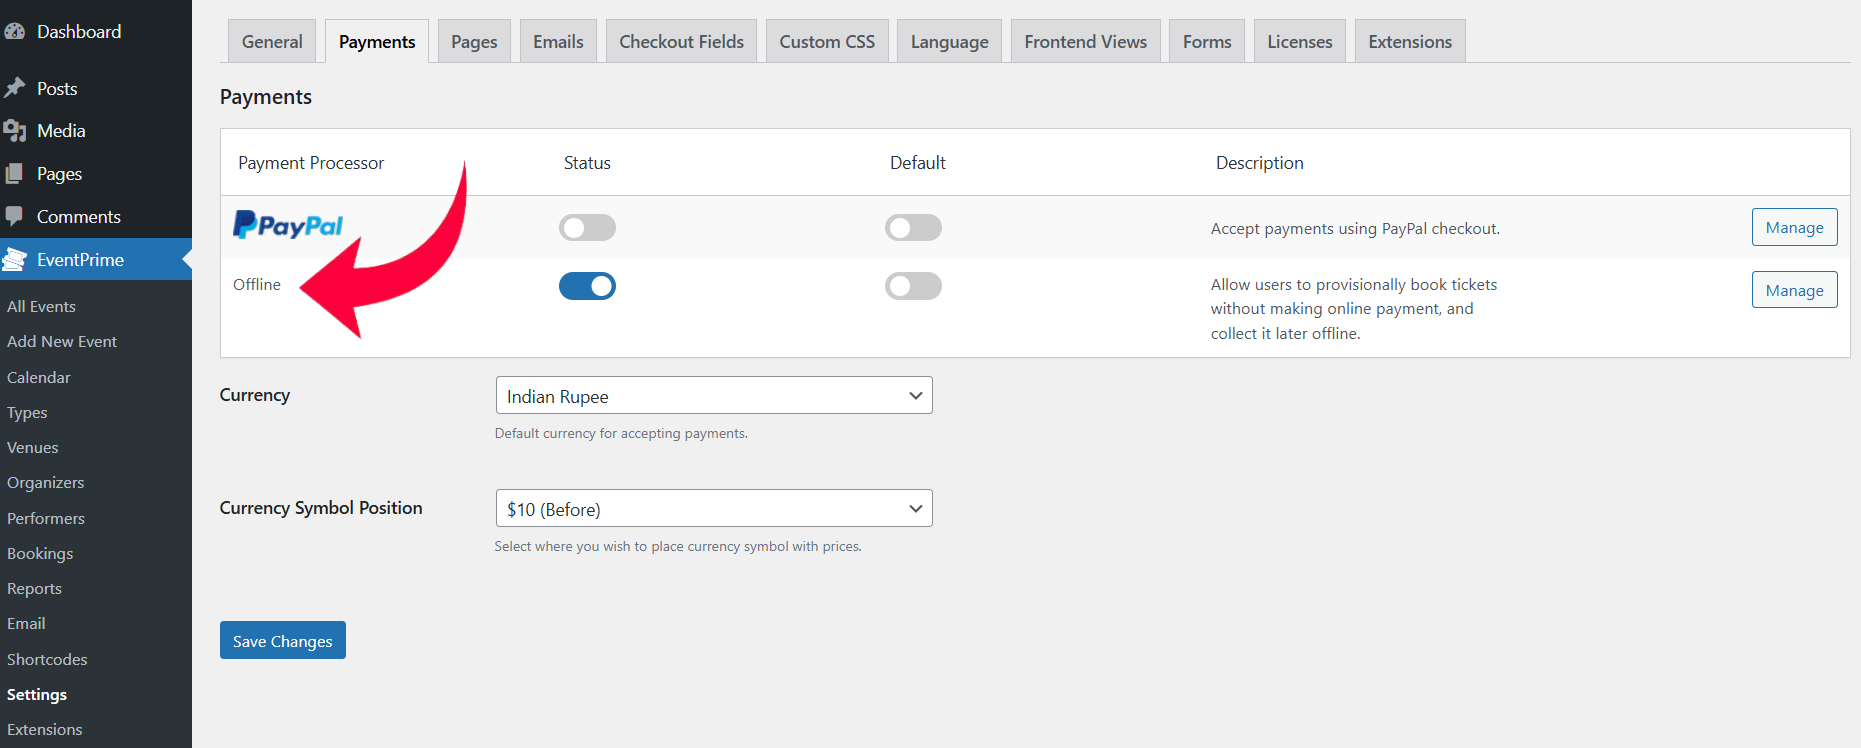
3. View the Offline Payments Option Under the Payments Tab
After saving, the Offline Payment option will automatically appear under the Payments tab in EventPrime settings, confirming it’s active for your site’s checkout.
4, Admin Can Track and Filter Offline Payments from the Bookings Tab
To manage offline Bookings,
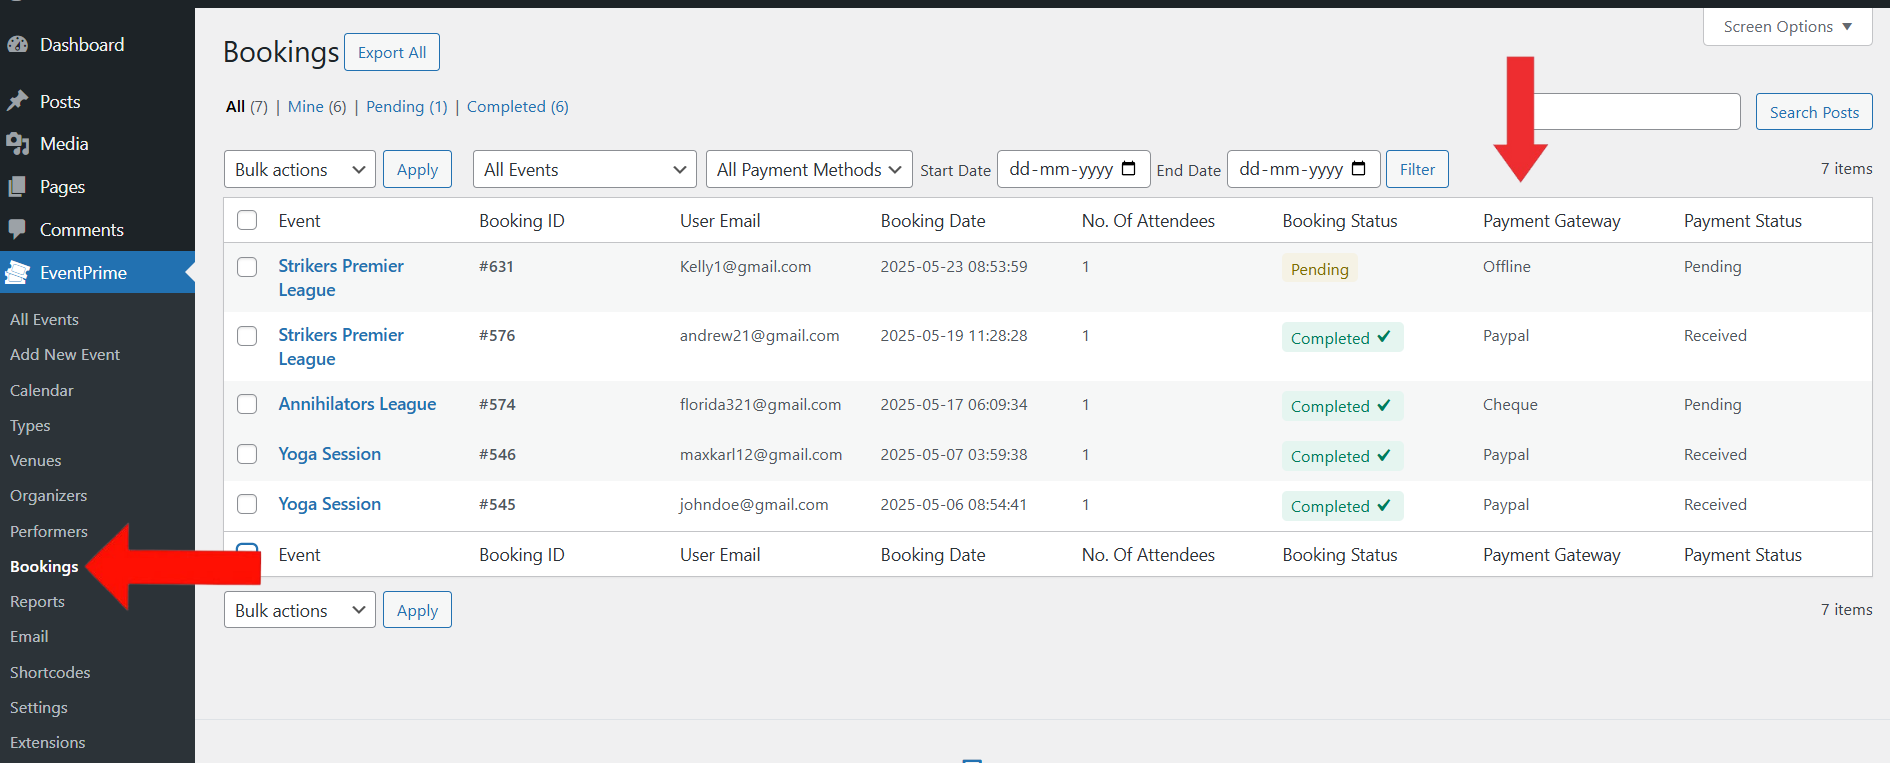
- Navigate to the EventPrime menu and select the Bookings submenu.
- Here, under the Payment Gateway column in the Bookings list, the admin can view which Bookings were made using Offline payment gateway.
Frontend View
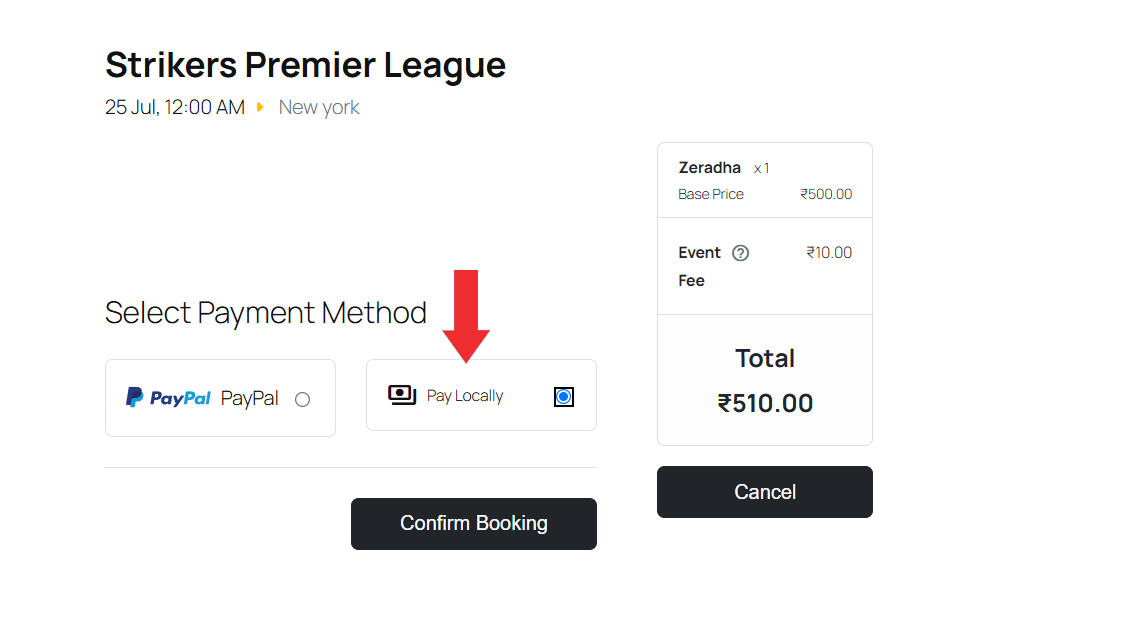
On the frontend, attendees will see the Offline Payment option (e.g., “Pay Locally”) on the Event Booking page under Select Payment Method.
After selecting this option, they can confirm their booking, which will be marked as either Pending or Completed, depending on your settings.
Conclusion
The Offline Payments extension in EventPrime makes it easy to collect payments outside online gateways by giving you full control over the payment verification process. It’s a helpful addition for events accepting in-person, bank transfer, or cash payments.
Questions, Support & Custom Solutions
- Need more details or can't find what you're looking for? Let us know how we can help! Contact our support team here.
- Looking for a tailor-made solution to meet your specific needs? Our dedicated customization team is here to help! Use this link to share your requirements with us, and we'll collaborate with you to bring your vision to life.
Hello,
how can I send email with QR code for the payment after each booking?
I need my customers to recieve the email with the details containing this information.
I don’t want to send every email separately or wait until all the bookings are done.
Thanks in advance
Jan
To include QR codes in booking confirmation emails, please ensure that The Event Tickets Extension, attendees will receive a ticket containing a unique QR code as part of the booking confirmation email. This QR code links directly to the booking details page and can be scanned with any QR code application on iOS or Android devices for real-time verification.
For more information about Event ticket extension please visit this link:
https://theeventprime.com/all-extensions/event-tickets/
If the issue persists, please let us know, and we will be happy to assist you further.
My offline checkout is’t working. I can’t proceed with the checkout
Thank you for reaching out.
To better understand and resolve the issue with offline payments at checkout, could you please share a screenshot of the error or the specific behavior you’re experiencing?
In the meantime, here’s our detailed documentation on how to enable the offline payment option:
https://theeventprime.com/how-to-enable-offline-payment-option-in-events/
Looking forward to your reply.
We are here to help.
In my site I see the confirm booking button, but it does nothing and I can not submit the order.
Thanks for reaching out to us.
To assist you further, could you please share the URL of the event where you are experiencing the issue?
Looking forward to your reply.