
Overview
EventPrime’s Wishlist feature lets users save Events by clicking a heart icon. Saved Events appear in the My Wishlist section of their profile, where they can view and complete their Booking later.
Steps to Enable and Use the Wishlist Feature in EventPrime
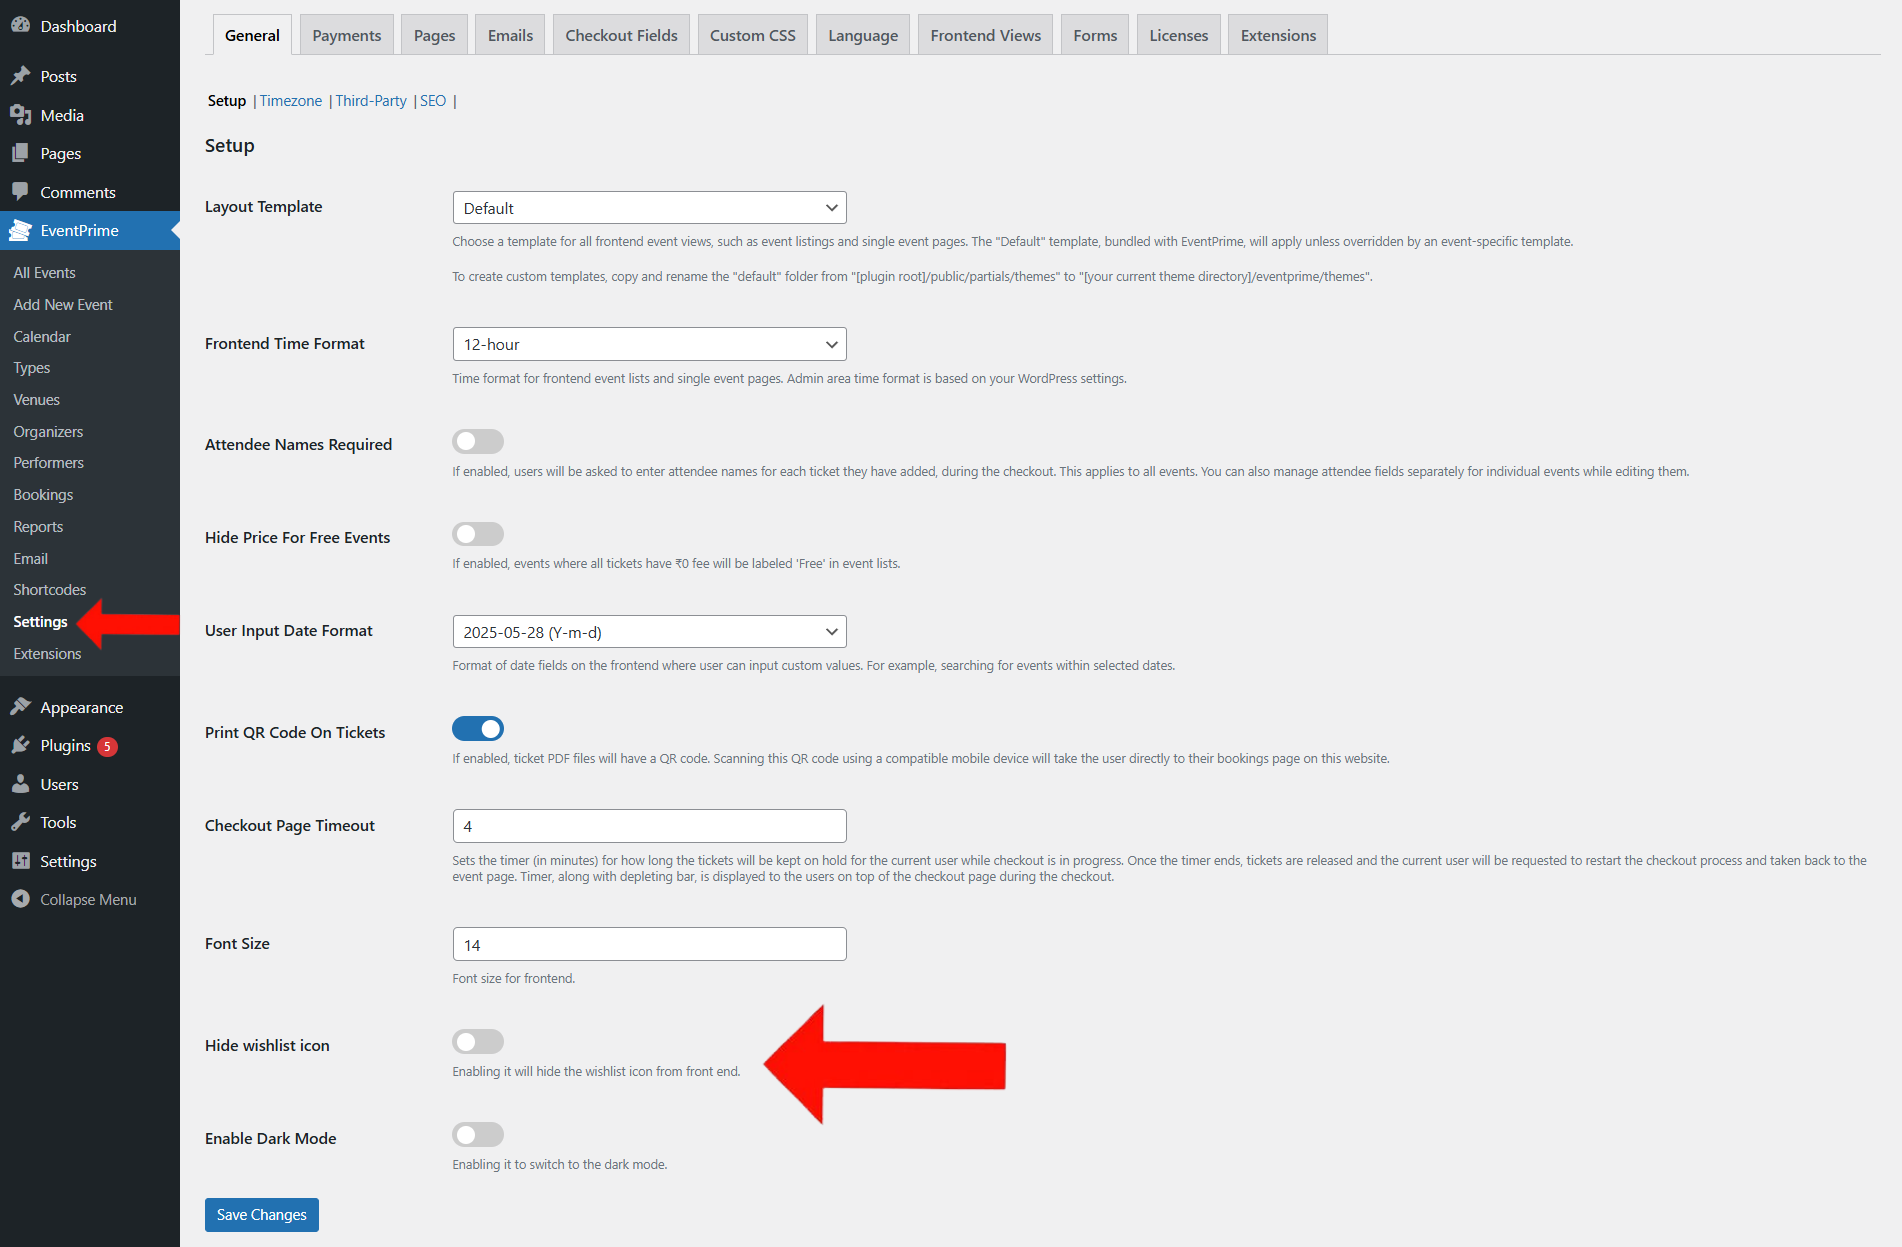
- Navigate to the EventPrime menu and select the Settings submenu.
- In the General tab, ensure that the Hide Wishlist Icon option is disabled.
- This setting allows users to see and use the Wishlist heart icon on the Event page.
- If you enable this option, users won’t be able to add Events to their Wishlist.
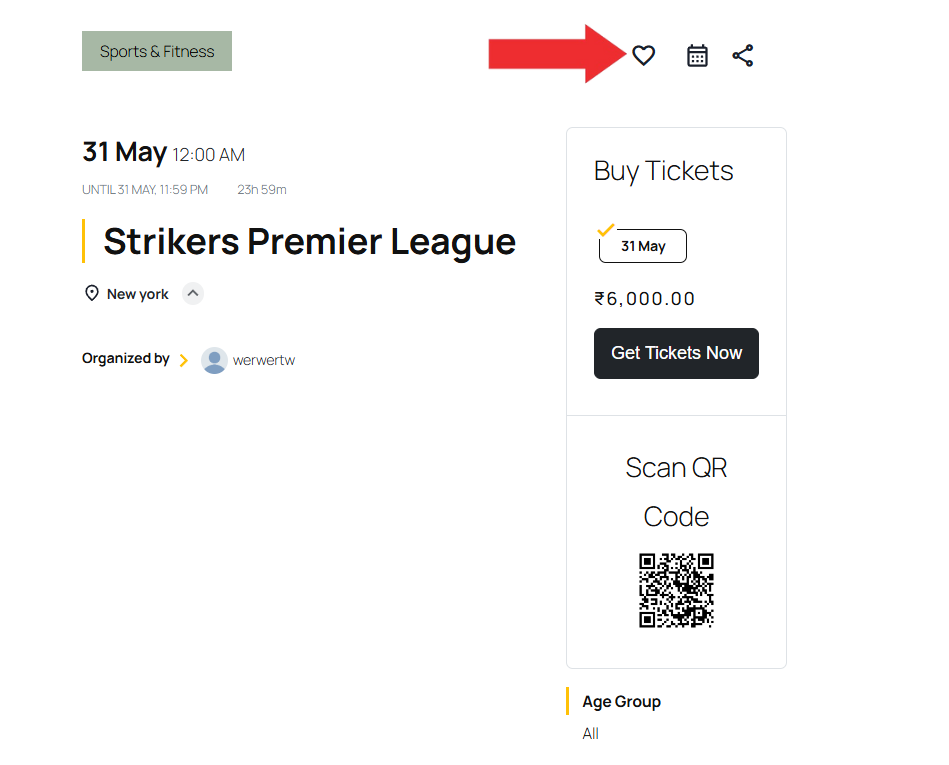
Frontend View
When the Wishlist option is enabled, a heart icon appears on each Event block on the frontend Event Booking page.
Users can click this heart icon to add the Event to their Wishlist for future reference.
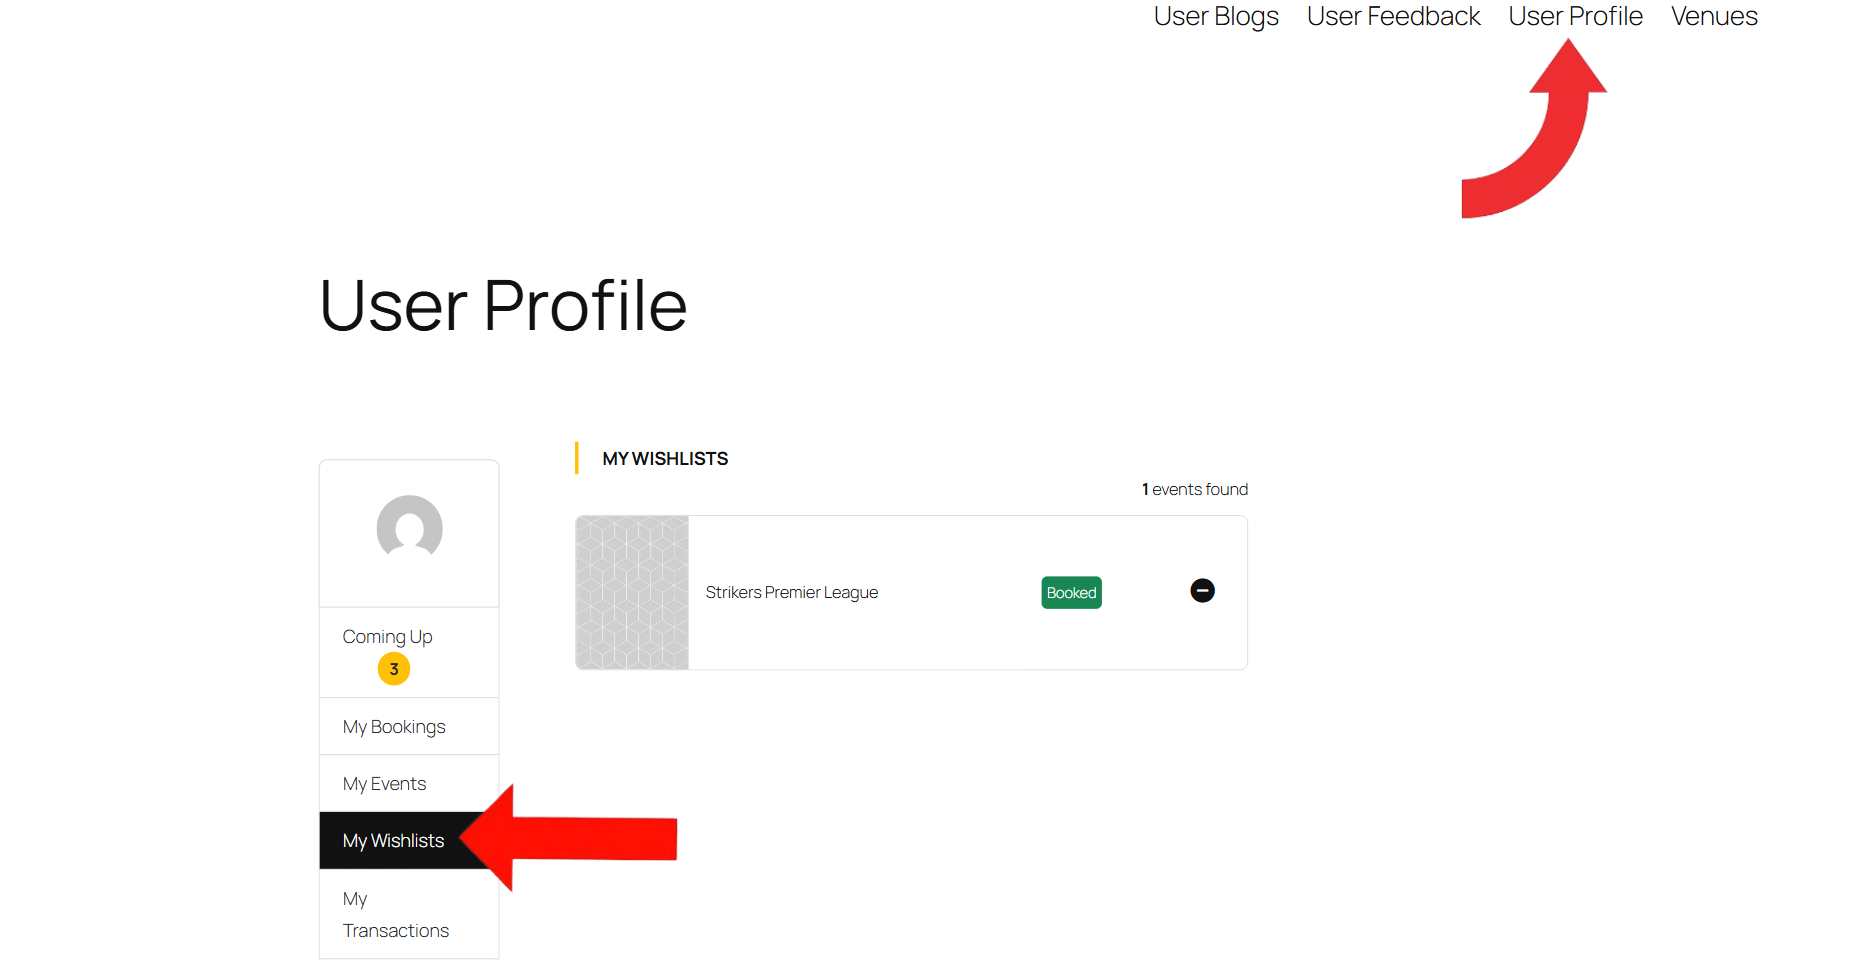
To view all the wishlisted Events, users can go to their User Profile page.
Inside the My Wishlist section, they will see a list of all saved Events, along with options to view, book, and remove them directly.
Conclusion
The Wishlist feature in EventPrime lets users easily save Events they’re interested in and return to them later for Booking. It simplifies Event planning and boosts engagement by giving each user a personalized space to manage their favorite Events—all with a single click
Questions, Support & Custom Solutions
- Need more details or can't find what you're looking for? Let us know how we can help! Contact our support team here.
- Looking for a tailor-made solution to meet your specific needs? Our dedicated customization team is here to help! Use this link to share your requirements with us, and we'll collaborate with you to bring your vision to life.
Is there a way to disable the wishlist feature? It is not appropriate for my website.
Hello Larry,
Yes, you can hide the wishlist icon from the front end.
Go to EventPrime’s Settings -> click on the ‘General’ tab -> click on the ‘Setup’ subtab.
Find the ‘Hide Wishlist Icon’ option. Enable this to hide this and save the settings.