Overview
The Advanced Seat Plan Builder extension for EventPrime allows Event Organizers to create detailed, interactive seating layouts and assign seats to specific Ticket types. It supports both manual seat selection and random seat assignment on the frontend, giving attendees flexibility while ensuring Organizers maintain full control over seating logic.
Seat plans can be created globally and reused across Events, or assigned directly while editing an Event. Each seat plan supports custom layouts, shapes, amenities, seat numbering rules, and ticket-based seat filtering. Organizers can also import prebuilt seating layout templates such as Football Stadium, Cabaret, Theater, Conference, and more, and further customize them to match their Event requirements.
Prerequisite
Alongside EventPrime plugin, the Advanced Seat Plan Builder extension needs to be installed and activated. The extension can be accessed from the following link: Get Your Advanced Seat Plan Builder Extension
Steps to Set Up and Use the Advanced Seat Plan Builder Extension for Your Events in EventPrime
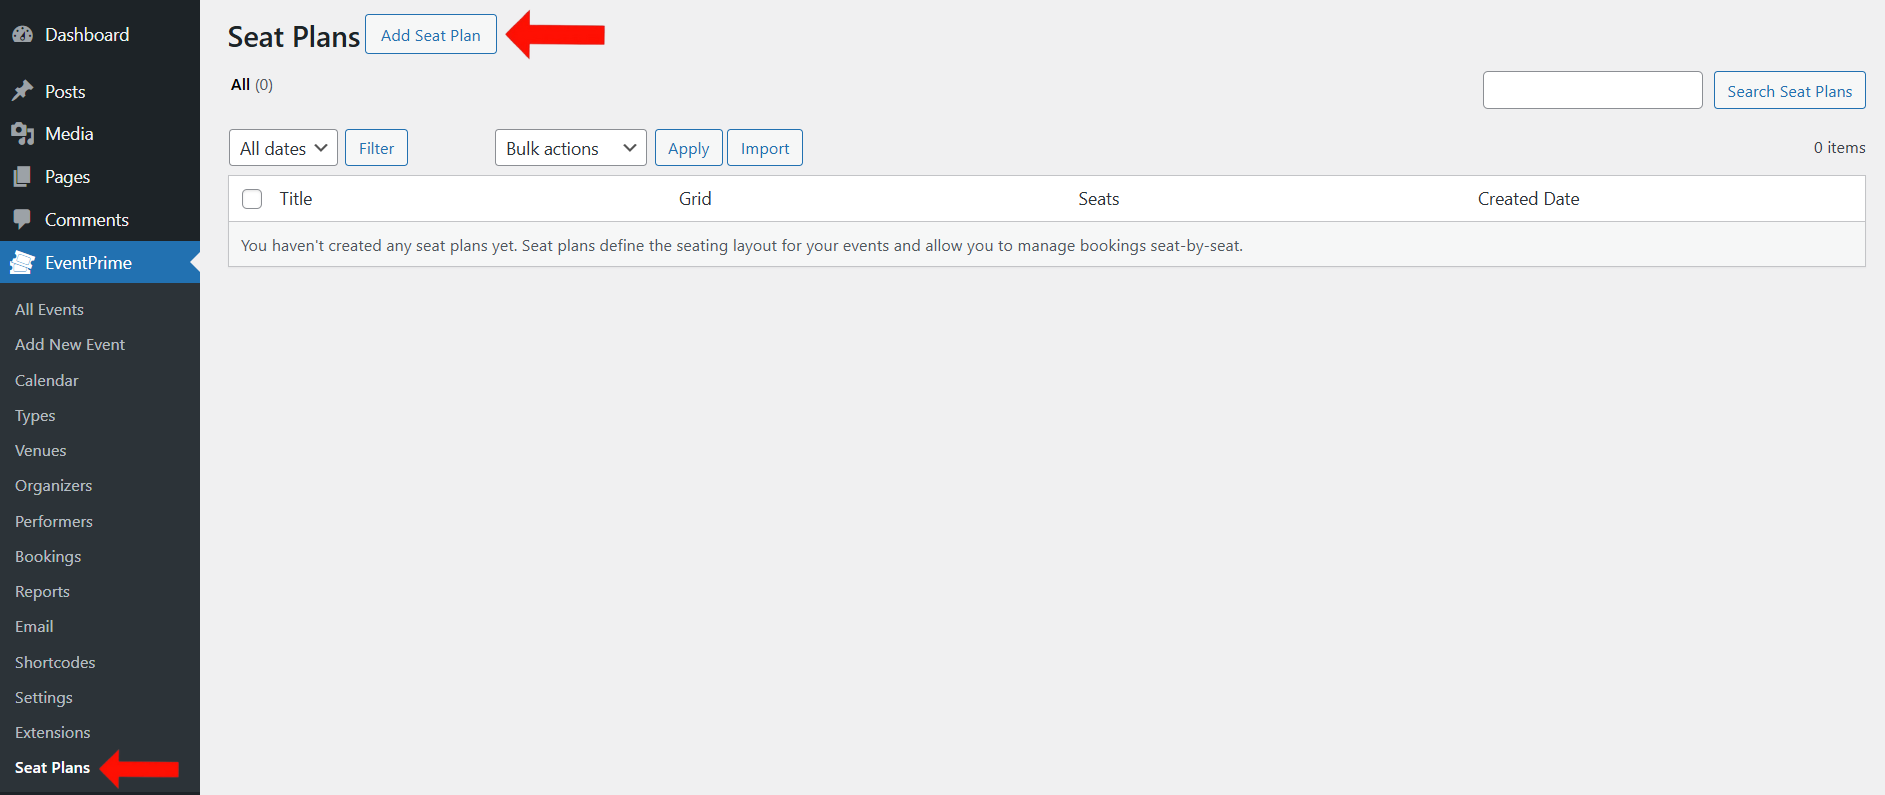
Step 1: Open Seat Plans Section
Navigate to the EventPrime menu and select the Seat Plans submenu. On the Seat Plans page, click the Add Seat Plan button to create a new seat plan.
Step 2: Choose Seat Plan Type
On the Seat Plan page, you can either import an already created seat plan template by clicking the Import button, or create a custom layout by clicking Start Designing.

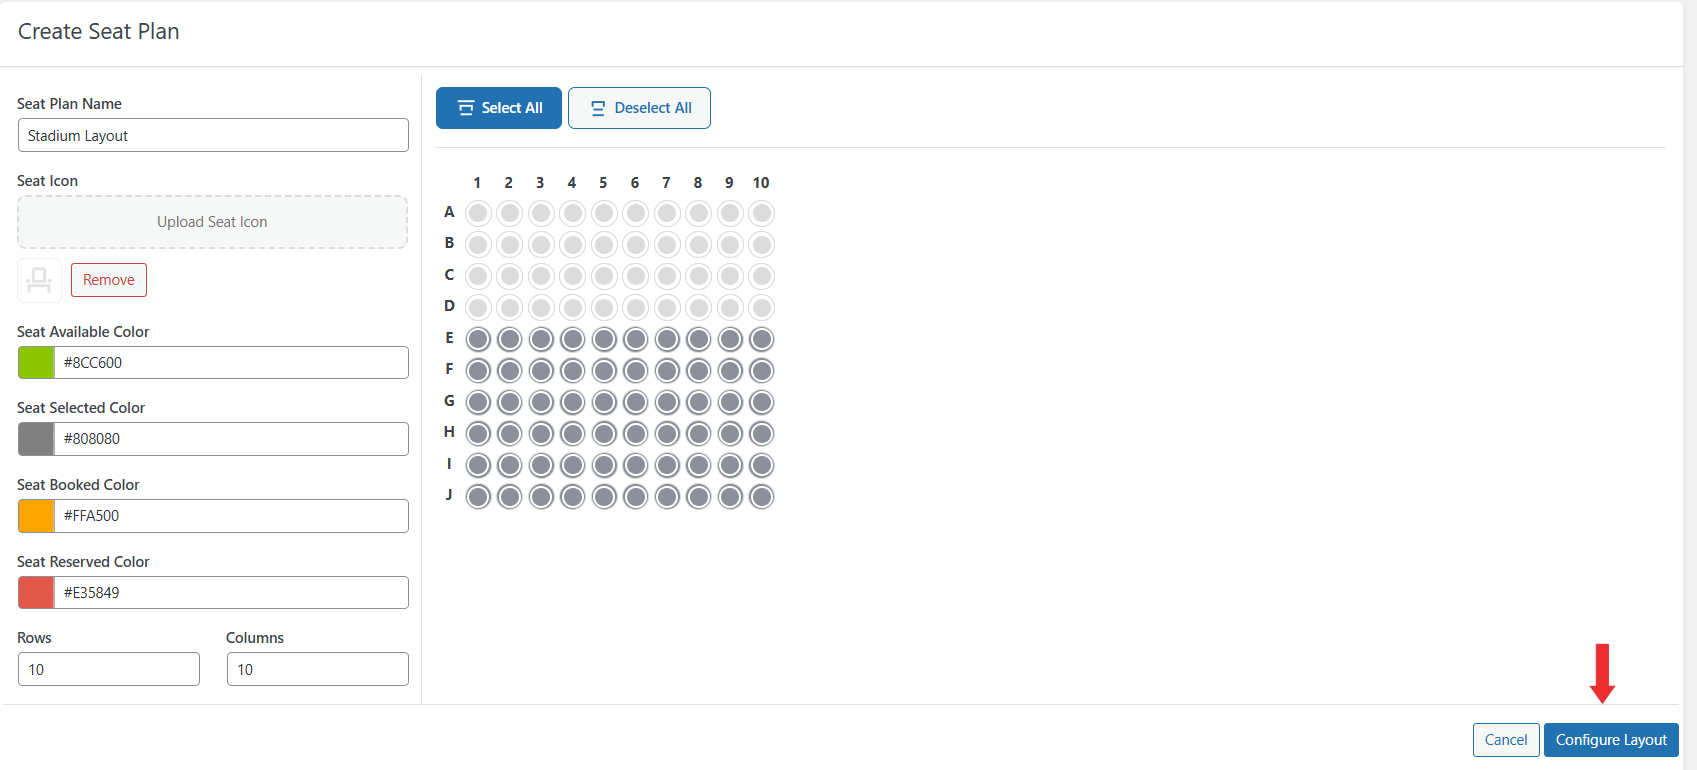
Step 3: Enter Seat Plan Details
On the Create Seat Plan page, enter the following details:
- Seat plan name
- Seat icon for seats in the layout
- Seat available color
- Seat selected color
- Seat booked color
- Seat reserved color
- Number of rows and columns
After selecting rows and columns, choose the seats based on your layout and seating requirements. Once seats are selected, click Configure Layout.
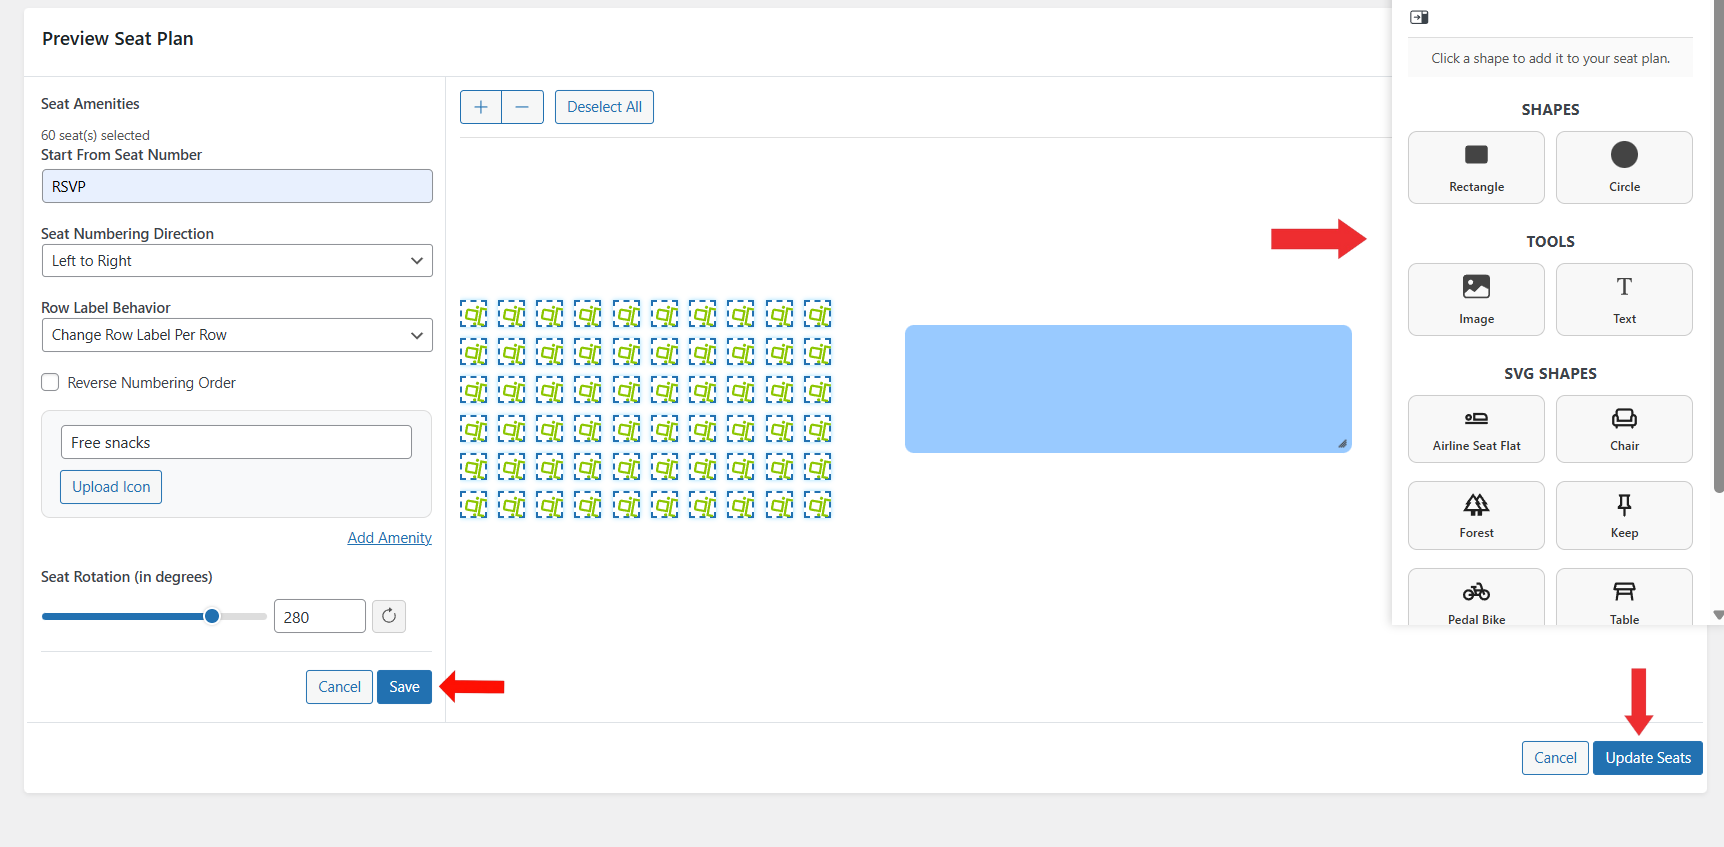
Step 4: Add Shapes and Elements
On the Preview Seat Plan screen, add shapes, images, and text by clicking the Add Shape button.

Step 5: Configure Seats and Labels and Save Seating Layout
On the Preview Seat Plan screen, select the required seats and use the left-side panel to configure seat behavior and details:
- Set the starting seat number for the selected seats
- Choose the seat numbering direction (for example, left to right)
- Configure row label behavior, such as changing labels per row
- Enable or disable reverse numbering order if required
- Add seat amenities by entering a label (for example, “Free snacks”) and uploading an icon
- Adjust seat rotation using the rotation control to change seat orientation
These options allow you to customize how seats are labeled, displayed, and enhanced for specific ticket groups or seating sections.
After completing the seat configuration, click Update Seats to save the seating layout.
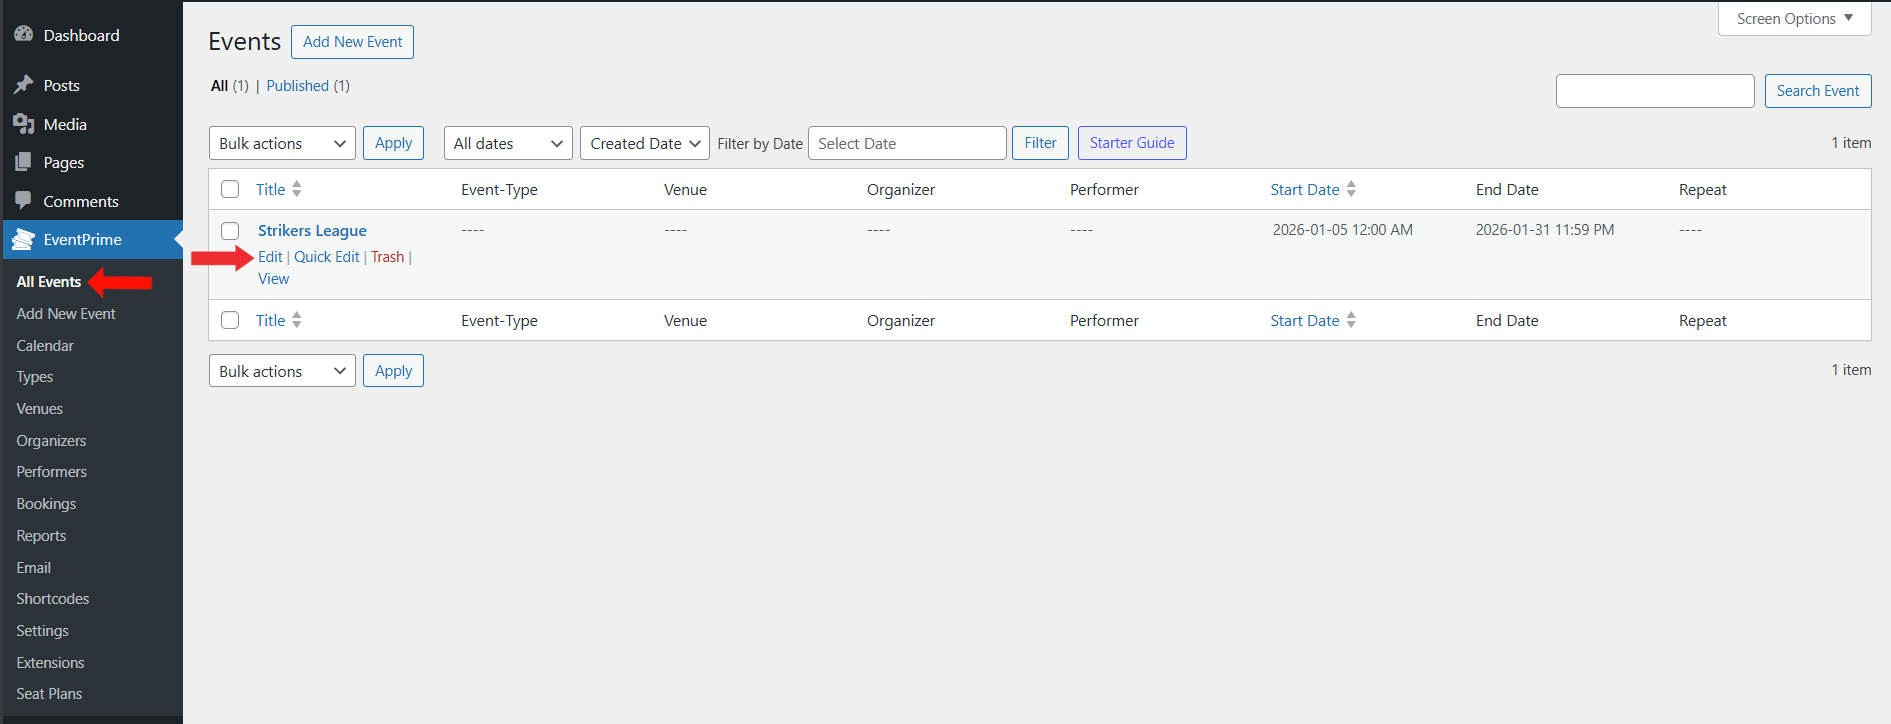
Step 6: Assign Seat Plan
Navigate to EventPrime menu, select All Events submenu. and click the Edit button for the Event where you want to assign the seat plan.
Step 7: Enable Seat Plan Options
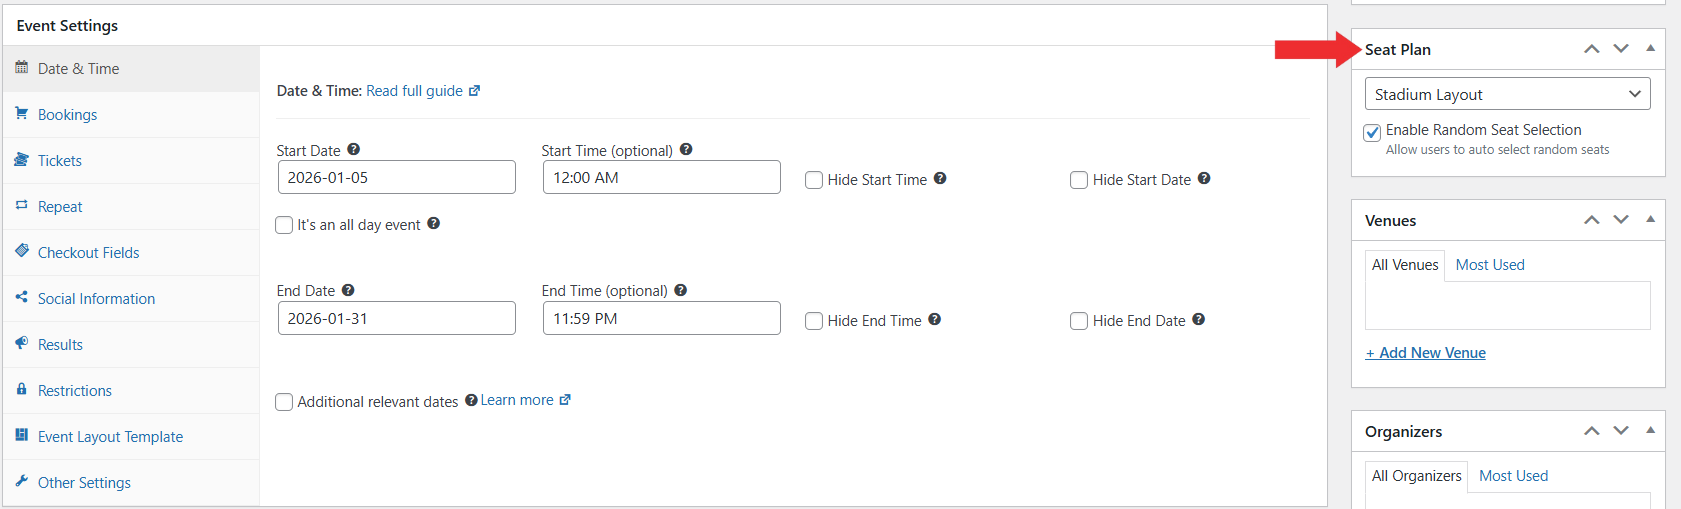
On the Edit Event page, locate the Seat Plan metabox and select the seat plan from the dropdown. Enable Random Seat Selection if required, allowing users to select random seats from available seats on the frontend.
Step 8: Assign Seats to Tickets
Go to the Event Settings metabox and open the Tickets tab. Click the Seat icon next to a Ticket to assign seats to that specific Ticket.
Step 9: Finalize Ticket Seat Assignment
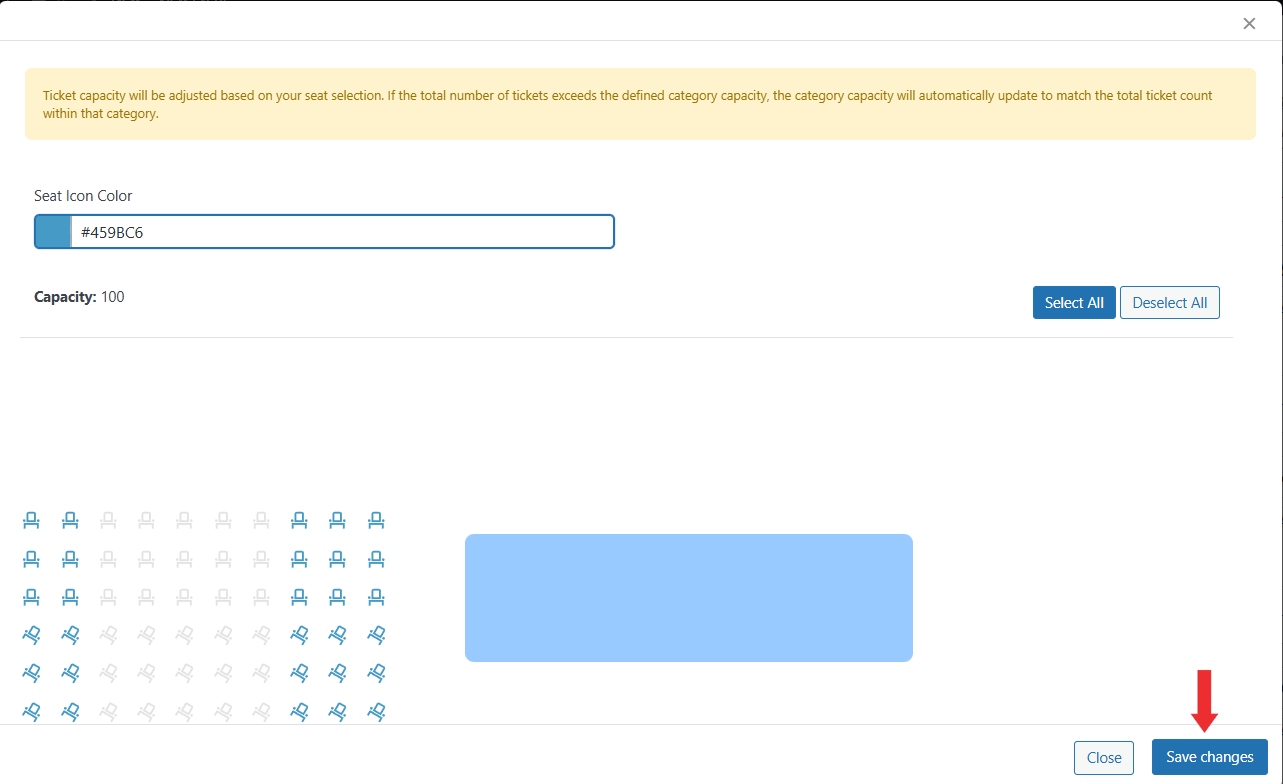
On the Assign Seats to Ticket screen, review the seats selected for the Ticket and optionally adjust the seat icon color to visually distinguish this Ticket’s seats from others.
Once verified, click Save Changes, then update the Event to apply the seat assignment and configuration.
Frontend View
On the frontend Event Booking page, users can select seats using two methods:
- Manual Seat Selection:
Users can click directly on available seats displayed in the seating layout. Selected seats are highlighted and added to the Booking summary. - Random Seat Selection(If Enabled):
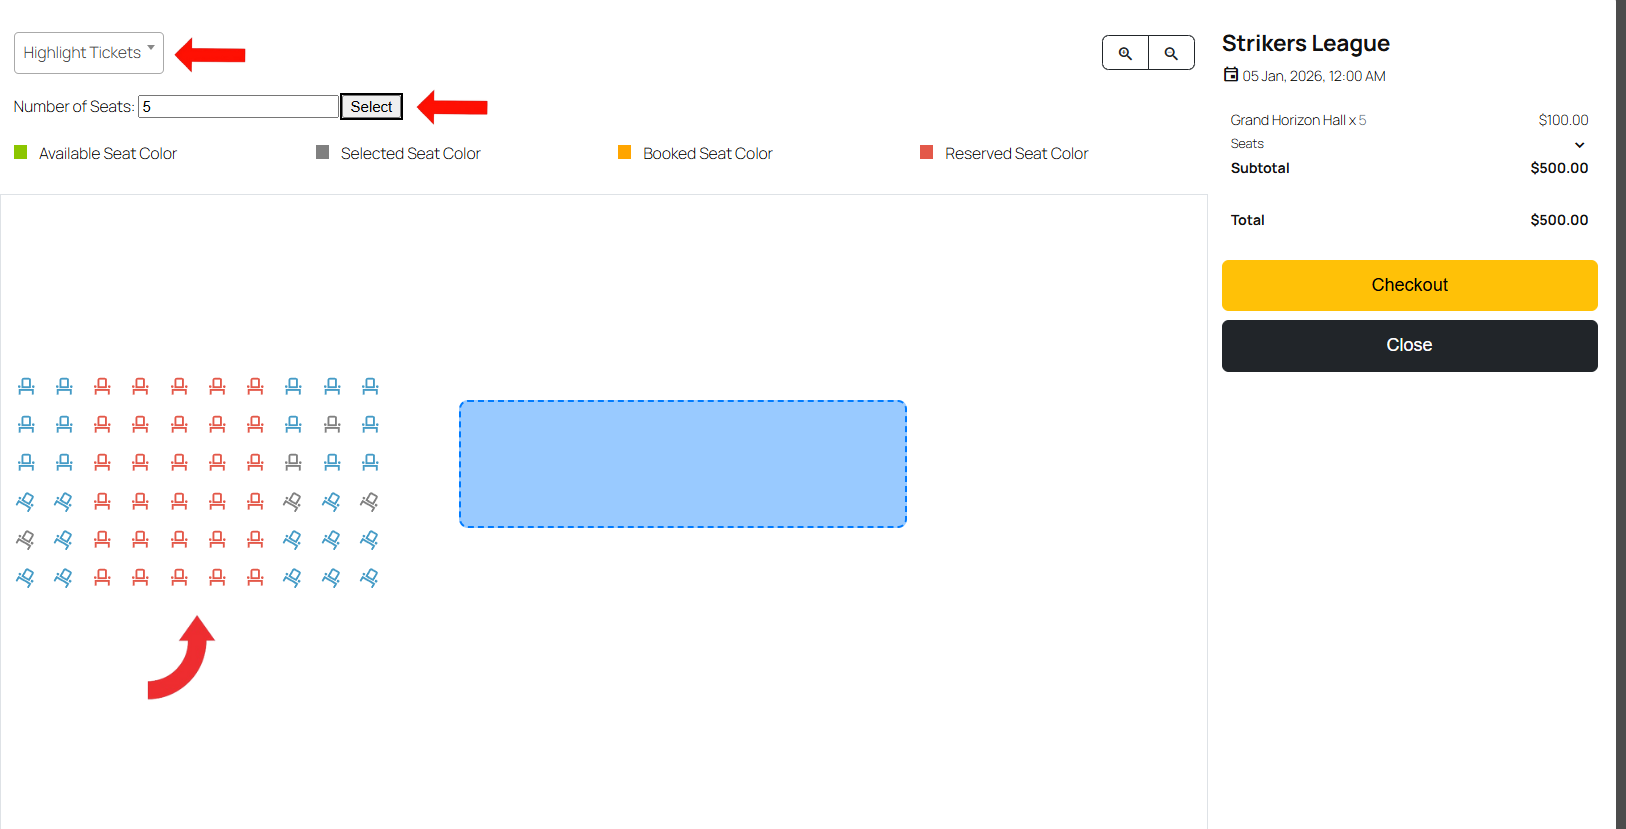
Users can enter the number of seats required and click Select. The system automatically selects the specified number of seats from the available seats assigned to the selected Ticket type.
Users can also use the ticket filter dropdown to highlight seats assigned to a specific Ticket. Only seats linked to the selected ticket type are selectable.
The seating legend clearly indicates available, selected, booked, and reserved seats. Selected seats and pricing details are displayed on the right side, allowing users to proceed to Checkout once seat selection is complete.
Conclusion
The Advanced Seat Plan Builder extension for EventPrime provides a flexible and powerful way to manage seat-based Events. By allowing organizers to create custom or template-based seating layouts, assign seats to specific Ticket types, and enable both manual and random seat selection on the frontend, it ensures a smooth booking experience for attendees while maintaining full administrative control.
With support for reusable seat plans, visual layout customization, seat filtering, and Ticket-specific assignments, the extension is well-suited for events that require precise and structured seating management.
Questions, Support & Custom Solutions
- Need more details or can't find what you're looking for? Let us know how we can help! Contact our support team here.
- Looking for a tailor-made solution to meet your specific needs? Our dedicated customization team is here to help! Use this link to share your requirements with us, and we'll collaborate with you to bring your vision to life.