
Overview
Integrating WooCommerce with EventPrime lets you offer WooCommerce products—like merchandise or add-ons—alongside your Event tickets. Attendees can select products during checkout, making it easy to bundle merchandise sales with your Events.
Prerequisite
- The WooCommerce plugin is installed and activated.
- The WooCommerce Integration extension for EventPrime is installed and activated.
If you need the integration extension, get it here: Get the WooCommerce Integration Extension
Steps to Use the WooCommerce Integration Extension
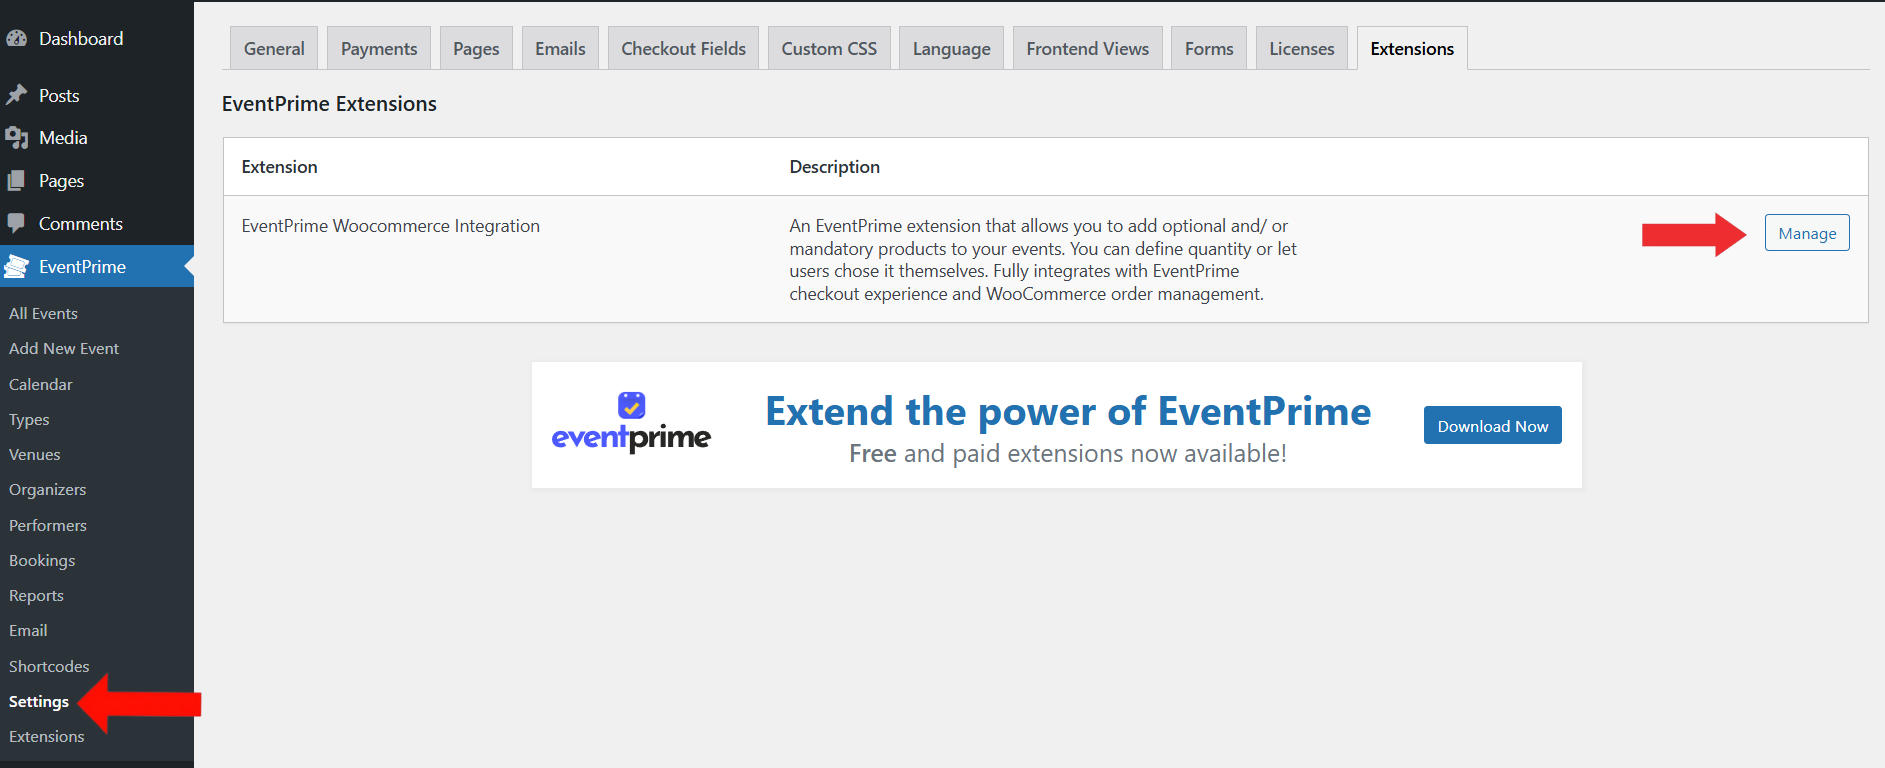
1. Open the WooCommerce Integration Settings in EventPrime
- Navigate to the EventPrime menu, select Settings submenu and click the Extensions tab.
- Click Manage button for EventPrime WooCommerce Integration extension.
2. Enable WooCommerce Integration for EventPrime
- On the Allow WooCommerce Integration page, toggle the Allow WooCommerce Integration field.
- Click the Save Changes button to activate the integration

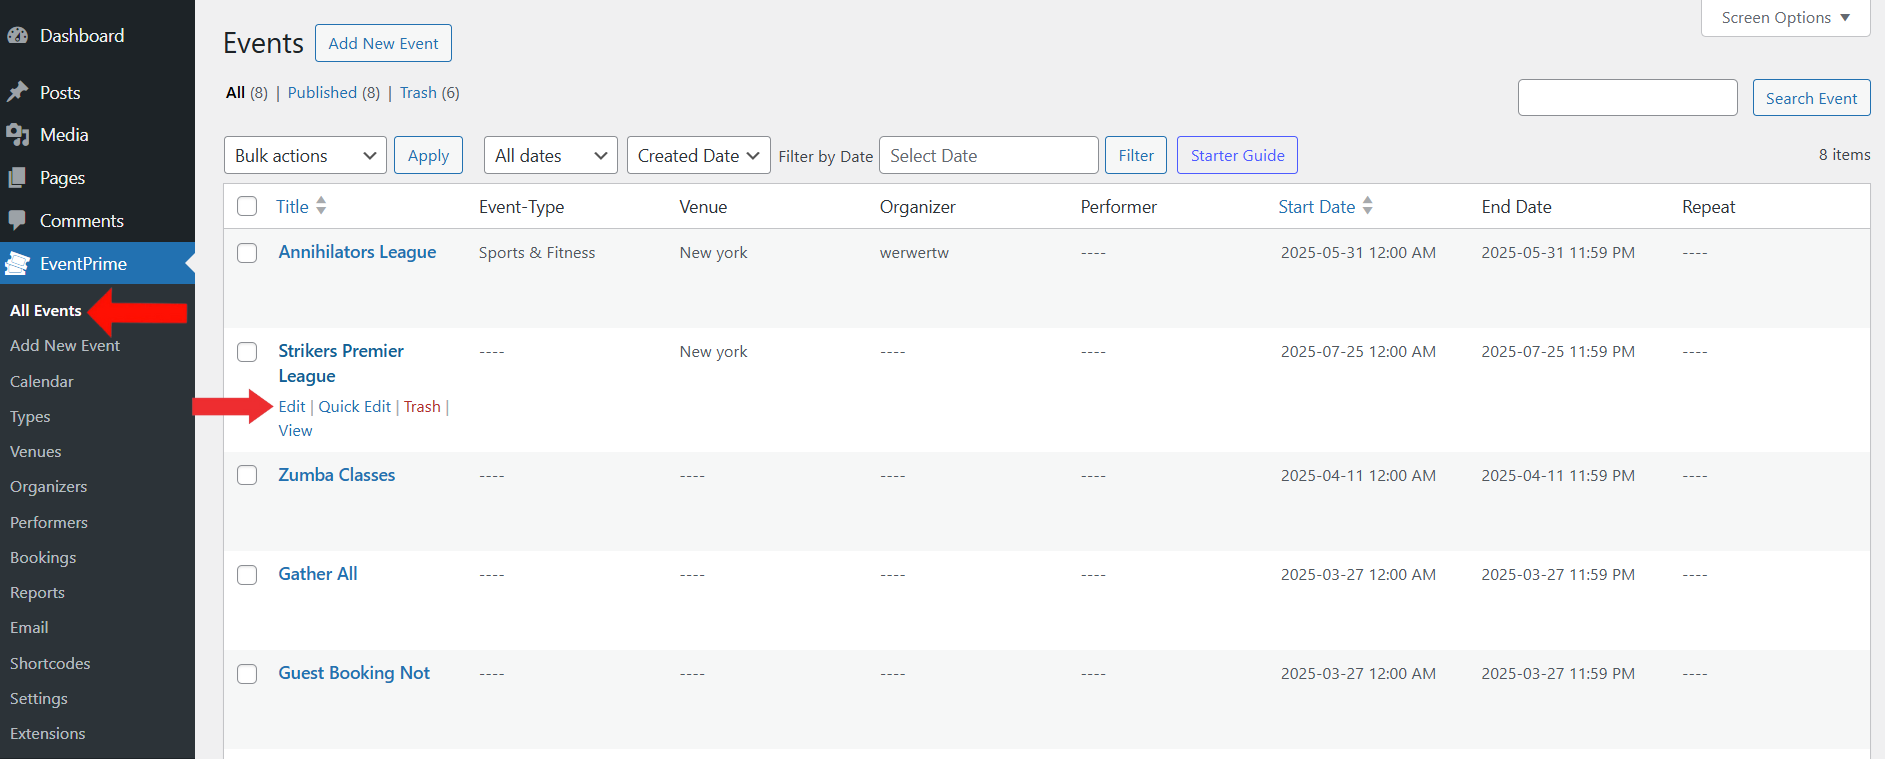
3. Select the Event for Which You Want to Sell WooCommerce Products
- Navigate to the EventPrime menu and select the All Events submenu.
- In the list of Events, click the Edit button for the Event where you want to add and sell WooCommerce products.
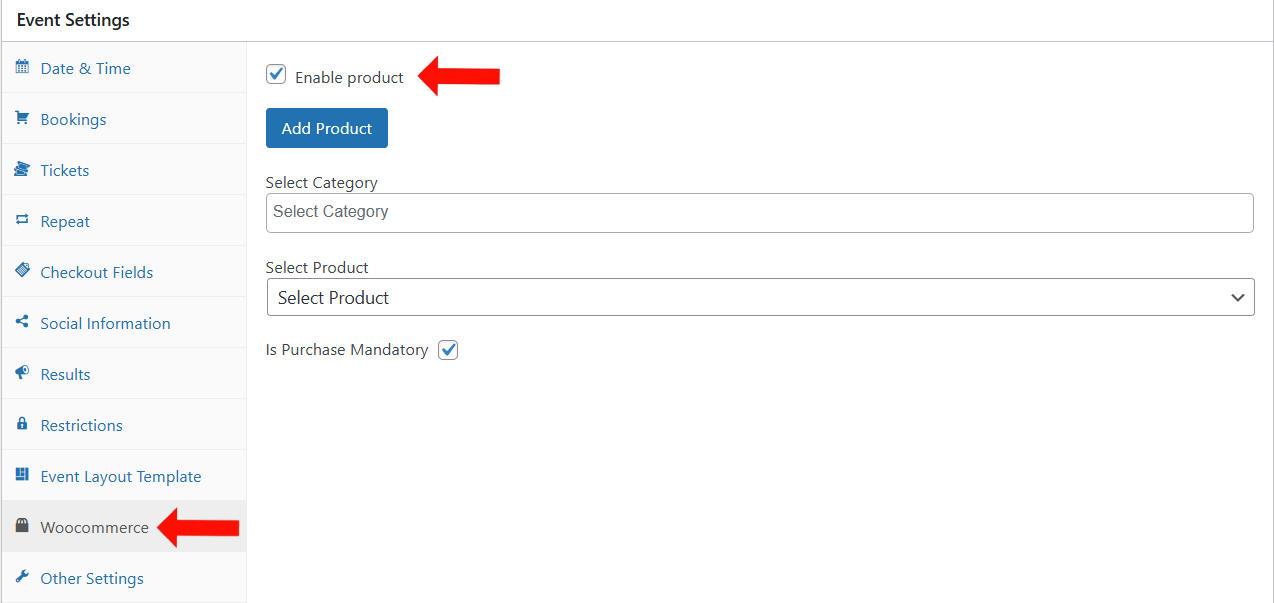
4. Enable WooCommerce Products for the Selected Event and Select the Items You Want to Offer
- On the Edit Event page, go to the Event Settings section and click on the WooCommerce tab.
- Here, check the box labeled Enable Product to allow the sale of WooCommerce products on this Event.
- Once products are enabled, you’ll see options to choose WooCommerce product categories from the Select Category field and individual products from Select Product field that should appear during the Event’s checkout process.
- If needed, you can make the purchase mandatory by enabling the Is Purchase Mandatory option. This will require attendees to buy at least one of the selected products before completing their Booking.
- Click Add Product button to add more than one product for the selected Event.
5. Update the Event to apply this setting.
Frontend View
During the Event checkout process, attendees can view a detailed breakdown of their ticket selection, including any WooCommerce products added to the Event.
Each included product is listed under the Included Products section with the product name, quantity, price, and whether it is mandatory.

Conclusion
The EventPrime WooCommerce Integration extension lets you add products to your Event checkout. Attendees can choose items like T-shirts or accessories while Booking tickets, all from the same page. It’s a helpful way to sell extras and make the Booking process more convenient.
Questions, Support & Custom Solutions
- Need more details or can't find what you're looking for? Let us know how we can help! Contact our support team here.
- Looking for a tailor-made solution to meet your specific needs? Our dedicated customization team is here to help! Use this link to share your requirements with us, and we'll collaborate with you to bring your vision to life.
Hi the optional product add-on on is not working.
I add it to my event and save, but then it disappear and is also not showing when adding to cart (it used to work before I updated my plugins.
Please help
Hi,
We’ve reviewed this on our end, and everything appears to be working correctly.
Could you please verify that the latest version of the “EventPrime WooCommerce Integration” (v4.3) is active on your site?
If the issue continues, we’d be happy to assist further.
How can we make the products that were added to the event display under the event description?
Thanks for reaching out to us.
The WooCommerce Integration extension allows you to link products with your events. These products appear directly under the event ticket section, making it easy for attendees to add them during checkout. You can configure them as optional or mandatory, and either set fixed quantities or allow attendees to choose their preferred quantity. For more information please follow this link: https://theeventprime.com/all-extensions/woocommerce-integration/
If you have any further questions, please don’t hesitate to reach out to us.