Overview
The EventPrime Waiting List extension enables attendees to join a queue for sold-out Events. It ensures that interested users can still register their intent to attend and be notified when spots become available, helping Organizers maximize attendance and manage Bookings efficiently.
Prerequisite
Make sure EventPrime and EventPrime Waiting List extension are installed and activated on your WordPress site.
If the extension is not installed, get it from here: Get Your Waiting List Extension
Steps to Use EventPrime Waiting List Extension
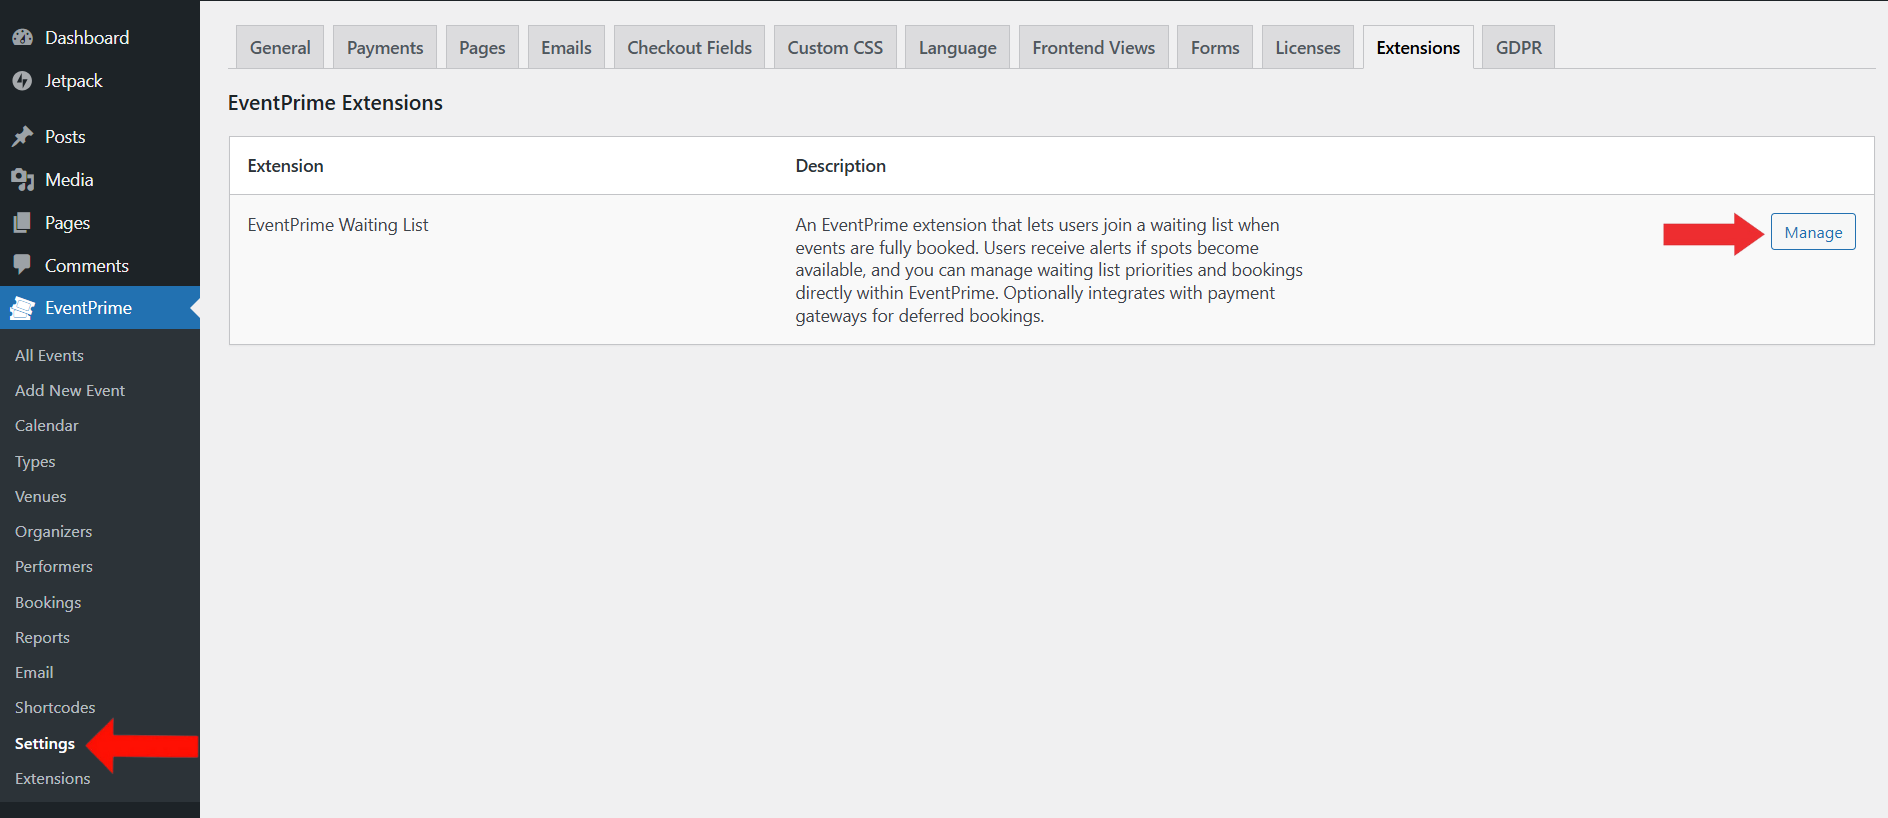
1. Access the Waiting List Settings
Navigate to the EventPrime menu, select the Settings submenu, go to the Extensions tab, and click the Manage button for the EventPrime Waiting List extension.
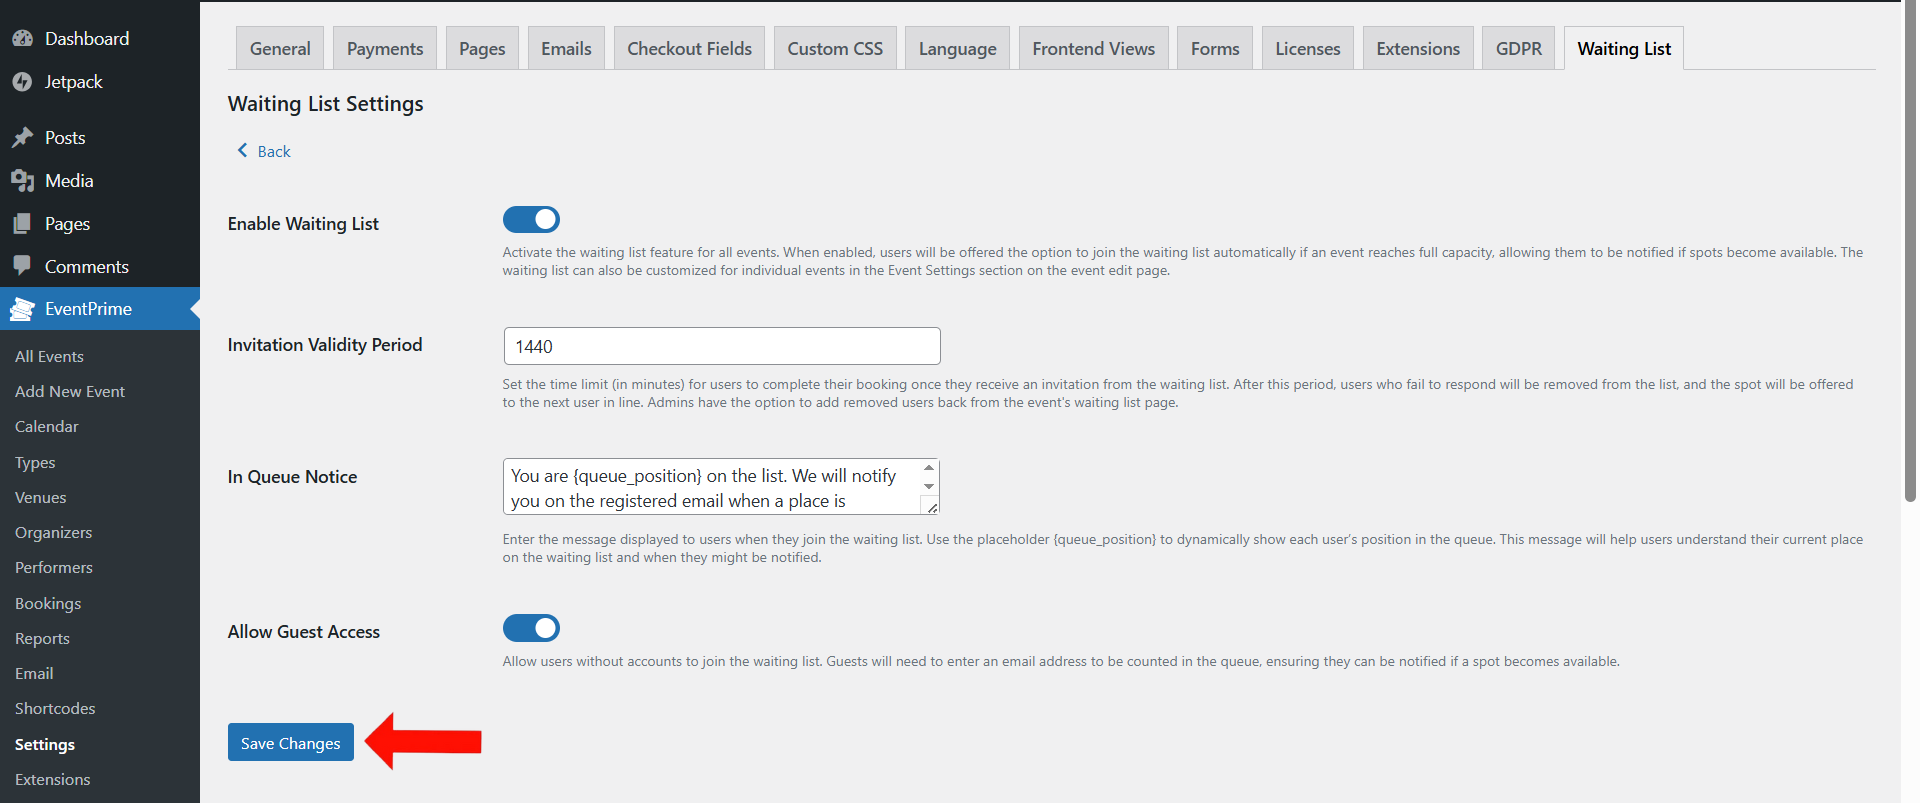
2. Enable and Configure the Waiting List Feature Globally
On the Waiting List Settings page, you can define how the waiting list works across all Events:
- Enable Waiting List: Toggle this to activate the Waiting List feature for all Events. Attendees will automatically be offered to join the list if an Event is full.
- Invitation Validity Period: Set the time limit in minutes (e.g., 1440 for 24 hours) for users to complete their booking after receiving an invitation. If they fail, the spot moves to the next user in line.
- In Queue Notice: Enter the message displayed when a user joins the Waiting List. Use
{queue_position}to dynamically show their position in the queue. - Allow Guest Access: Enable to let non-registered users join the Waiting List by entering an email address.
Click Save Changes but apply this setting for all Events.
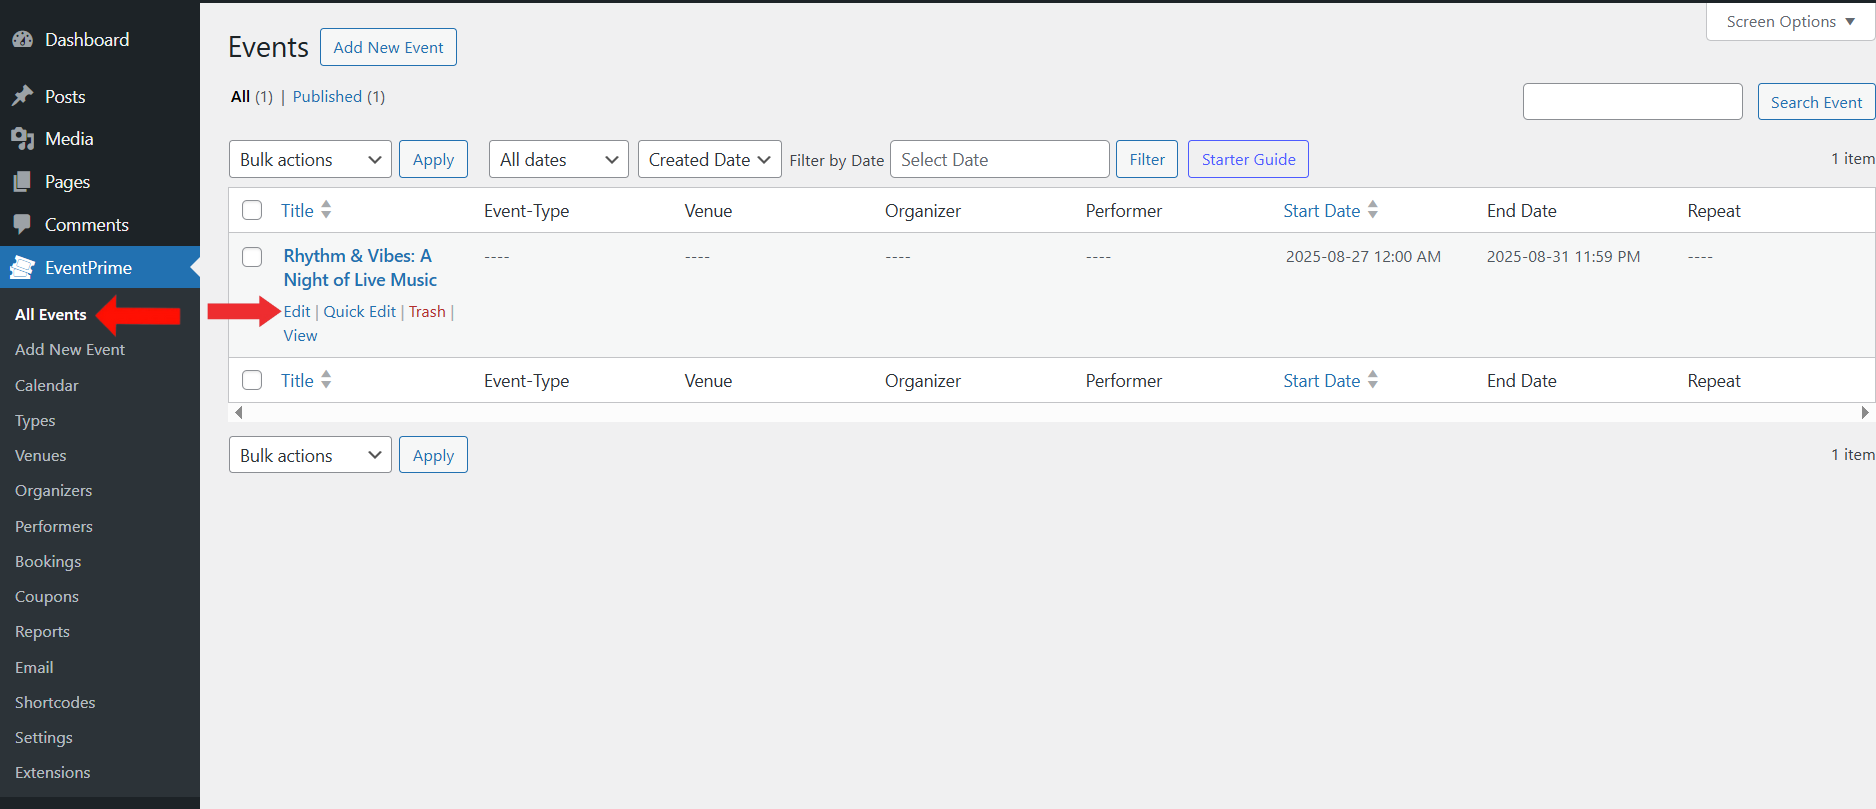
3. Enable Waiting List for an Individual Event
Navigate to the EventPrime menu, select All Events, and click Edit for the Event you want to enable the Waiting List request.
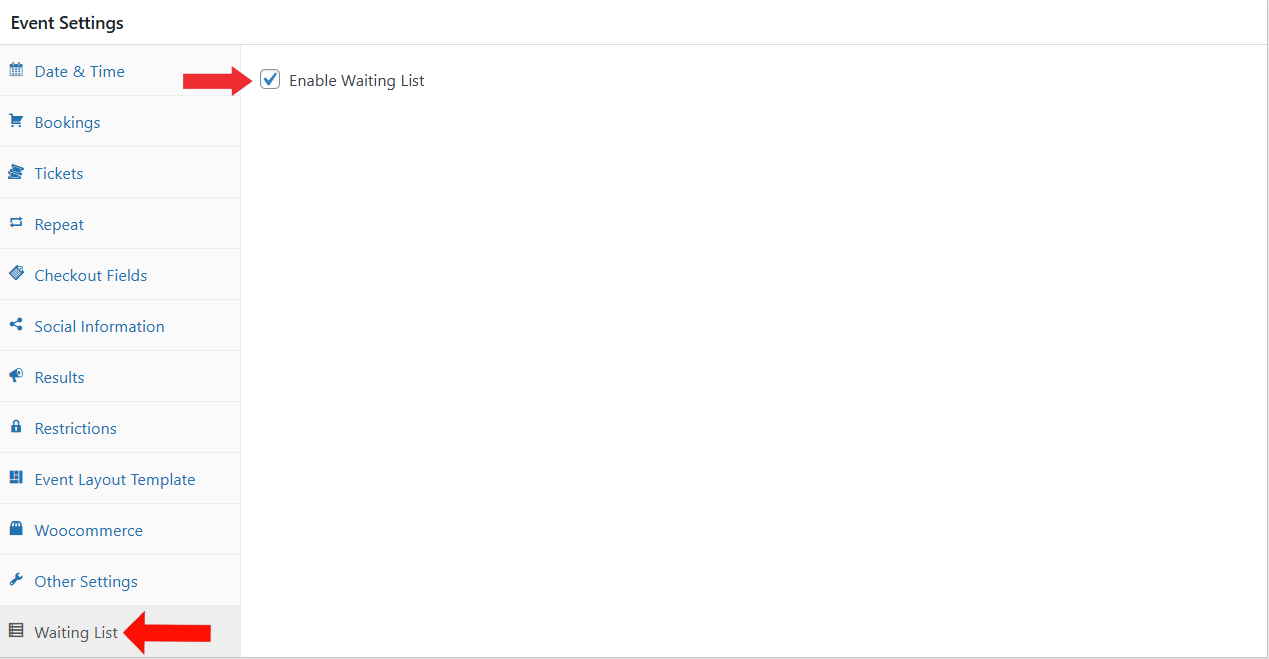
4. Enable the Waiting List Option
On the Edit Event page, navigate to the Event Settings Metabox, open the Waiting List tab, check Enable Waiting List checkbox, and Update Event to save the changes.
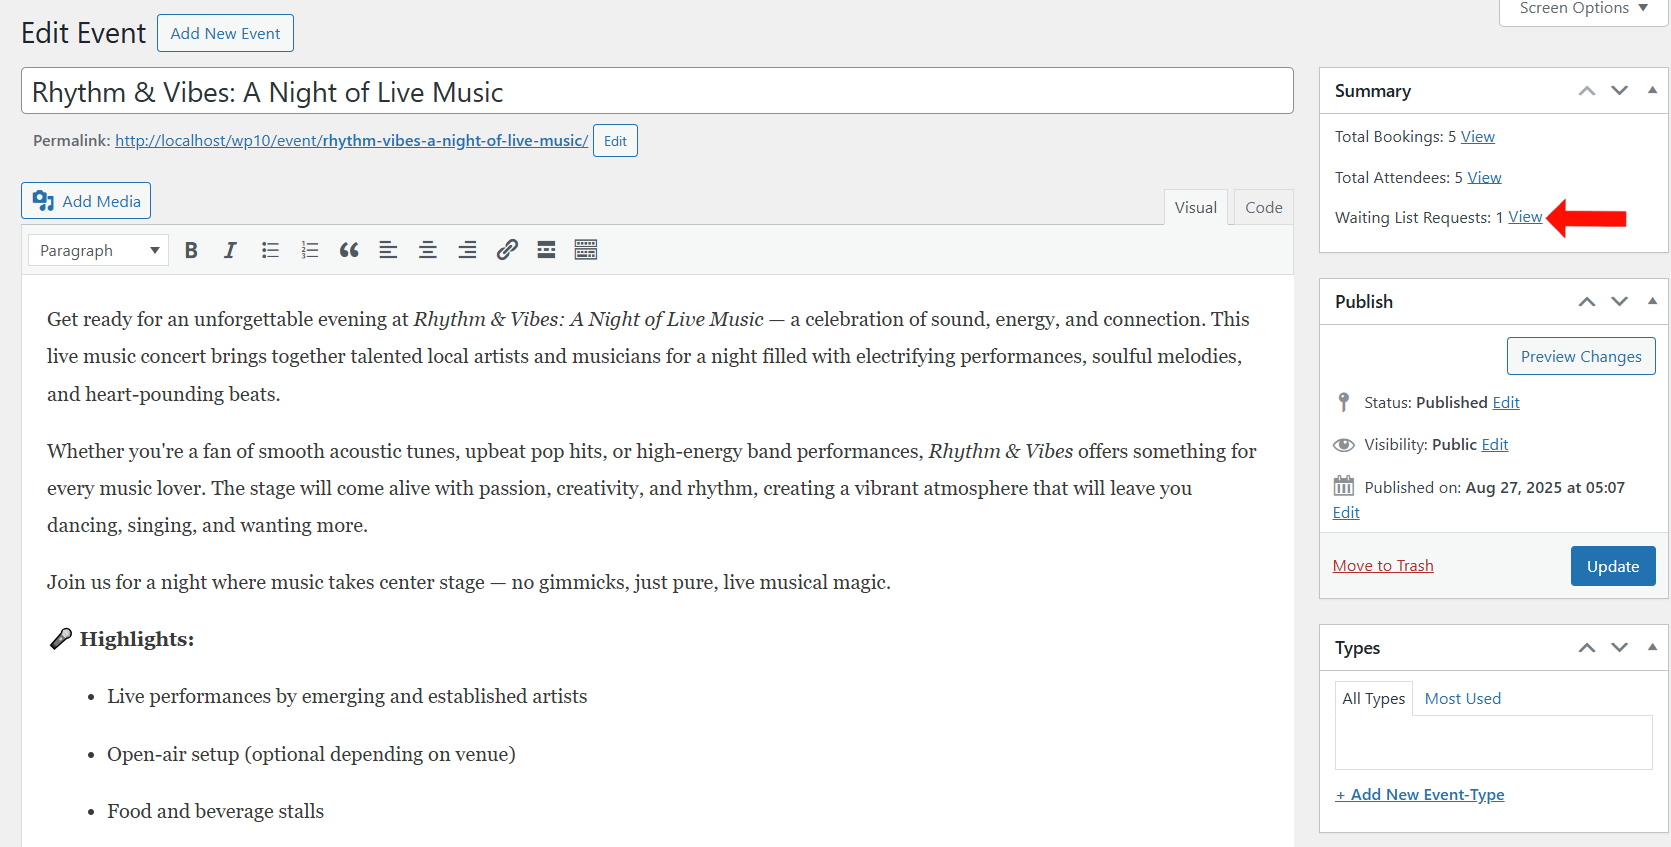
5. View Waiting List Requests from Event Summary
On the Edit Event page, go to the Summary Metabox and click the View button next to Waiting List Requests to see the attendees currently on the list.
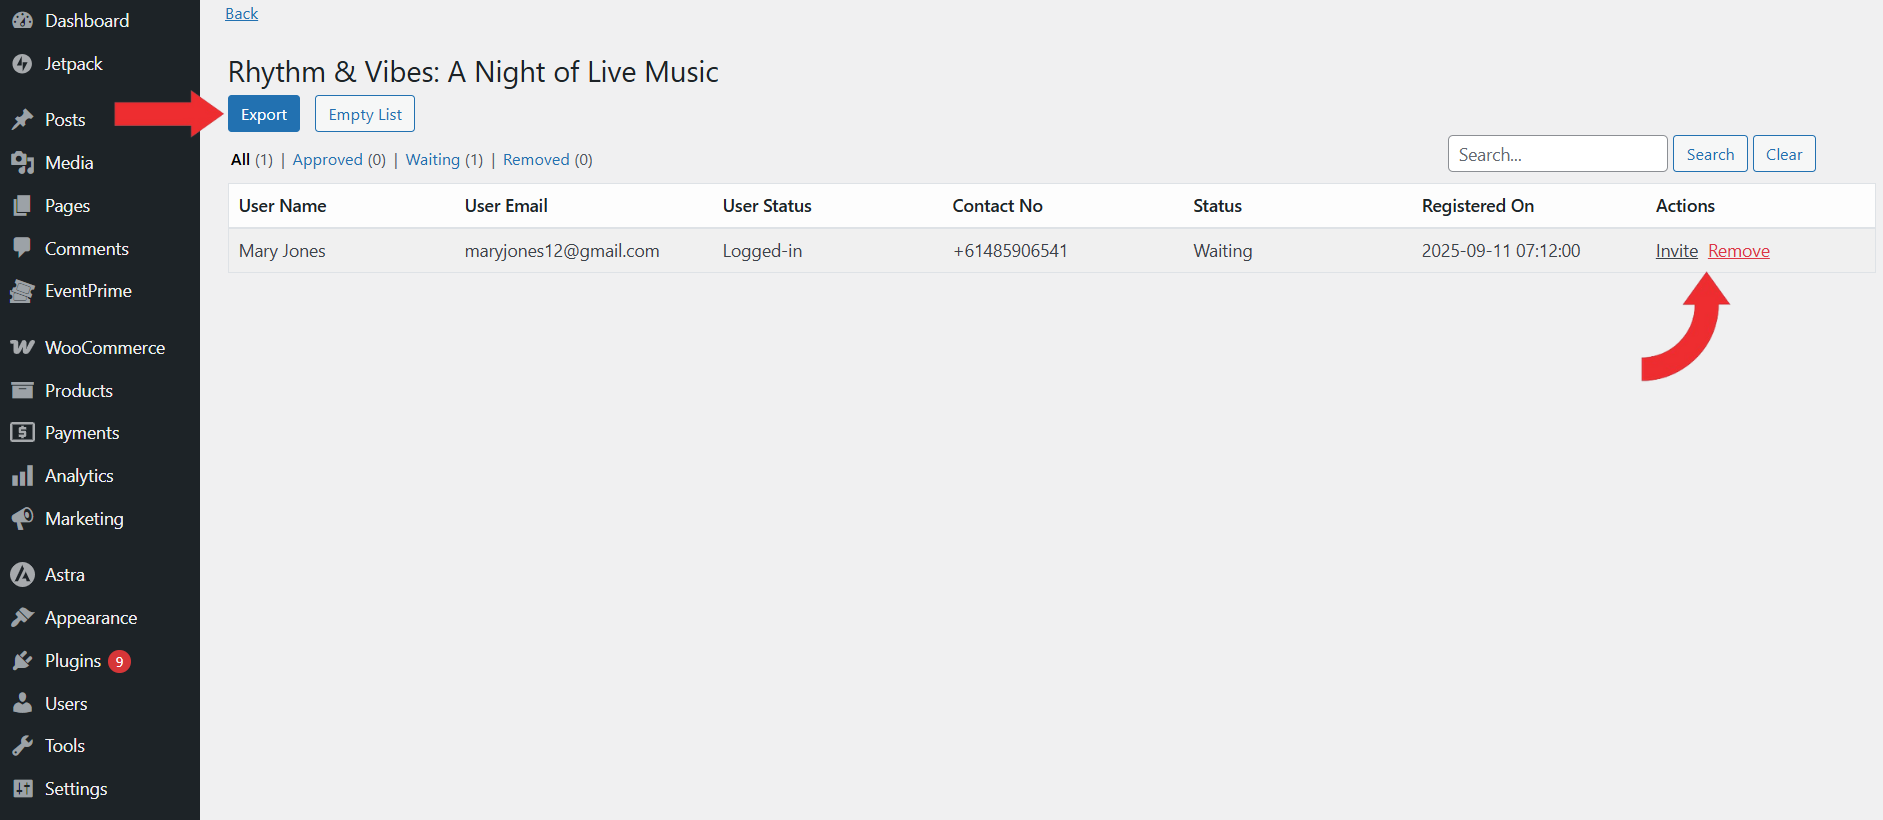
6. Manage Waiting List Invitations
On the Waiting List Requests page, you can manage attendees with the following options:
- Invite: Click the Invite button to send an invitation to the selected user to book their seat.
- Remove: Click the Remove button to delete the user from the Waiting List.
- Export: Click the Export button to download the list of Waiting List attendees for record-keeping or analysis.
- Empty List: Click the Empty List button to clear the entire waiting list for the Event.
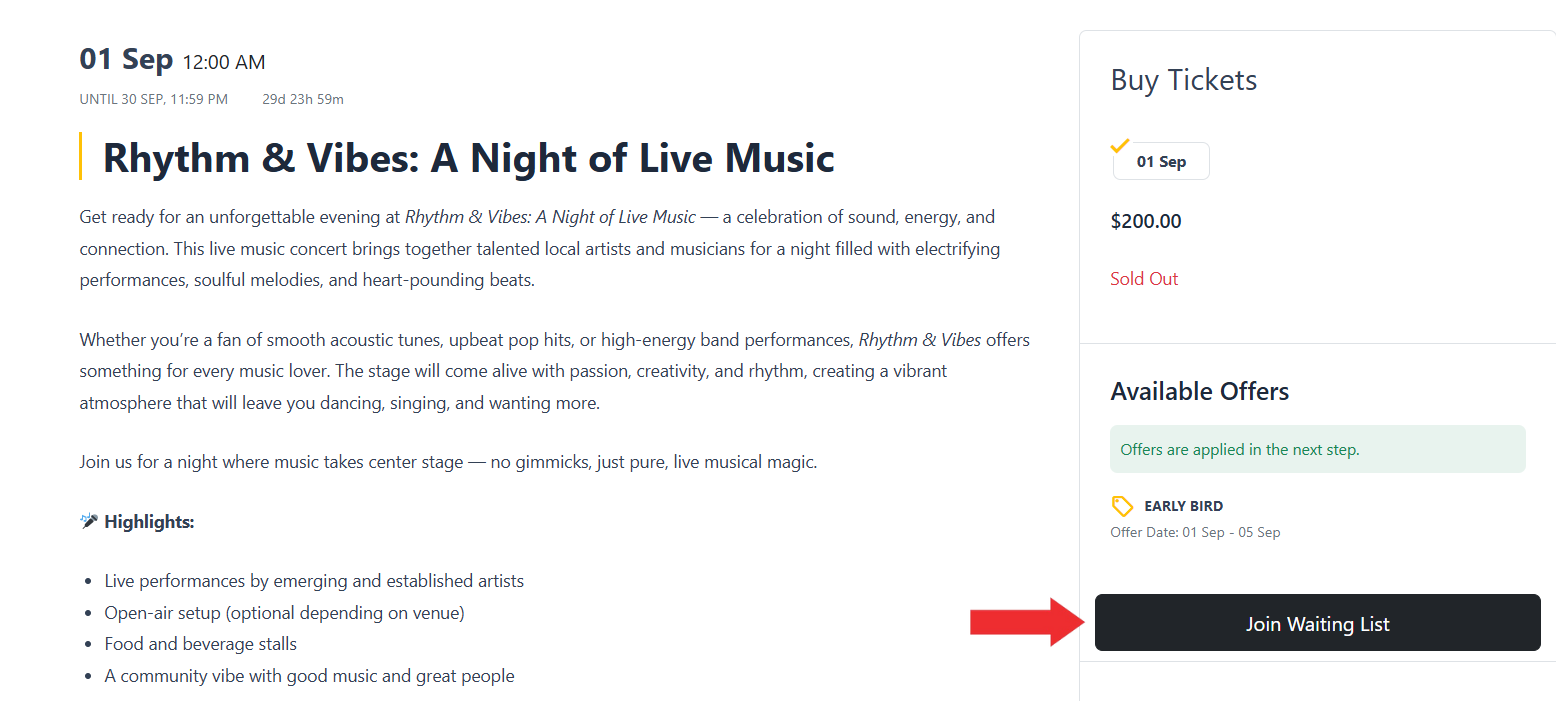
Frontend View
When tickets for an Event are sold out, attendees will see a Join Waiting List button on the Event Details page.
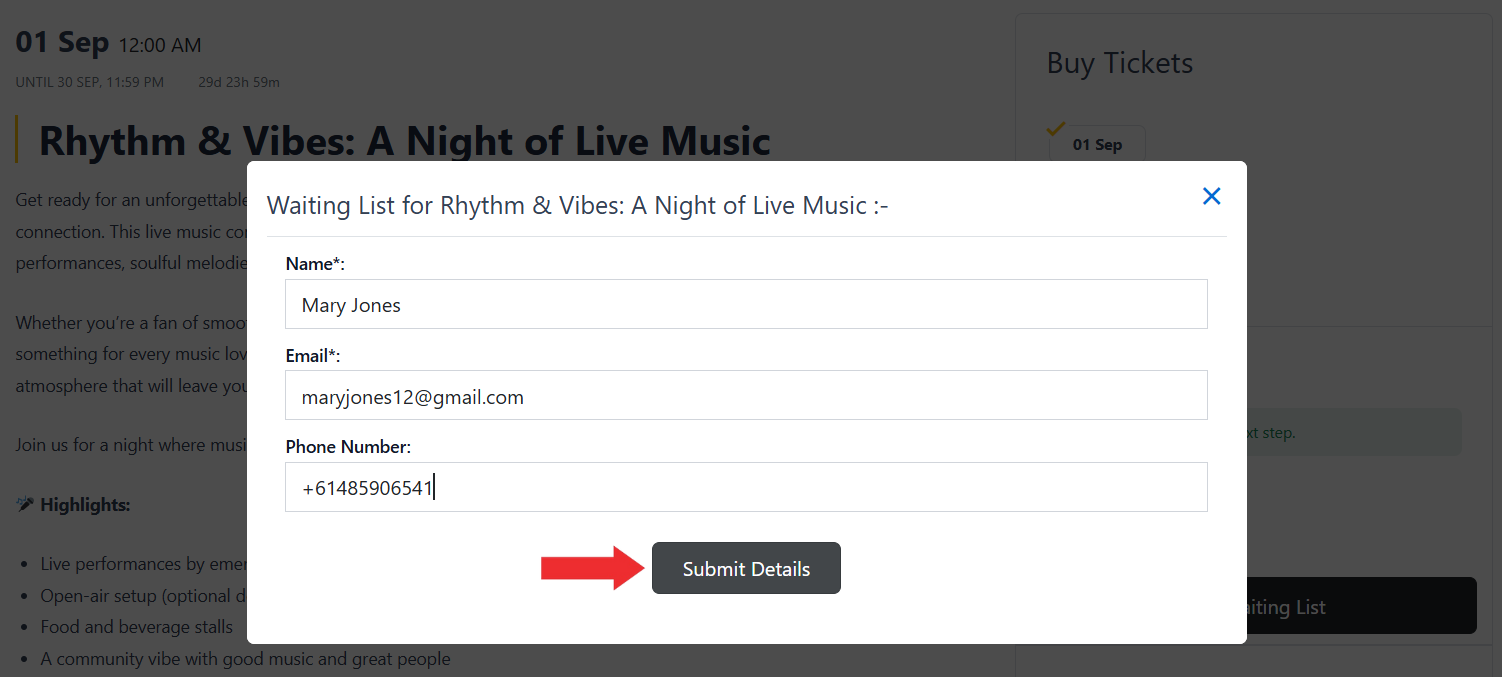
Clicking this opens a pop-up form where they can enter details such as name, email, and phone number (if required). Upon submission, they are added to the Waiting List and notified when a spot becomes available.
Conclusion
The EventPrime Waiting List extension offers a simple and effective way to manage sold-out Events. It helps keep attendees engaged, ensures maximum seat utilization, and gives Organizers full control through global and Event-level settings. With features like customizable queue notices, invitation management, and guest access support, it enables smooth and efficient handling of high-demand Events.
Questions, Support & Custom Solutions
- Need more details or can't find what you're looking for? Let us know how we can help! Contact our support team here.
- Looking for a tailor-made solution to meet your specific needs? Our dedicated customization team is here to help! Use this link to share your requirements with us, and we'll collaborate with you to bring your vision to life.