The Square Payments extension in EventPrime allows Organizers to accept secure event booking payments directly on their WordPress site. By connecting with the Square Developer Console, you can create an application, retrieve credentials, and configure them within EventPrime. The extension supports both Sandbox (testing) and Production (live) environments for flexibility. Organizers may also set Square as the default gateway to simplify checkout. On the frontend, attendees can pay seamlessly with Square, and successful payments confirm Bookings instantly. This integration ensures a professional, fast, and reliable payment experience for both Organizers and attendees.
Prerequisite
Make sure you have EventPrime and the Square Payments extension installed and activated on your WordPress website. If you do not yet have the extension, you can get it here: Get the Square Payment Extension.
Steps to Use Square Payments Extension
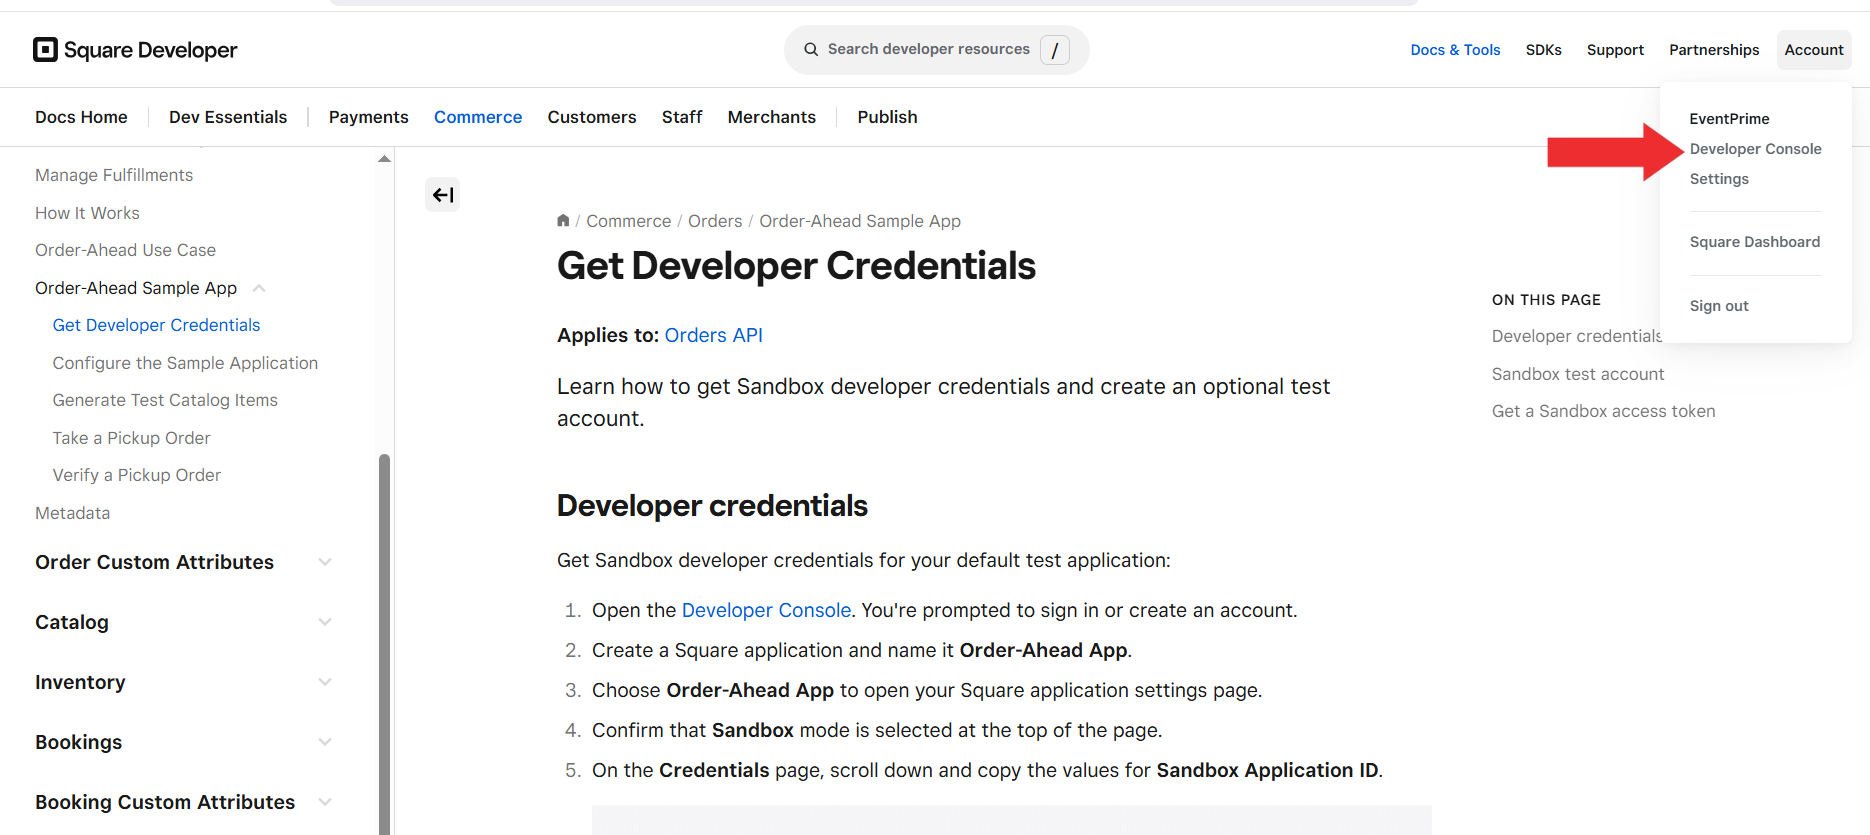
1. Sign in to the Square Developer Portal and access the Developer Console
Go to the Square Developer Portal, sign in with your Square account, and provide details such as Business Name and Business Category. After login click on Account and Select Developer Console from the top right corner.
Sign In to your Square Developer Account and Navigate to Developer Console
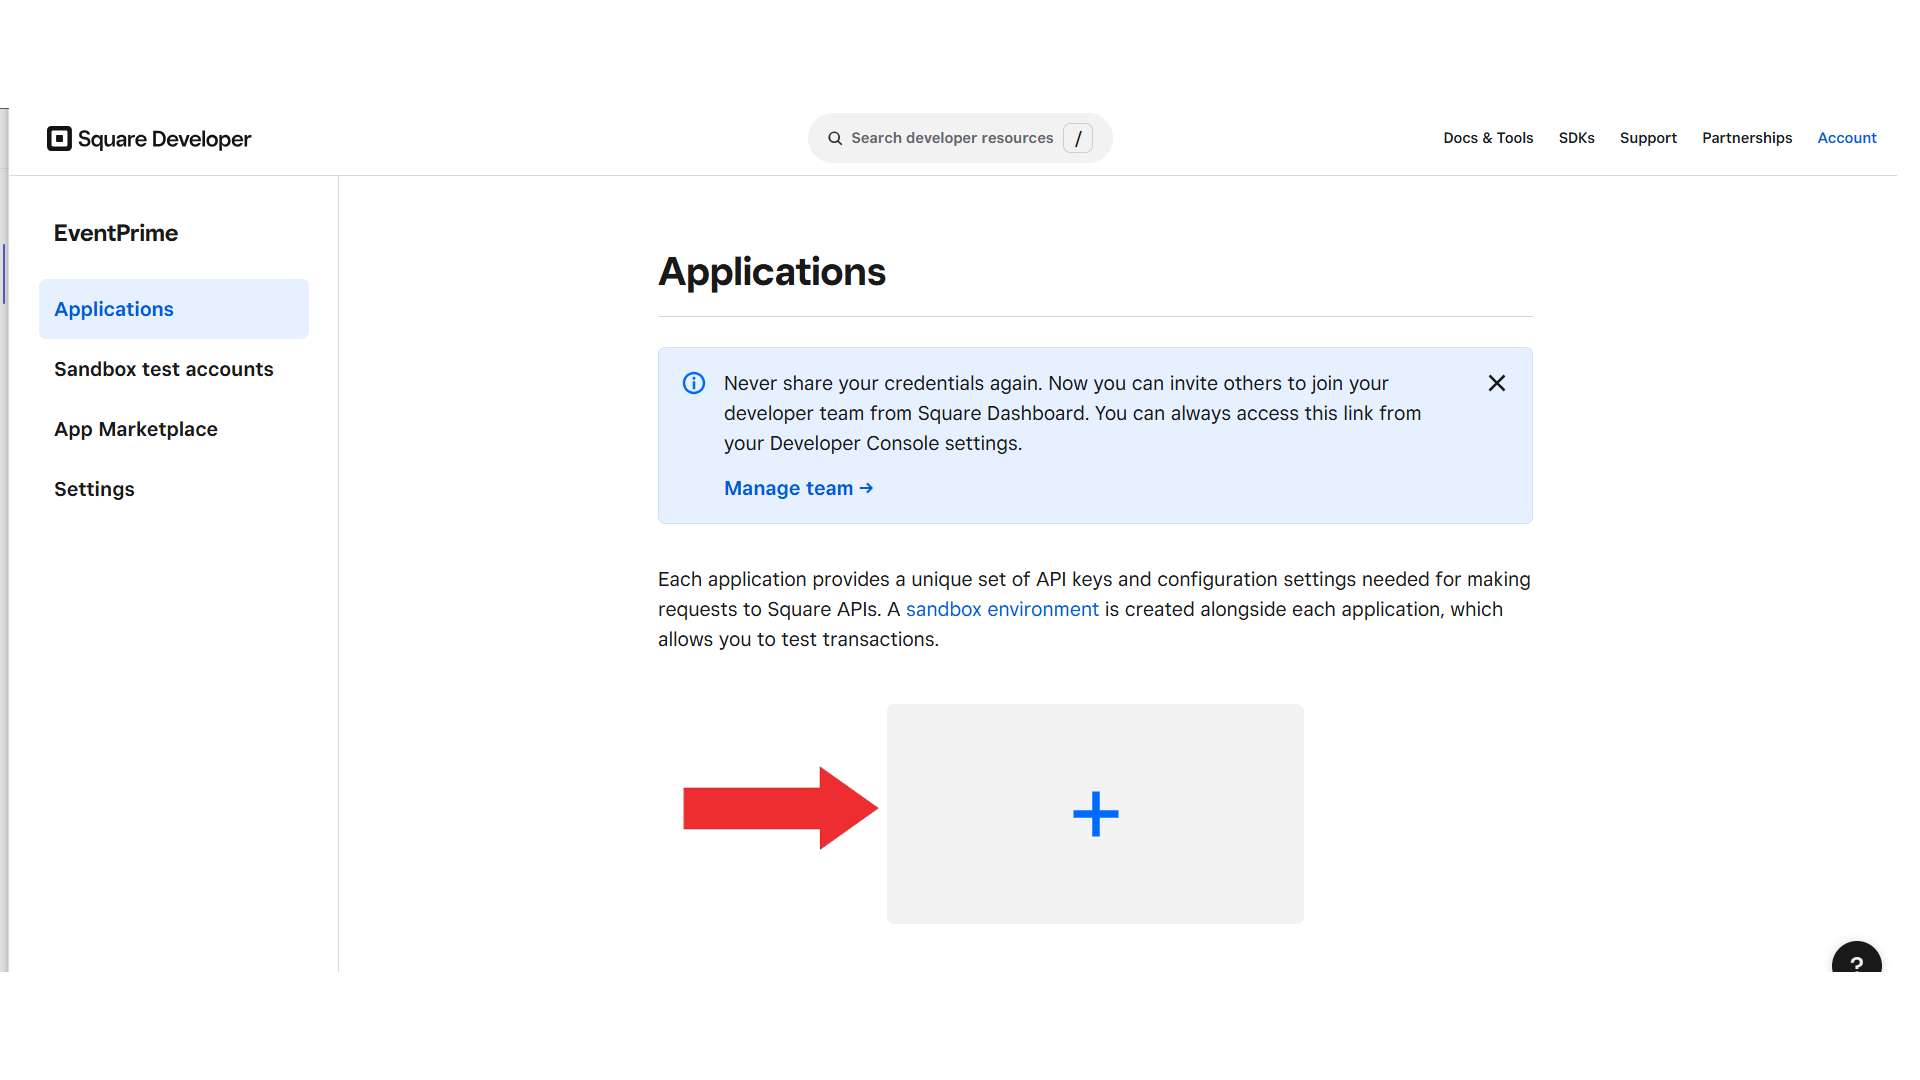
2. Create a New Application
In the Applicationstab of your Square Developer Console, click the ‘+’ icon to create a new application that will be linked with EventPrime.
Click + icon to Create a New Application to be Linked with EventPrime
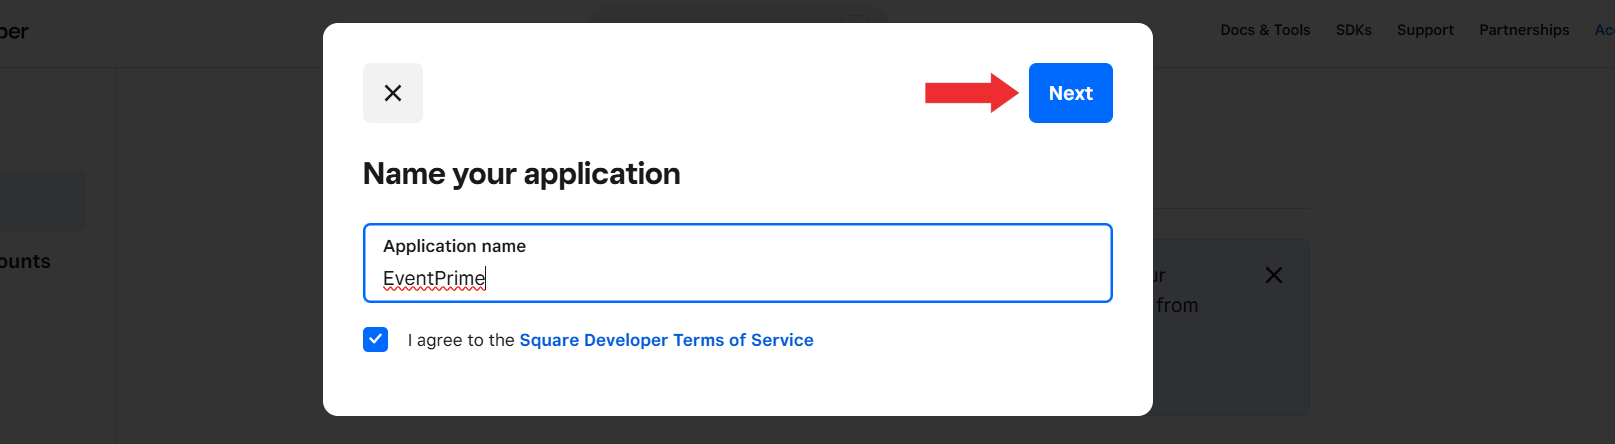
3. Enter an Application Name
Provide a unique and recognizable name for your application to easily identify it in your Square Developer account.
Enter Name for your Application
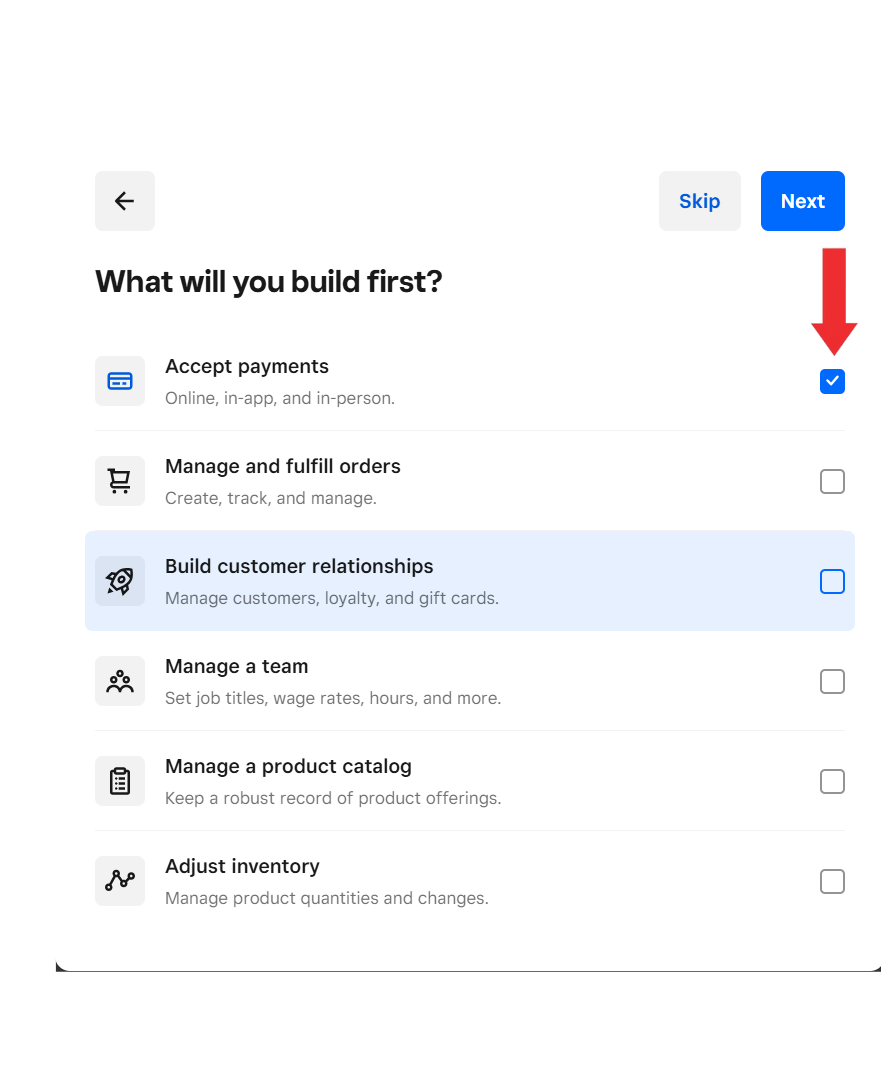
4. Select the Service “Accept Payments”
Choose Accept Paymentsas the service for your application, which enables it to process Event Booking transactions through Square.
Select Accept Payments as a Service
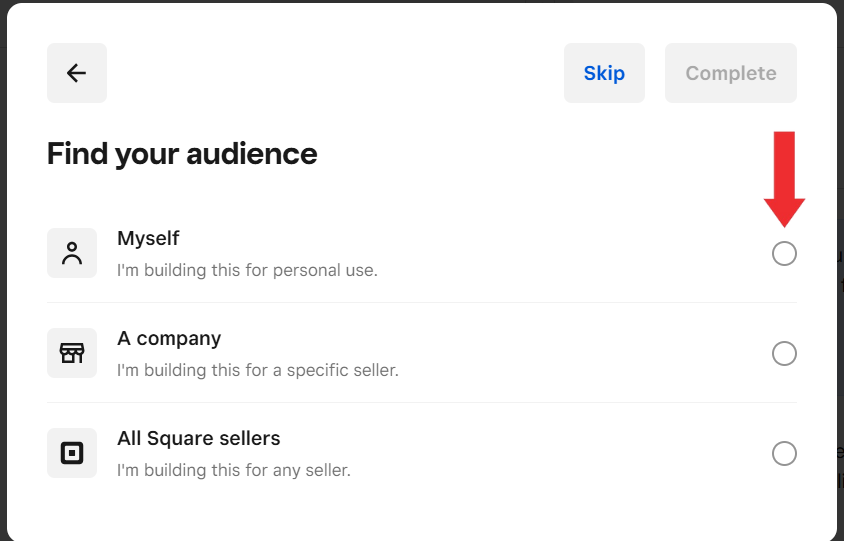
5. Choose your Audience
Choose your audience by selecting one of the following options:
Myself – Use the application for your own personal Square account.
A Company – Restrict the application to a specific company or seller account.
All Square Sellers – Make the application available for use by all Square sellers.
Choose your Audience Between Myself, A Company or All Square Sellers
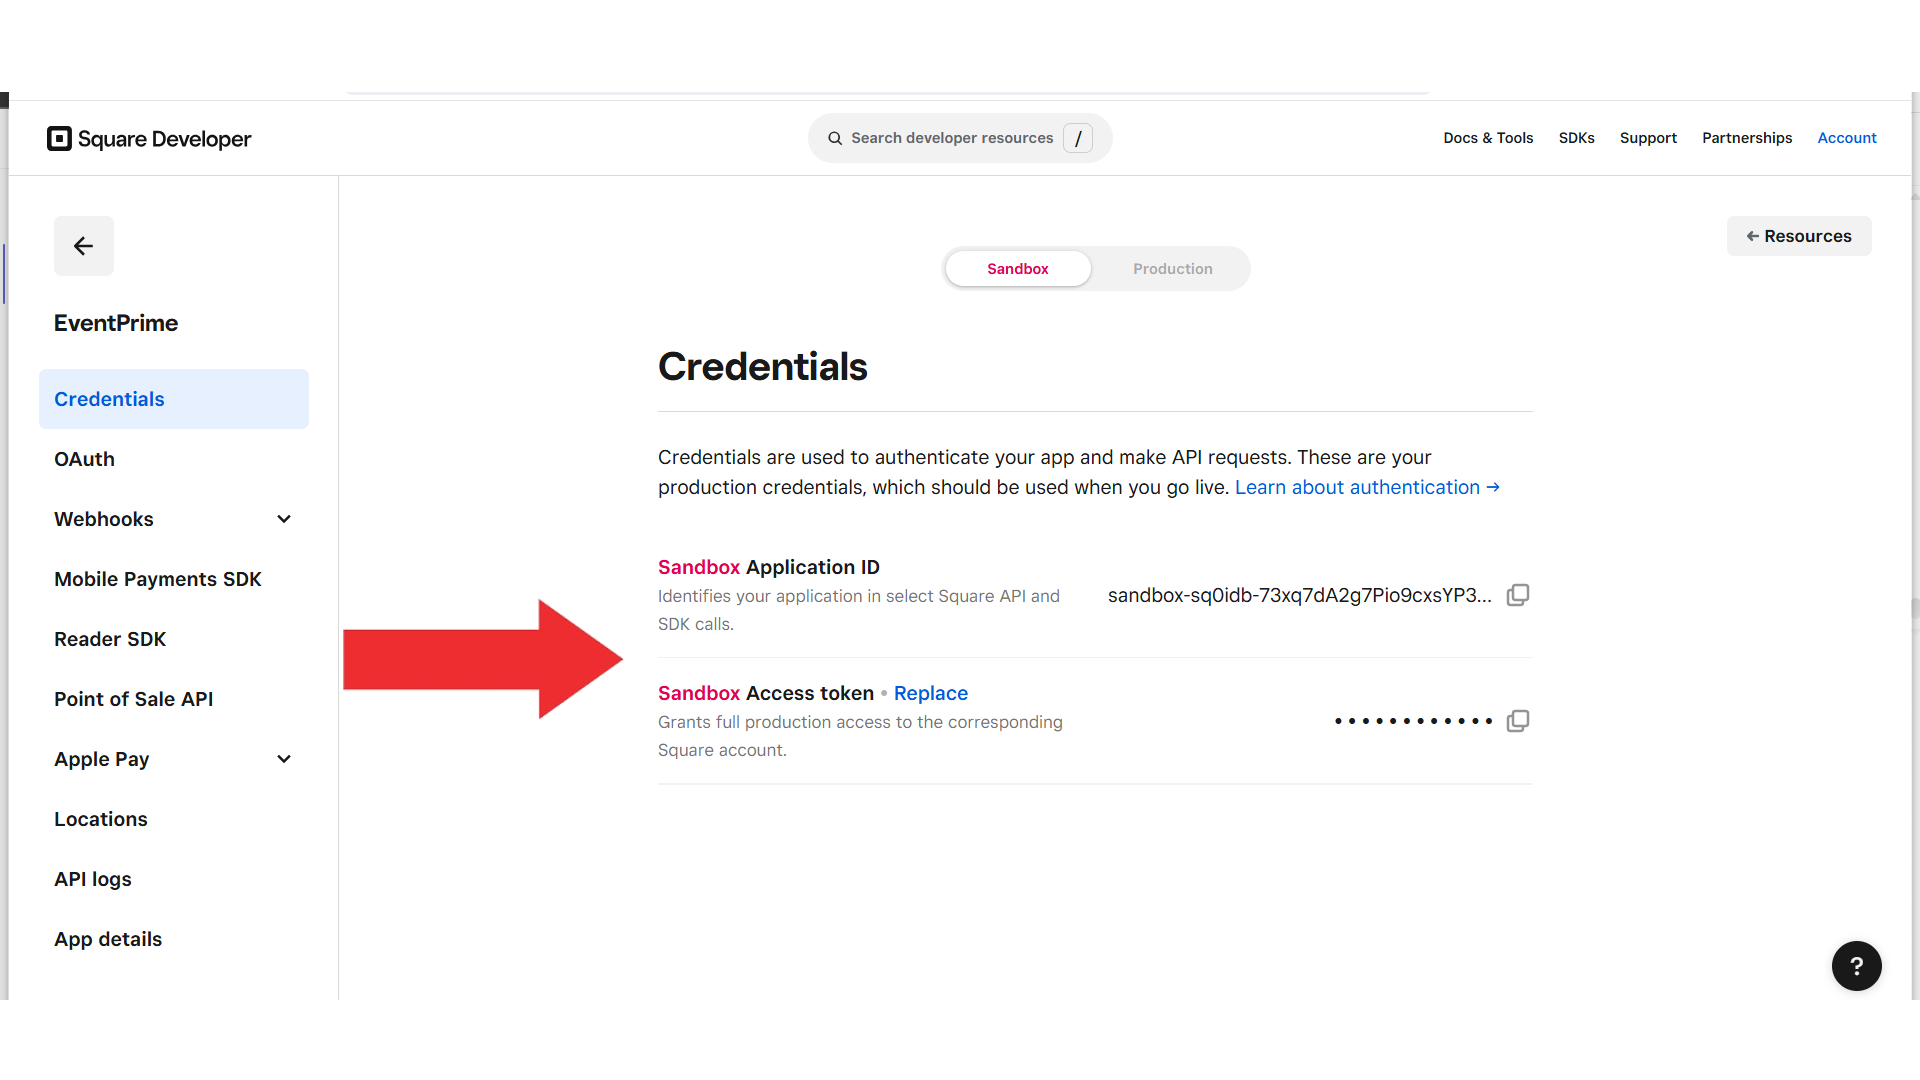
6. Select your Environment and Copy the Required Credentials:
Sandbox– Use this mode for testing payments without processing real transactions.
Production– Use this mode to accept live payments from attendees (see Square Access Tokens Guide for details).
From the Credentialstab, copy the Application ID and Access Token for the chosen environment.
Credentials Tab > Copy your Application ID and Access Token
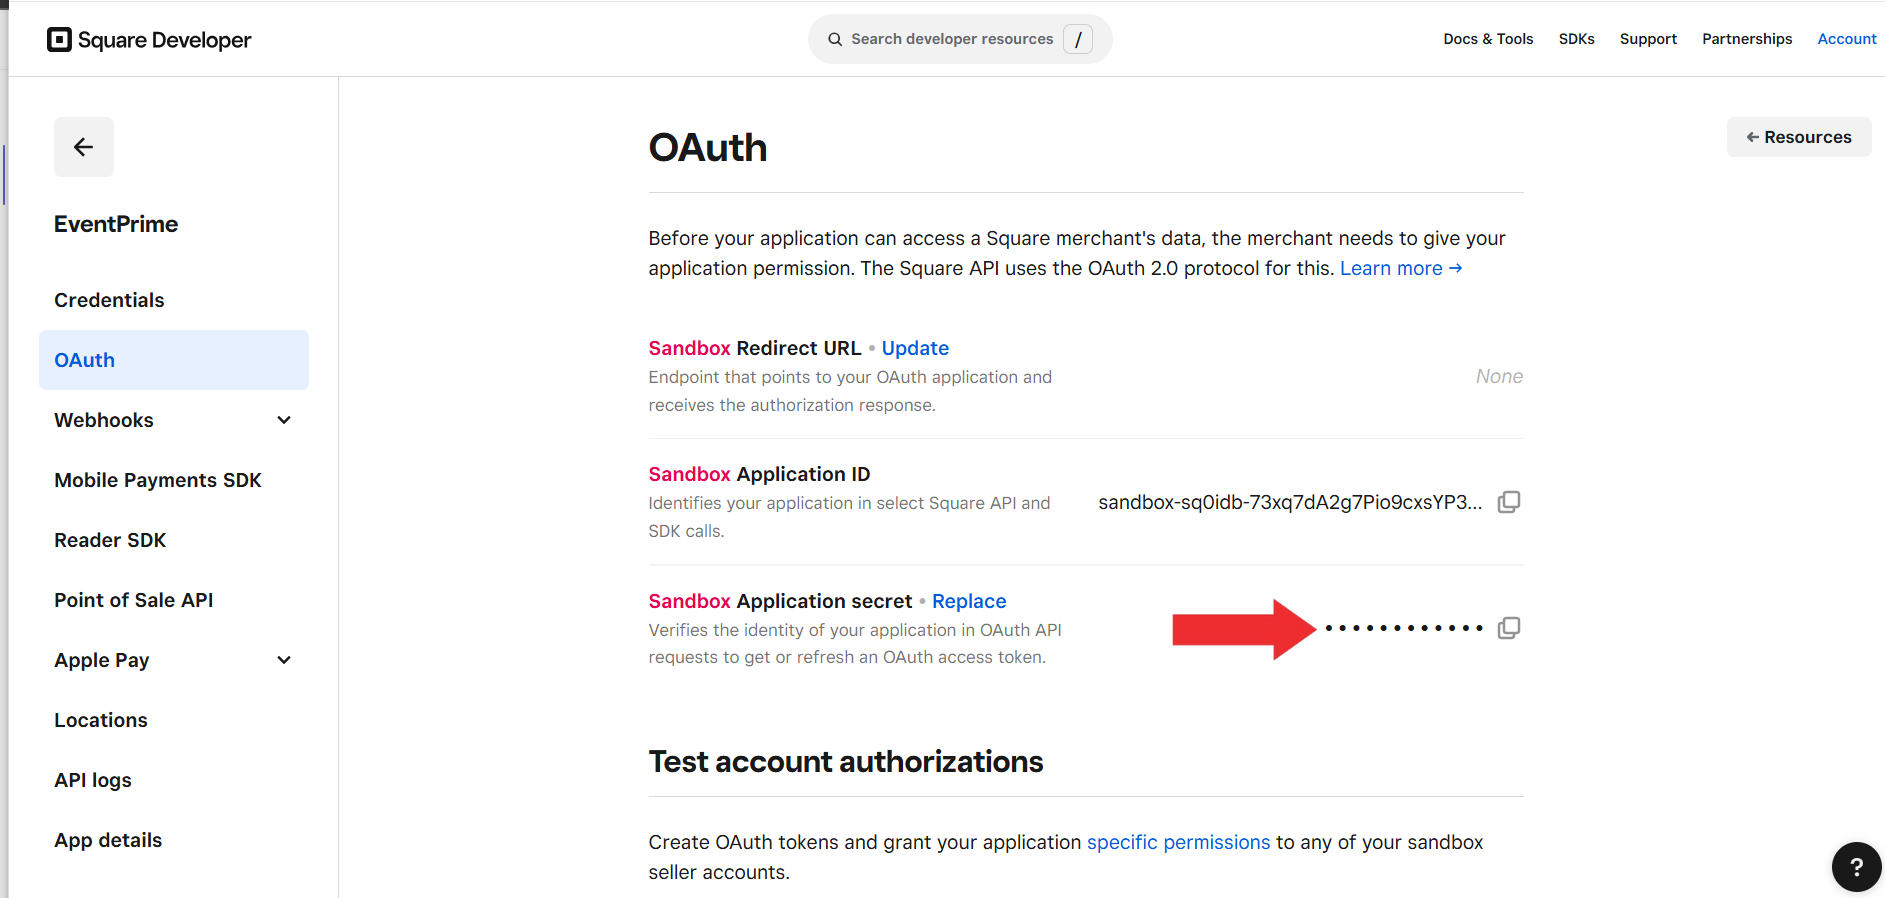
7. Copy the Application Secret
Navigate to the OAuth tab in your Square Developer Console and securely copy the Application Secret, which will be required to authorize your application’s connection with EventPrime.
OAuth Tab > Copy your Application Secret
8. Copy the Location ID
Navigate to the Locations tab, copy your Location ID.
Locations Tab > Copy your Location ID
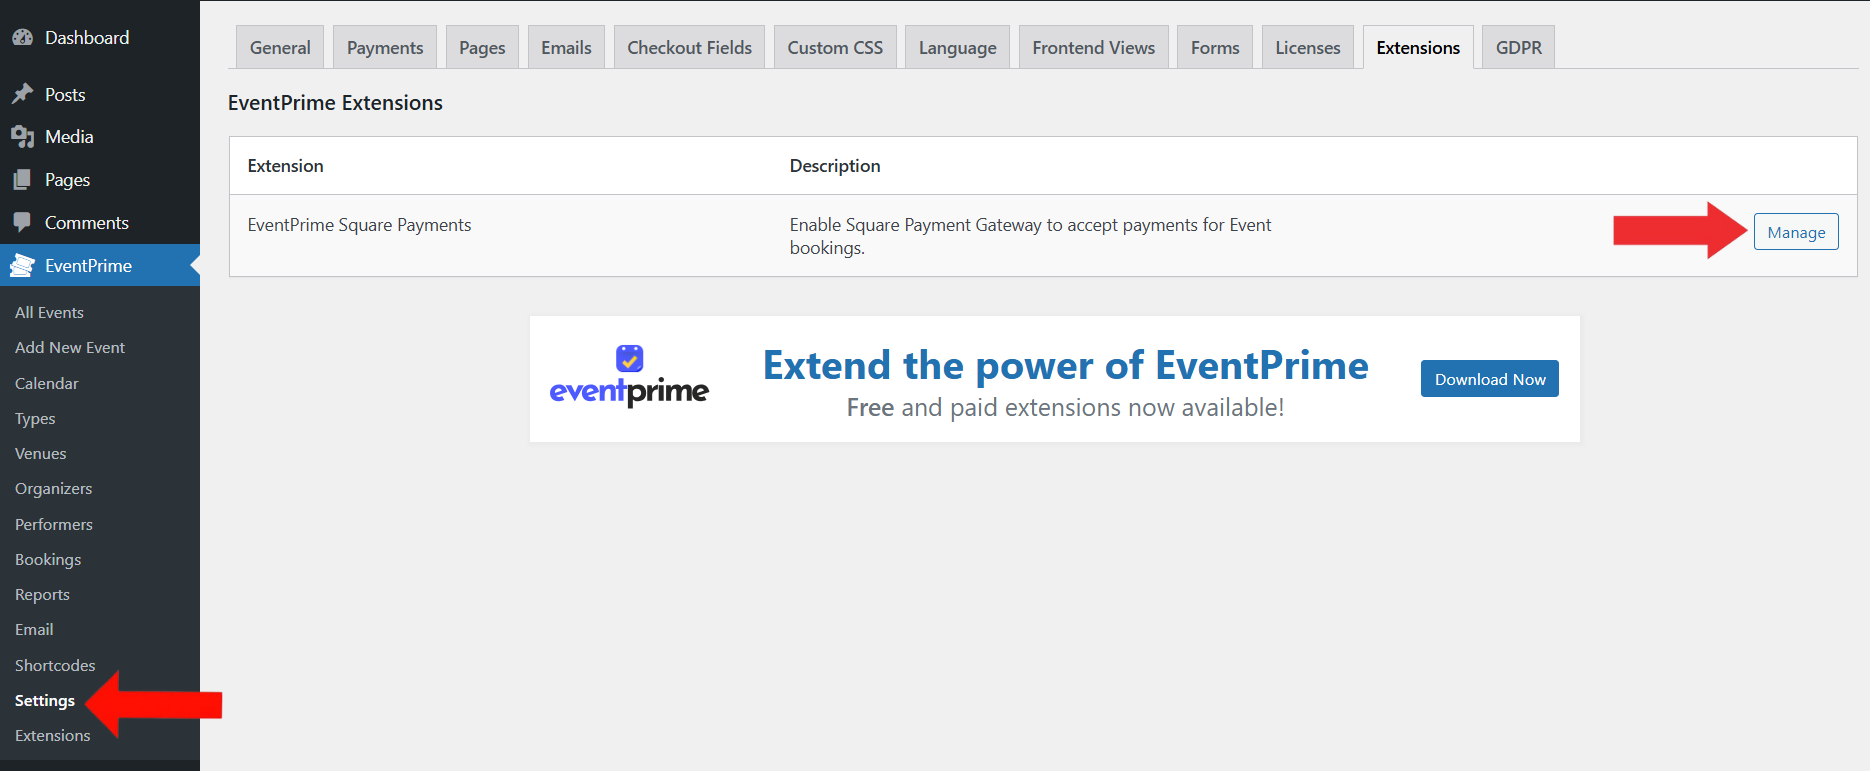
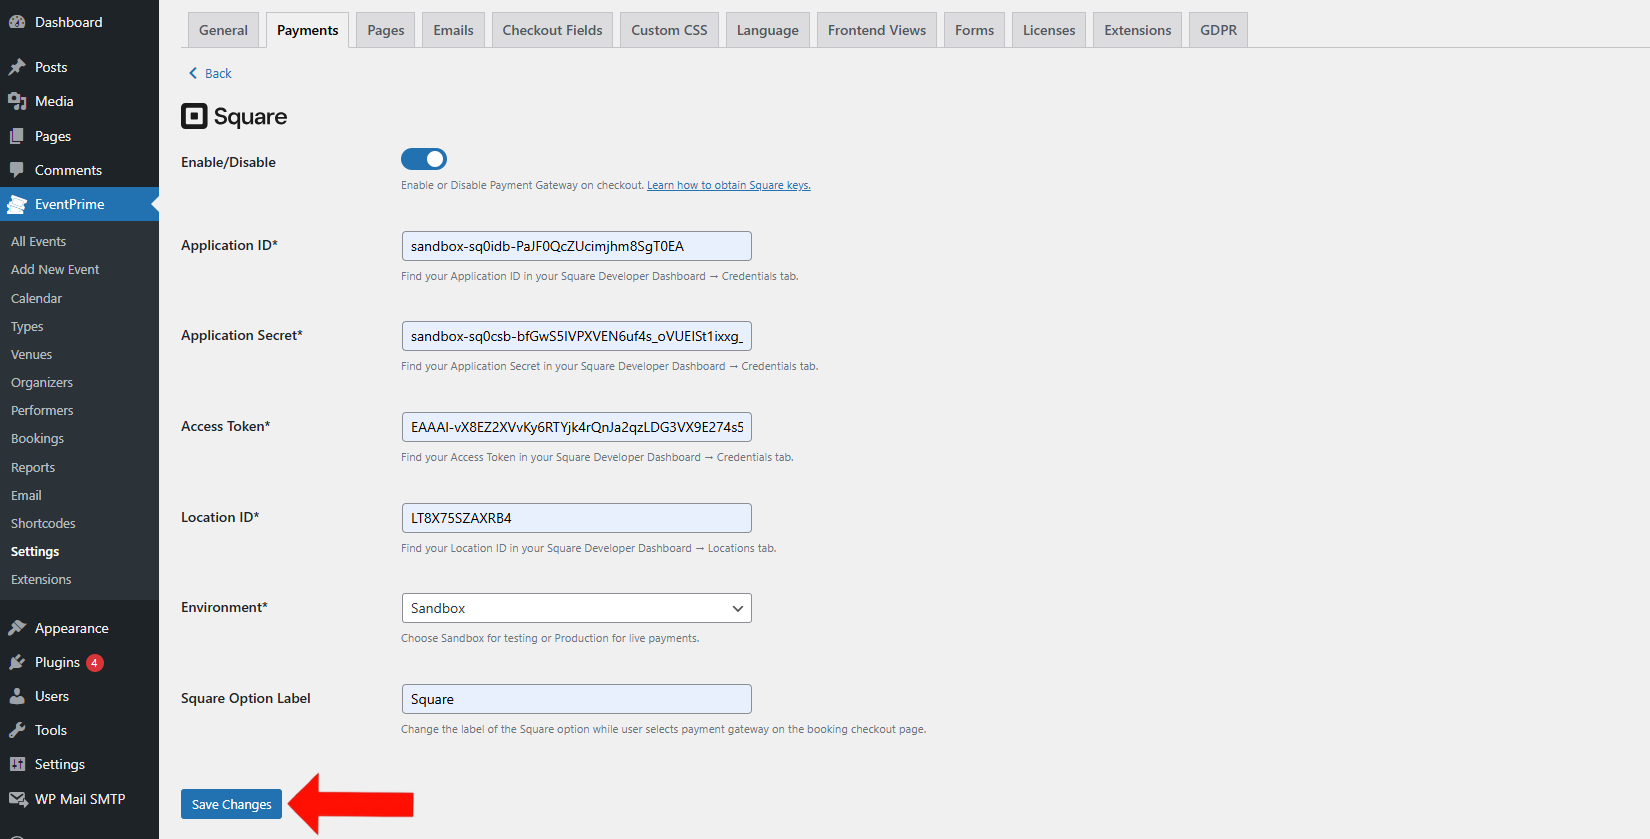
9. Open Square Payment Settings in EventPrime
Navigate to EventPrime menu and select Settings submenu.
Go to Extensions tab and click on Manage button for EventPrime Square Payments extension.
10. Enter your Square Credentials for Accepting Payment
Fill in the following fields on the settings page:
Enable/Disable– Use this toggle to activate or deactivate Square as a payment method on your site.
Application ID – Enter the Application ID obtained from the Credentialstab of your Square Developer Console.
Application Secret – Paste the Application Secret copied from the OAuthtab of your application.
Access Token – Provide the Access Token generated under the Credentialstab for your selected environment.
Location ID – Enter the Location ID from the Locationstab in your Square account, corresponding to your business location.
Environment– Choose Sandboxfor testing or Productionfor live payments..
Square Option Label – Customize the payment option name shown at checkout.
click Save Changes to save this settings for accepting payment.
Enter Credentials for Accepting Square Payments
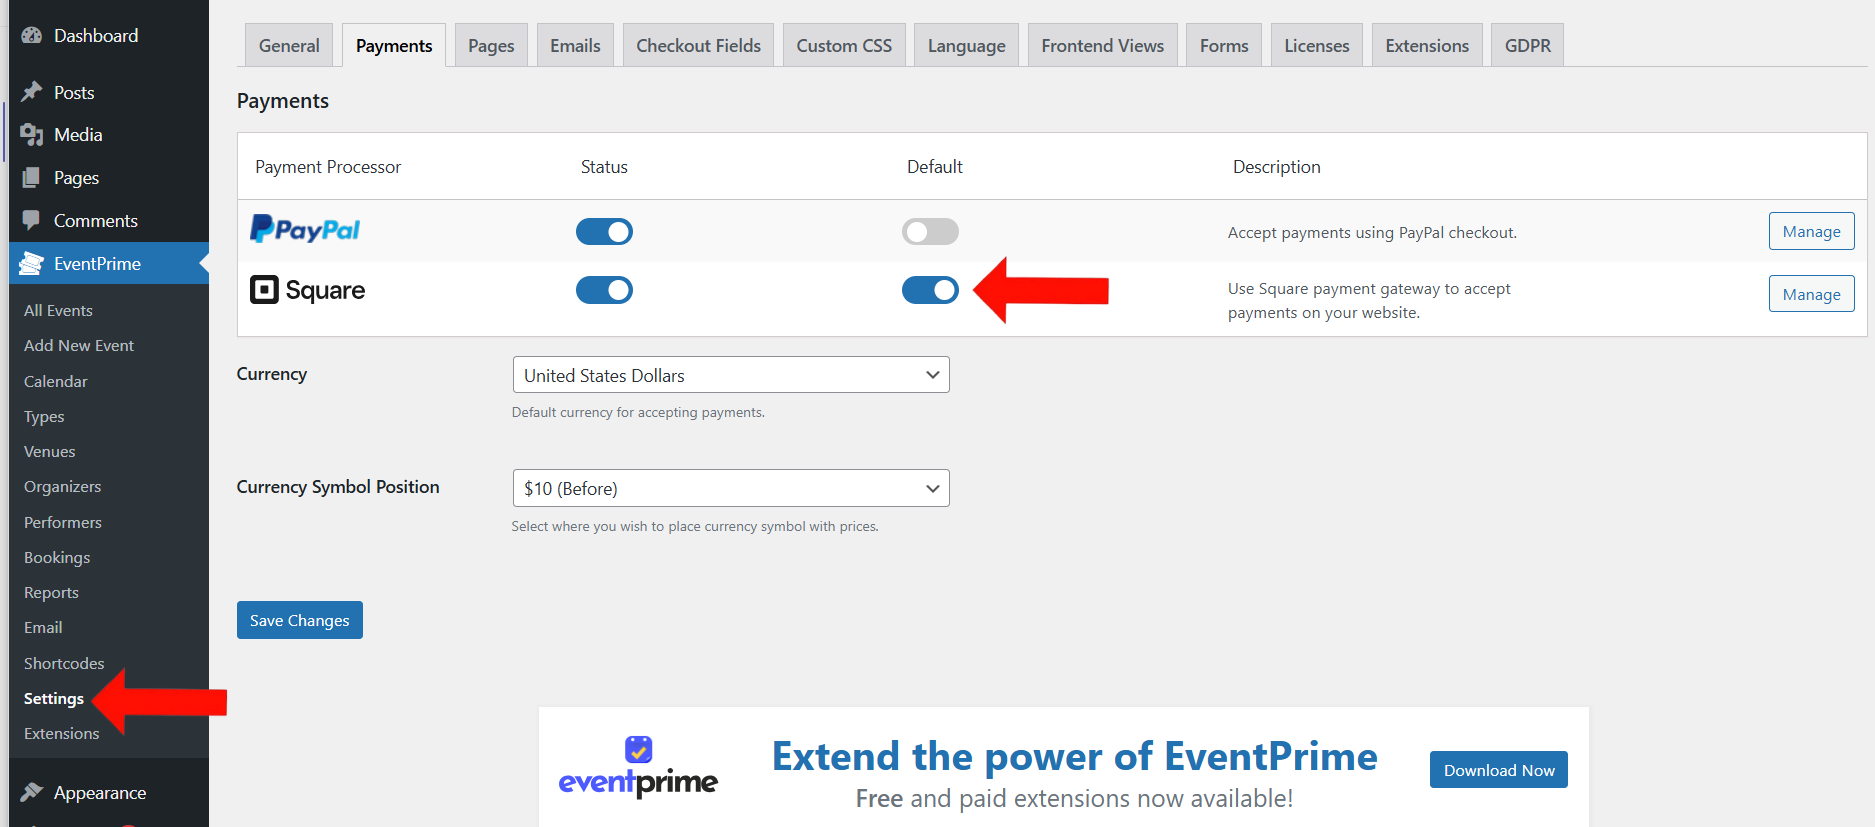
12. Optionally Set Square as the Default Payment Gateway
Navigate to EventPrime menu and select Settings submenu.
Go to Payments tab and enable the default payment toggle for Square to make it a default payment gateway for Event Booking checkout.
EventPrime Menu > Settings Submenu > Payments Tab > Make Square Default
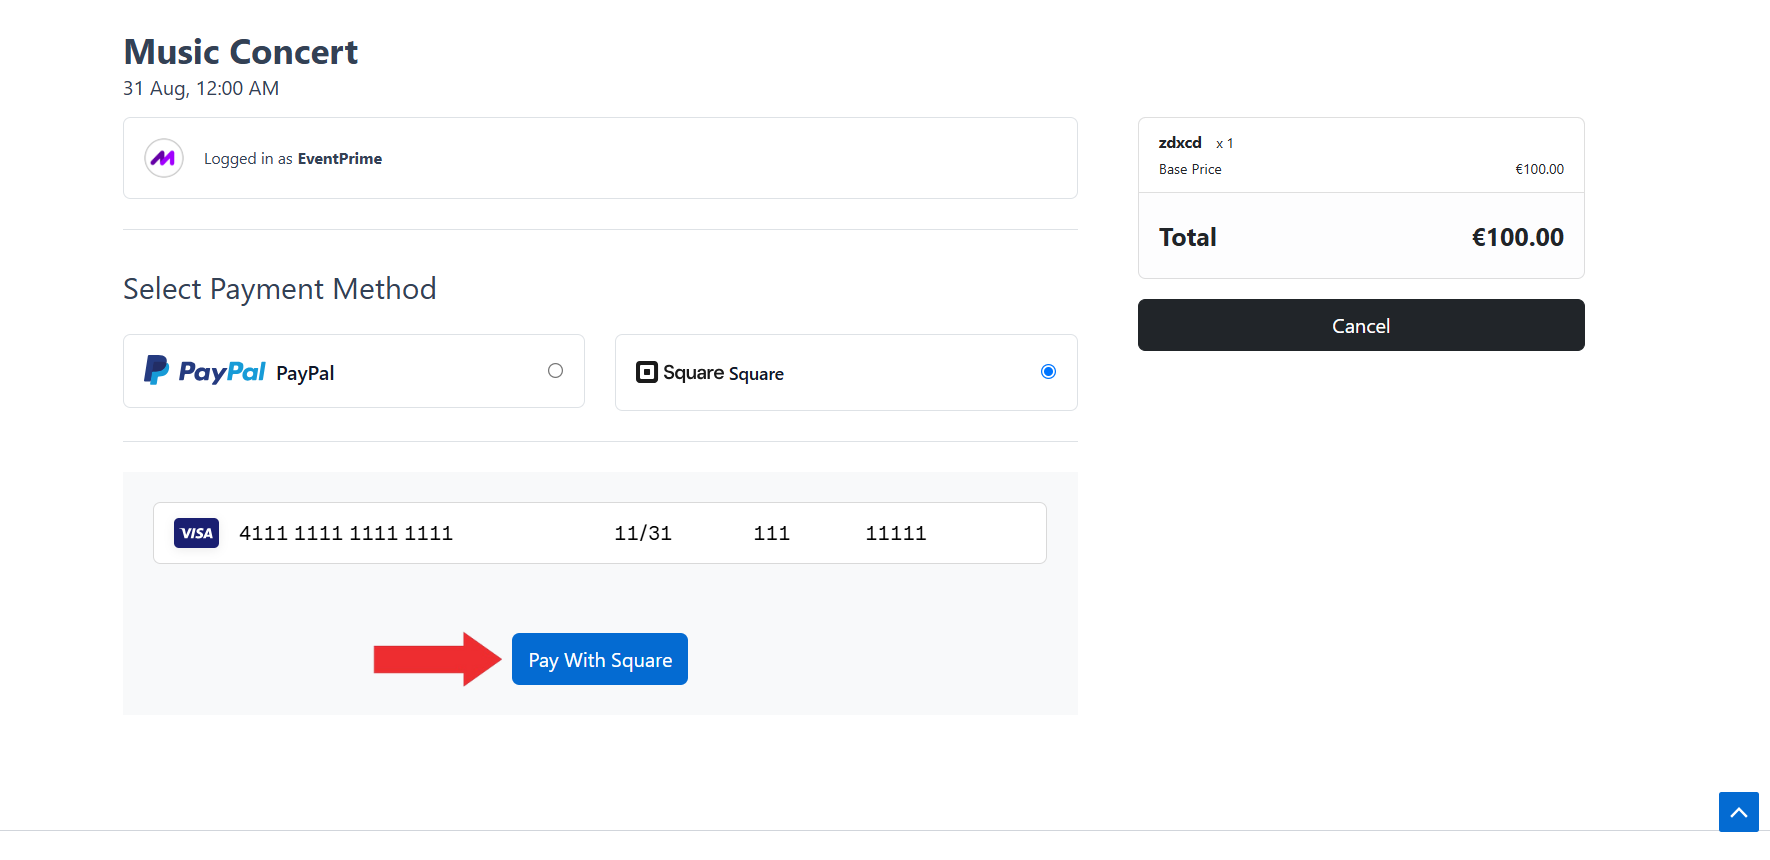
Frontend View
During checkout, Attendees can complete your Booking payment using Square. Simply select Squareas the payment option, enter their card details in the form that appears, and click the Pay With Square button. Once the payment is successful, your Booking will be confirmed and the Booking details will be shared with you instantly.
Frontend View of Square Payments Option
Conclusion
The Square Payments extension enables you to accept secure payments for Event Bookings directly on your WordPress website. By connecting EventPrime with Square, you offer attendees a fast, reliable, and professional checkout experience.
Looking for a tailor-made solution to meet your specific needs? Our dedicated customization team is here to help!
Use this link
to share your requirements with us, and we'll collaborate with you to bring your vision to life.