Overview
The EventPrime Multi-Session Events extension allows Organizers to add multiple sessions under a single Event. This is useful for workshops, conferences, summits, or any Event that includes a structured agenda with different time slots, Venues, or Performers.
With this extension enabled, a dedicated Sessions tab becomes available inside the Event settings, allowing you to create and manage session-level schedules while keeping everything under one main Event.
Prerequisite
Along with the EventPrime plugin, the EventPrime Multi-Session Events extension must be installed and activated to use this feature. The extension can be accessed from the following link: Get Your EventPrime Multi-Session Events Extension
How to Configure Multi-Session Events
Step 1: Enable Multi-Session Extension Settings
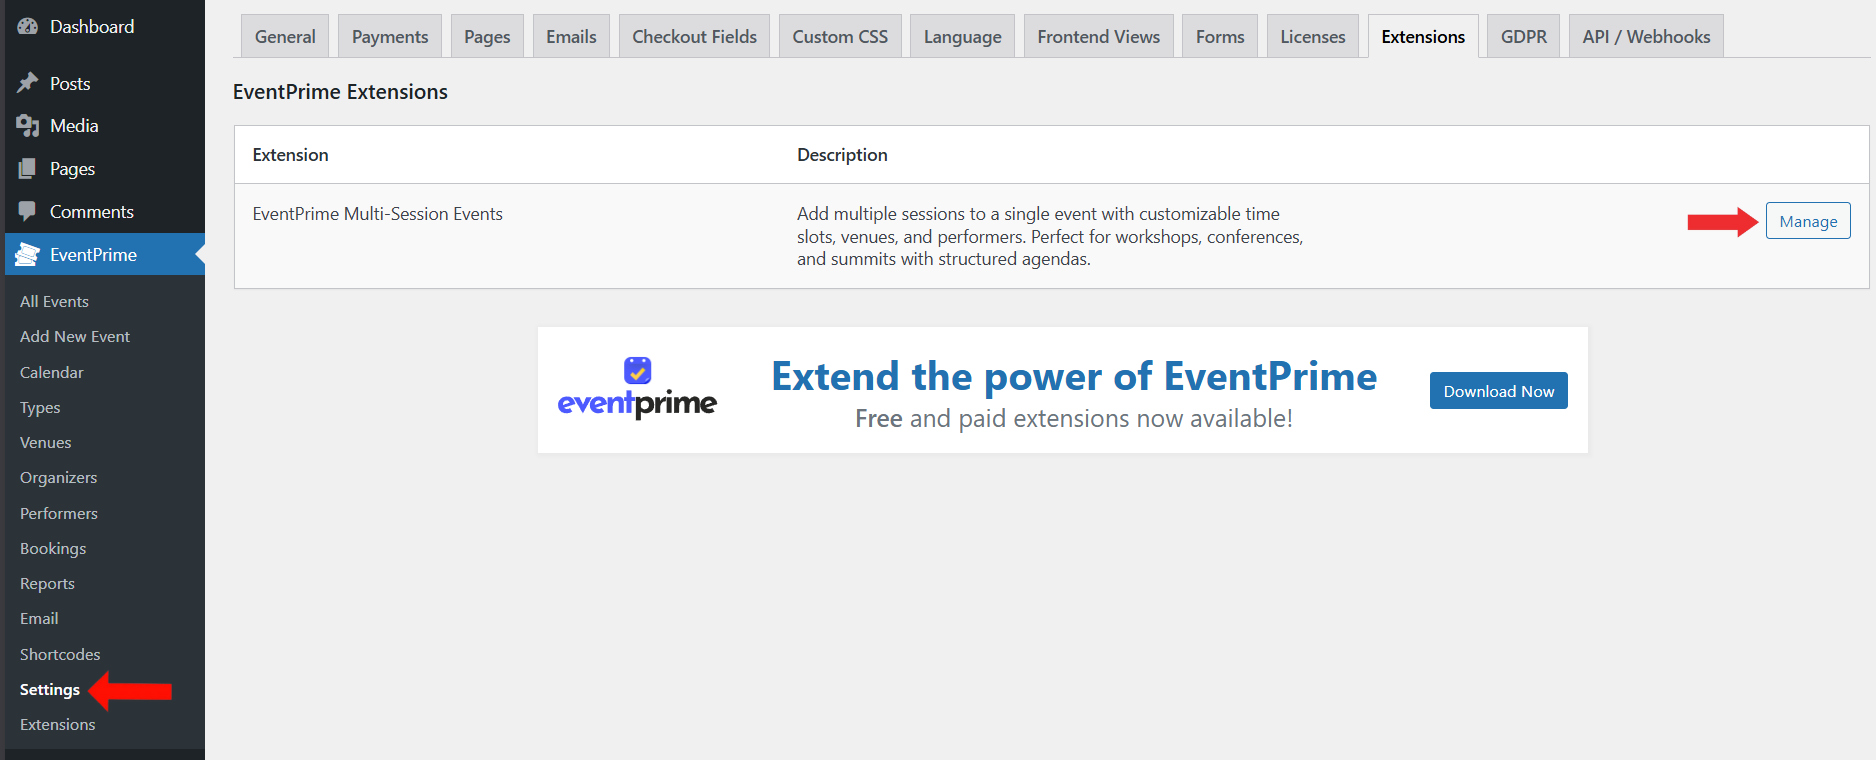
- Navigate to EventPrime menu and select Settings submenu.
- Open the Extensions tab.
- Locate EventPrime Multi-Session Events extension.
- Click the Manage button to access the extension settings.
Step 2: Configure Multi-Session Display Settings
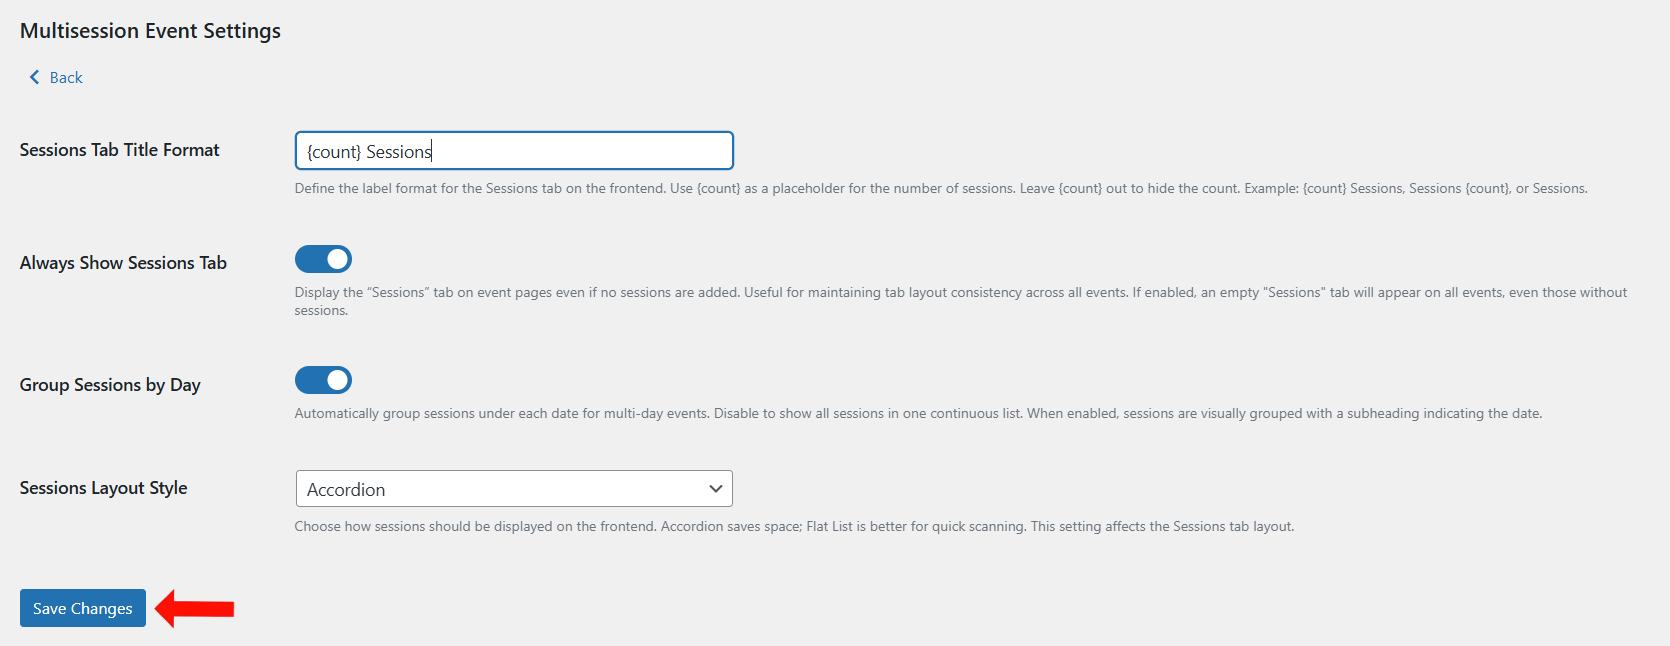
On the Multisession Event Settings page, configure how sessions will appear on the frontend.
You can set the following options:
- Enter a Sessions Tab Title Format (example:
{count} Sessions) to control how the tab label is displayed. - Enable Always Show Sessions Tab if you want the Sessions tab to appear even when no sessions are added.
- Enable Group Sessions by Day to automatically organize sessions under each date for multi-day Events.
- Select a Sessions Layout Style such as Accordion or Flat List based on how you want sessions displayed.
Click Save Changes to apply the configuration.
Step 3: Open the Event Where Sessions Are Needed
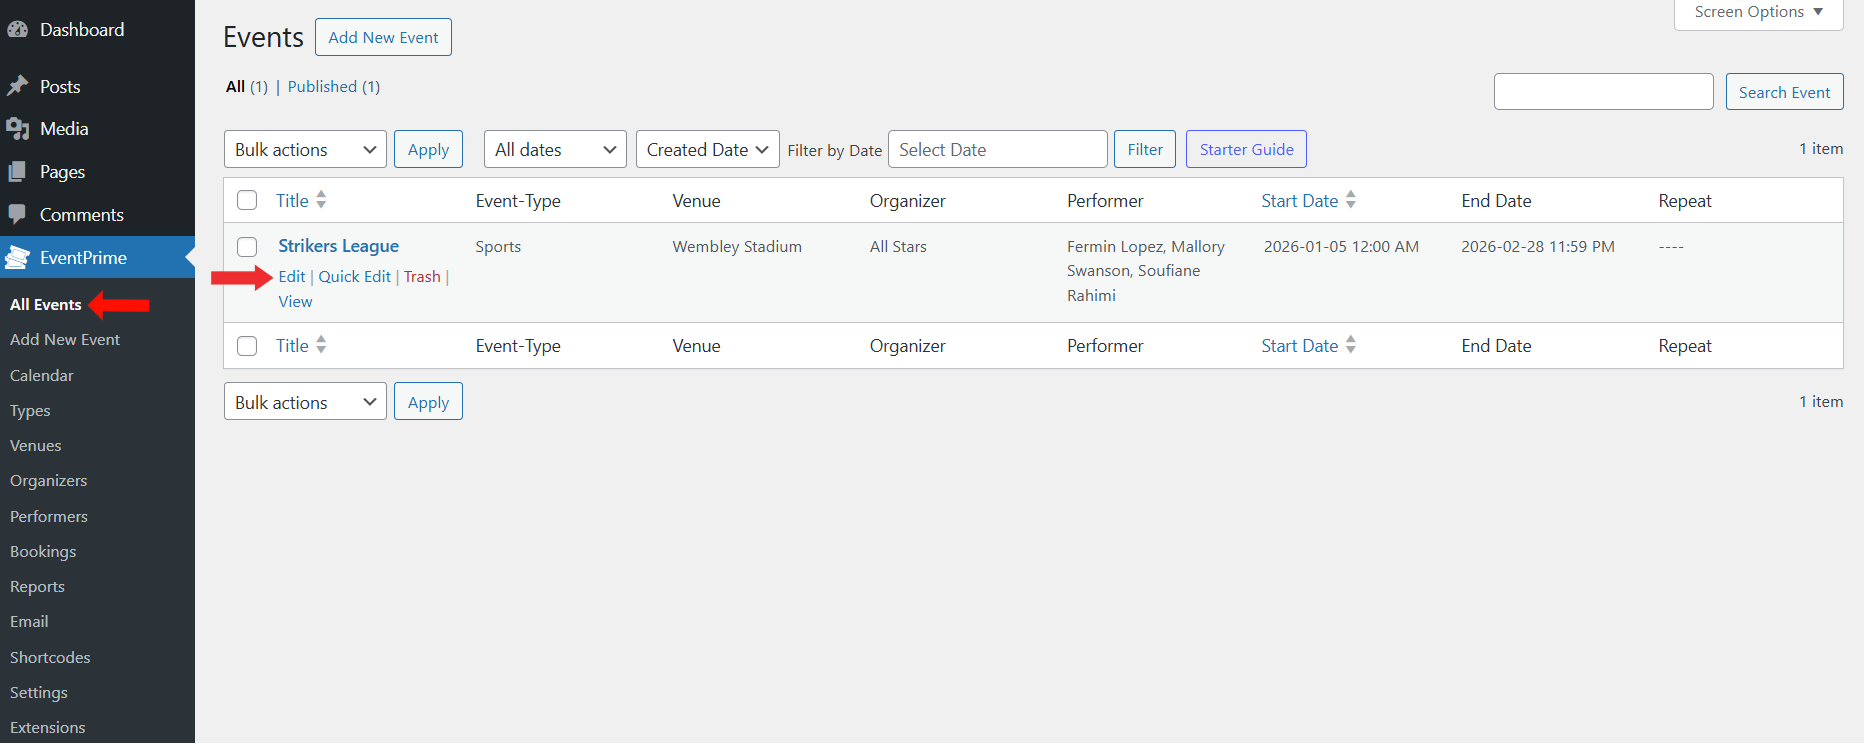
- Navigate to EventPrime menu and select All Events submenu.
- From the list of Events, click the Edit button for the Event where you want to add sessions.
Step 4: Access Sessions Tab in Event Settings
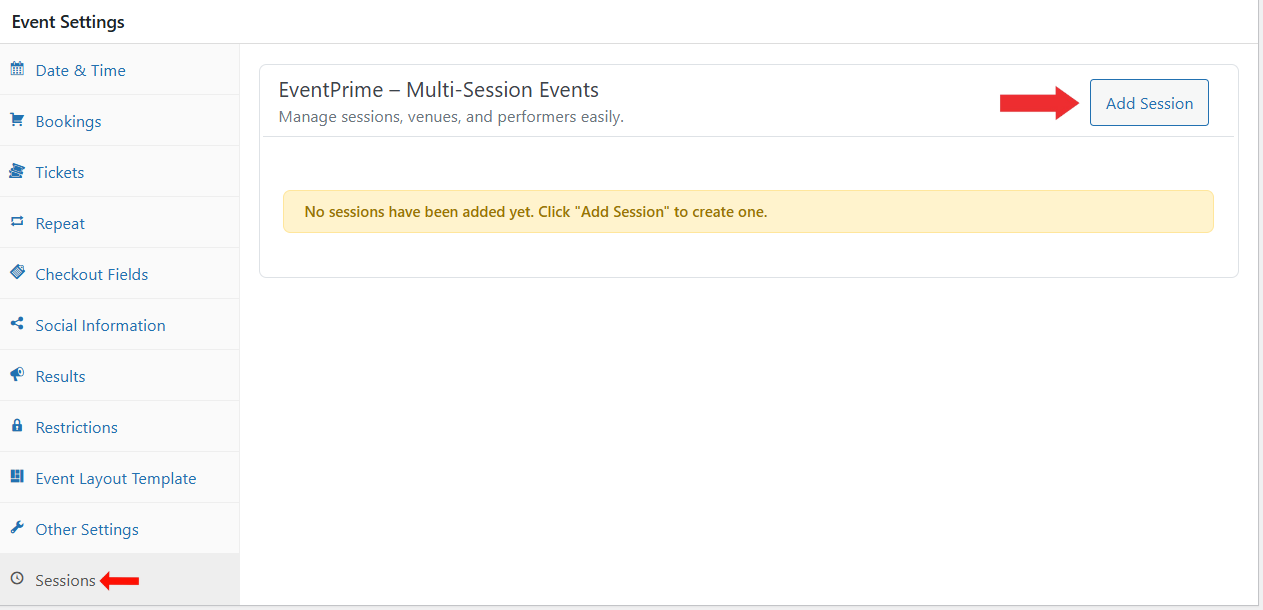
- On the Edit Event page, locate the Event Settings metabox.
- Scroll to the Sessions tab.
- Click the Add Session button to create a new session for the Event.
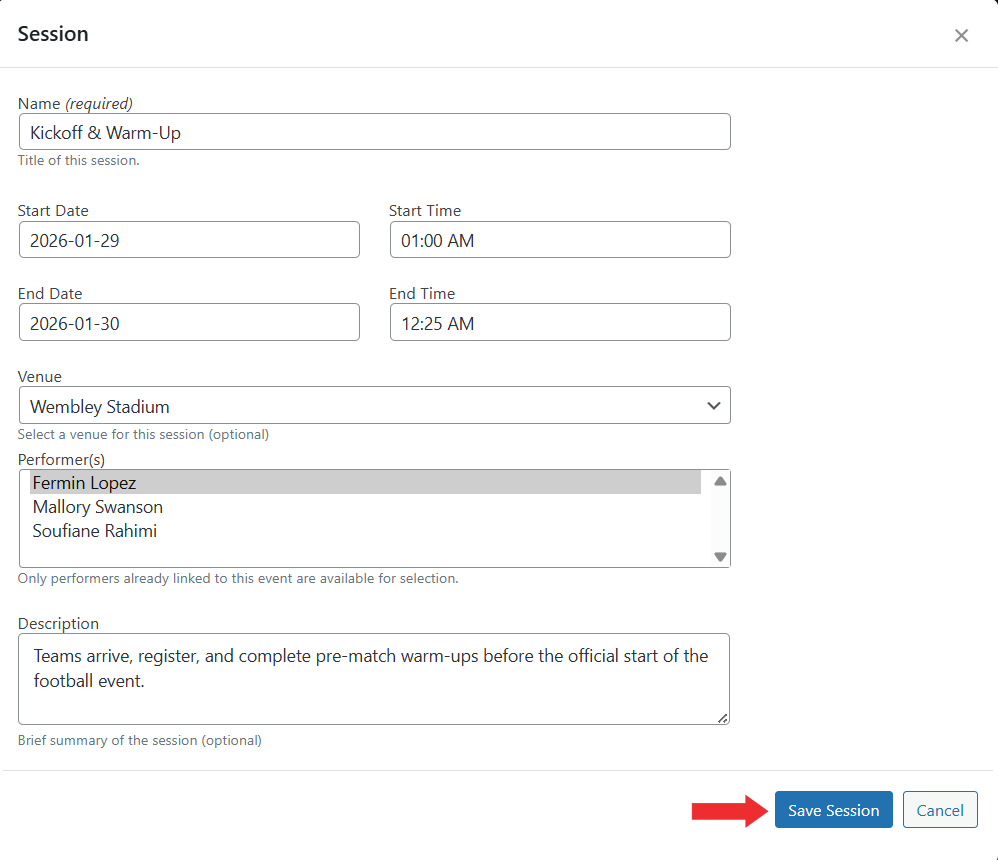
Step 5: Add Session Details and Save
In the Session popup modal, enter the required session information:
- Enter the Session Name
- Select the Start Date and Time
- Select the End Date and Time
- Choose a Venue (optional)
- Select Performer(s) linked to the Event
- Add a short Description for the session
Click Save Session to create the session.
After adding sessions, Update the Event to ensure all session details are saved properly.
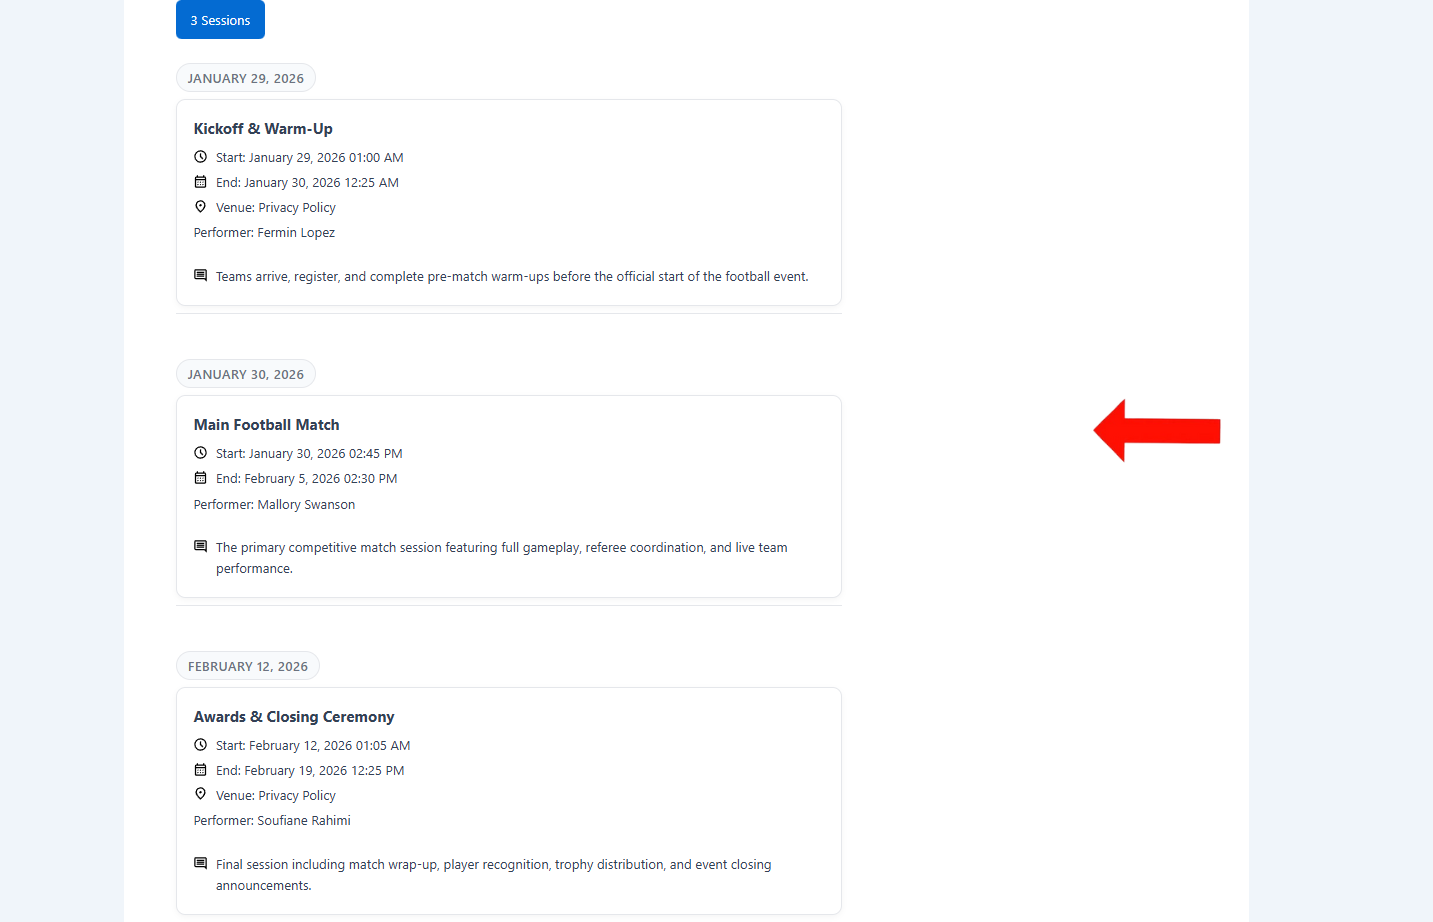
Frontend View
On the Event Details page, attendees will see a dedicated Sessions tab where all configured sessions are displayed. Each session includes its schedule, Venue, Performer information, and description, allowing visitors to easily understand the full agenda of the Event before Booking or attending.
Conclusion
The EventPrime Multi-Session Events extension helps Organizers manage structured agendas within a single Event. By adding sessions with specific timings, Venues, and Performers, you can present a clear schedule to attendees. This makes it ideal for conferences, workshops, and multi-day programs where multiple activities happen under one main Event.
Questions, Support & Custom Solutions
- Need more details or can't find what you're looking for? Let us know how we can help! Contact our support team here.
- Looking for a tailor-made solution to meet your specific needs? Our dedicated customization team is here to help! Use this link to share your requirements with us, and we'll collaborate with you to bring your vision to life.