Overview
The EventPrime Countdown Timer extension allows Event Organizers to display a countdown timer for Events scheduled in the future. The timer helps attendees quickly understand how much time is left before the Event begins and appears directly on the Event Details page.
The countdown design is configured globally, while the timer itself is enabled per Event.
Prerequisite
Along with the EventPrime plugin, theEventPrime Countdown Timer extension must be installed and activated to use this feature. The extension can be accessed from the following link: Get Your Countdown Timer Extension
How to Use Event Countdown Timer
Step 1: Open Countdown Timer Settings
- Navigate to EventPrime menu and select the Settings submenu.
- Open the Extensions tab, locate EventPrime Event Countdown, and click the Manage button.

Step 2: Configure Countdown Timer and Use Shortcode
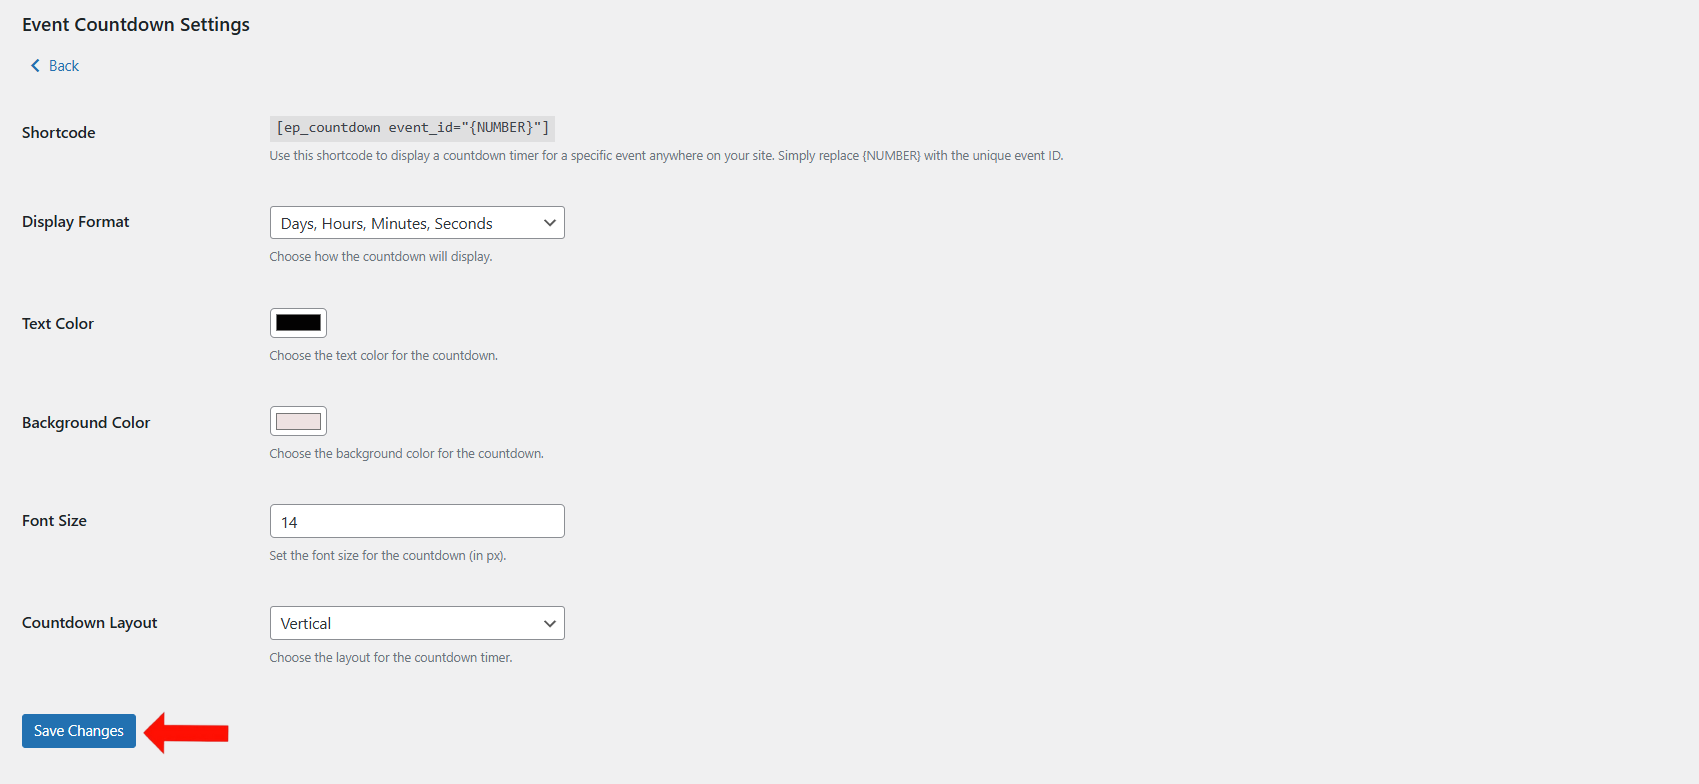
On the Event Countdown Settings page, you can configure how the countdown timer appears for future Events.
From this page, you can:
- Use the Countdown Shortcode
- Copy the shortcode shown on the page:
[ep_countdown event_id="{NUMBER}"] - Replace
{NUMBER}with the Event ID of a future Event. - Use this shortcode on any page or content section to display the countdown timer.
- Copy the shortcode shown on the page:
- Select Countdown Display Format
- Choose how the timer values are displayed, such as days, hours, minutes, and seconds.
- Configure Text Color
- Select the color used for the countdown numbers and labels.
- Configure Background Color
- Choose the background color for the countdown timer container.
- Set Font Size
- Define the font size of the countdown text in pixels for better visibility.
- Choose Countdown Layout
- Select how the countdown units are arranged, such as Vertical or Horizontal layout.
- Save Configuration
- Click Save Changes to apply the countdown timer settings.
These settings control the appearance of the countdown timer shown for upcoming Events.
Step 3: Open Event to Enable Countdown Timer
- Navigate to EventPrime menu and select the All Events submenu.
- From the list of Events, click the Edit button for the Event where you want to enable the countdown timer.

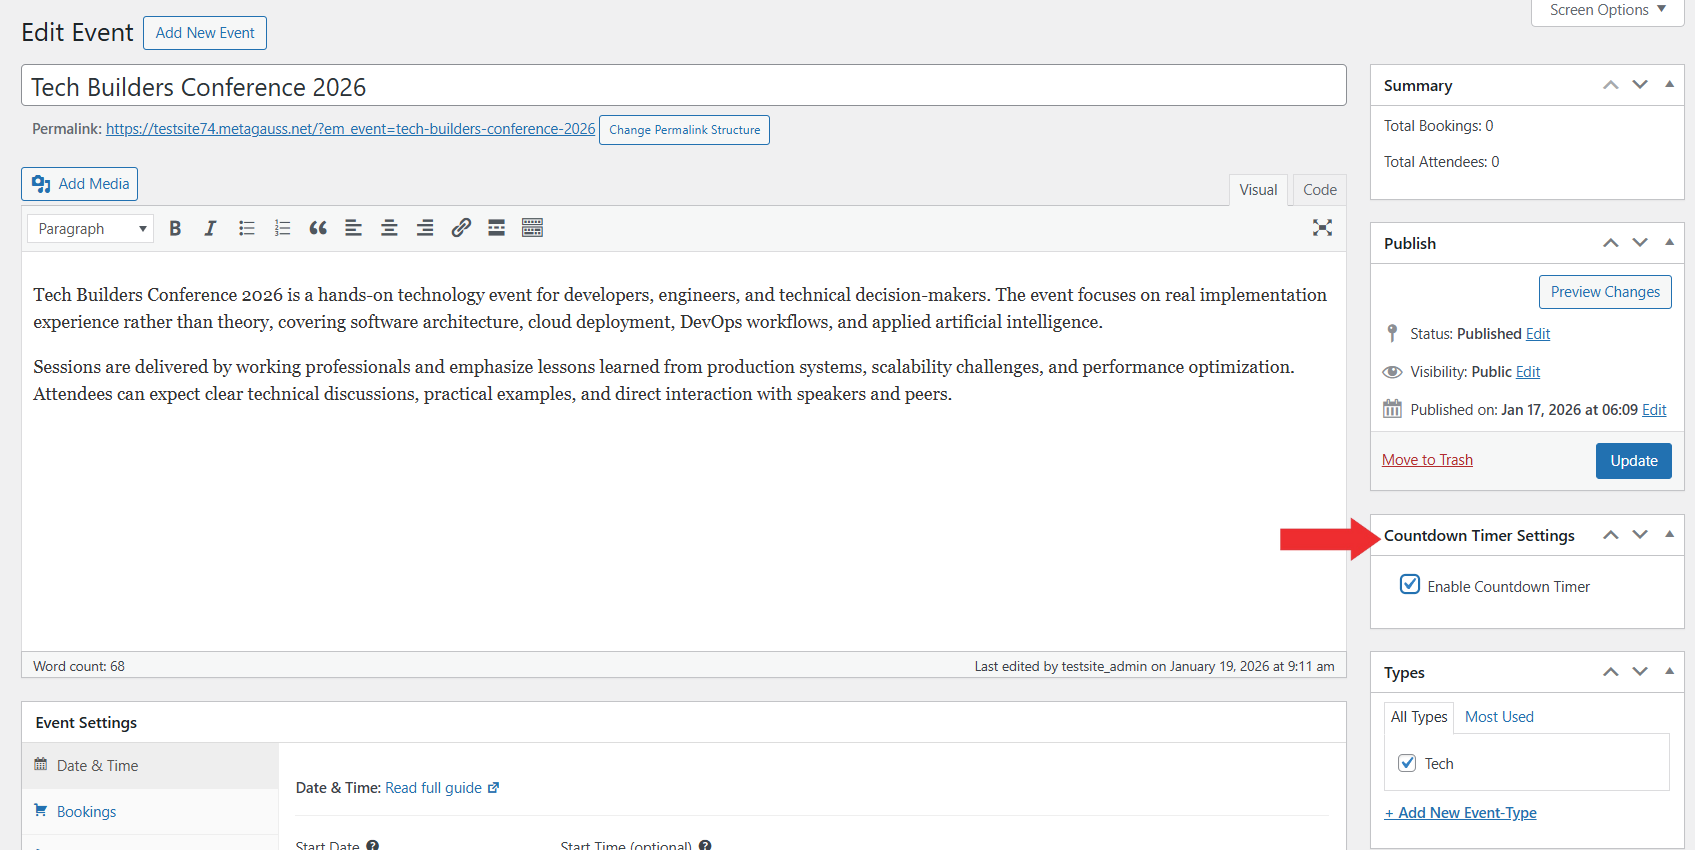
Step 4: Enable Countdown Timer for Event
- On the Edit Event page, locate the Countdown Timer Settings metabox.
- Enable the countdown timer by checking the Enable Countdown Timer option and update the Event.
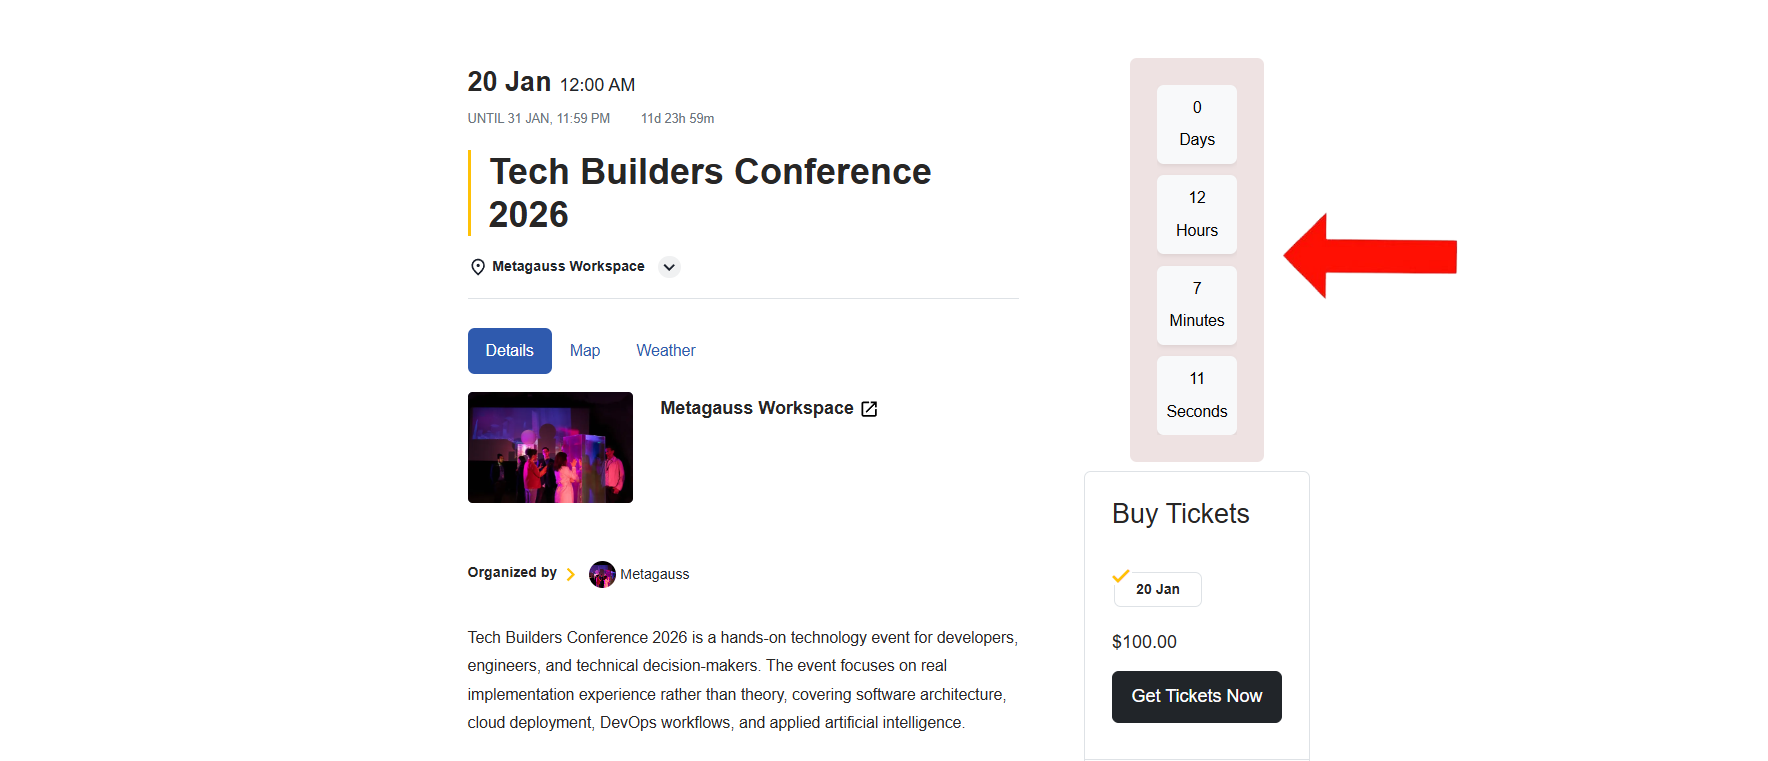
Frontend View
Once the Countdown Timer is enabled, a countdown timer widget appears on the Event Details page. The timer automatically counts down to the Event start time based on the configuration you set in the Countdown Timer Settings.
Conclusion
The EventPrime Countdown Timer extension helps create urgency for upcoming Events by clearly displaying the remaining time before the Event starts. By enabling the timer for future Events and configuring its appearance, Organizers can improve Event visibility and encourage timely registrations.
Questions, Support & Custom Solutions
- Need more details or can't find what you're looking for? Let us know how we can help! Contact our support team here.
- Looking for a tailor-made solution to meet your specific needs? Our dedicated customization team is here to help! Use this link to share your requirements with us, and we'll collaborate with you to bring your vision to life.