Overview
EventPrime provides a Checkout Fields option that allows you to collect additional attendee and booking information during the checkout process. You can create custom fields such as text, number, email, date, or terms & conditions, and apply them to your Events. This ensures you capture all necessary details at the time of booking.
Steps to Add Checkout Fields
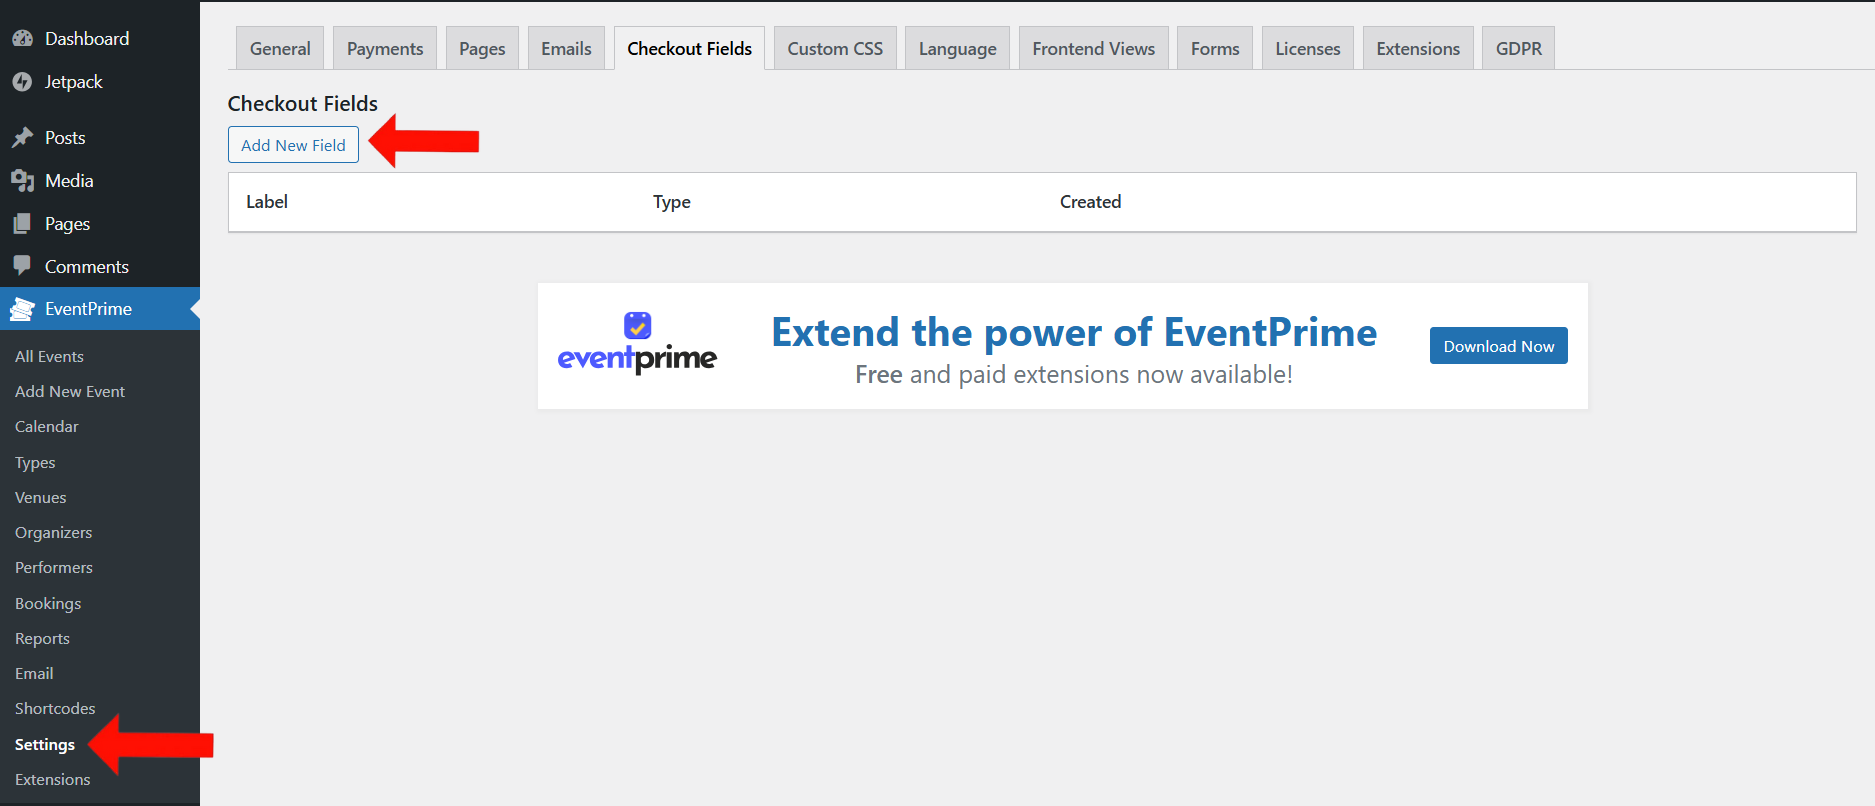
1. Navigate to the EventPrime menu, select the Settings submenu, go to the Checkout Fields tab, and click the Add New Field button.
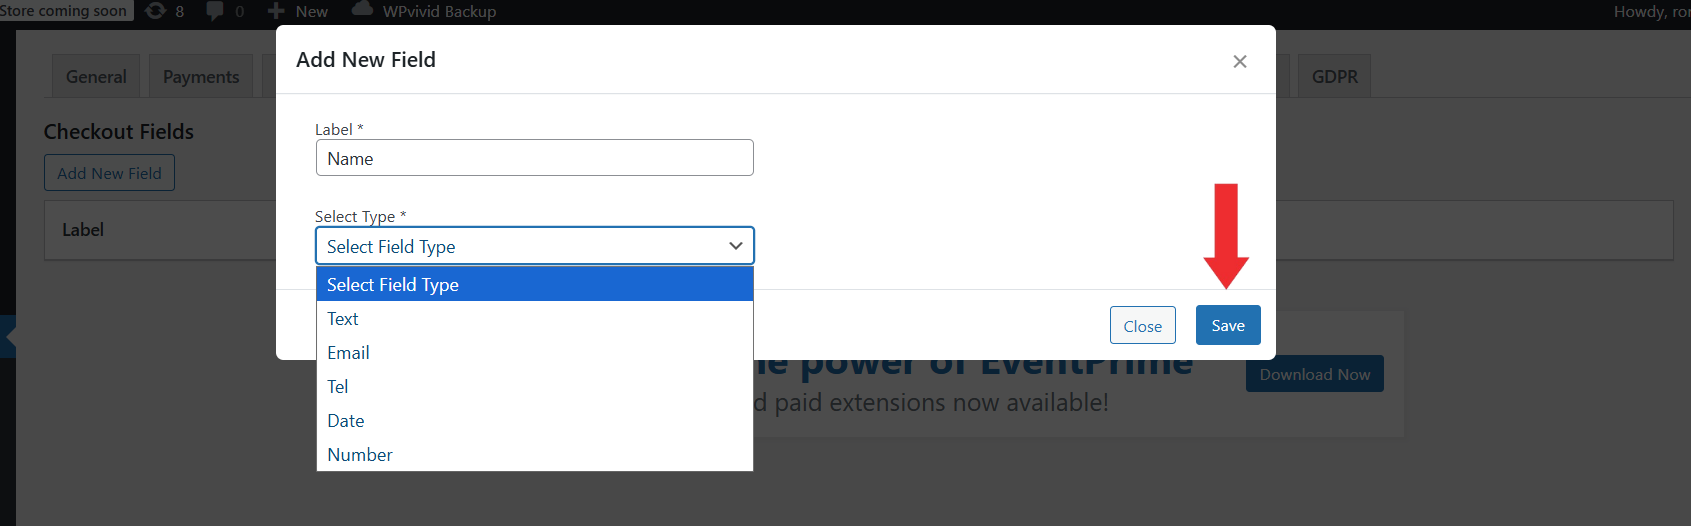
2. In the Add New Field popup, enter a label for the checkout field in Label field and select a field type from the Select Type dropdown (Text, Telephone, Email, Number, Date). Click Save to create the field.
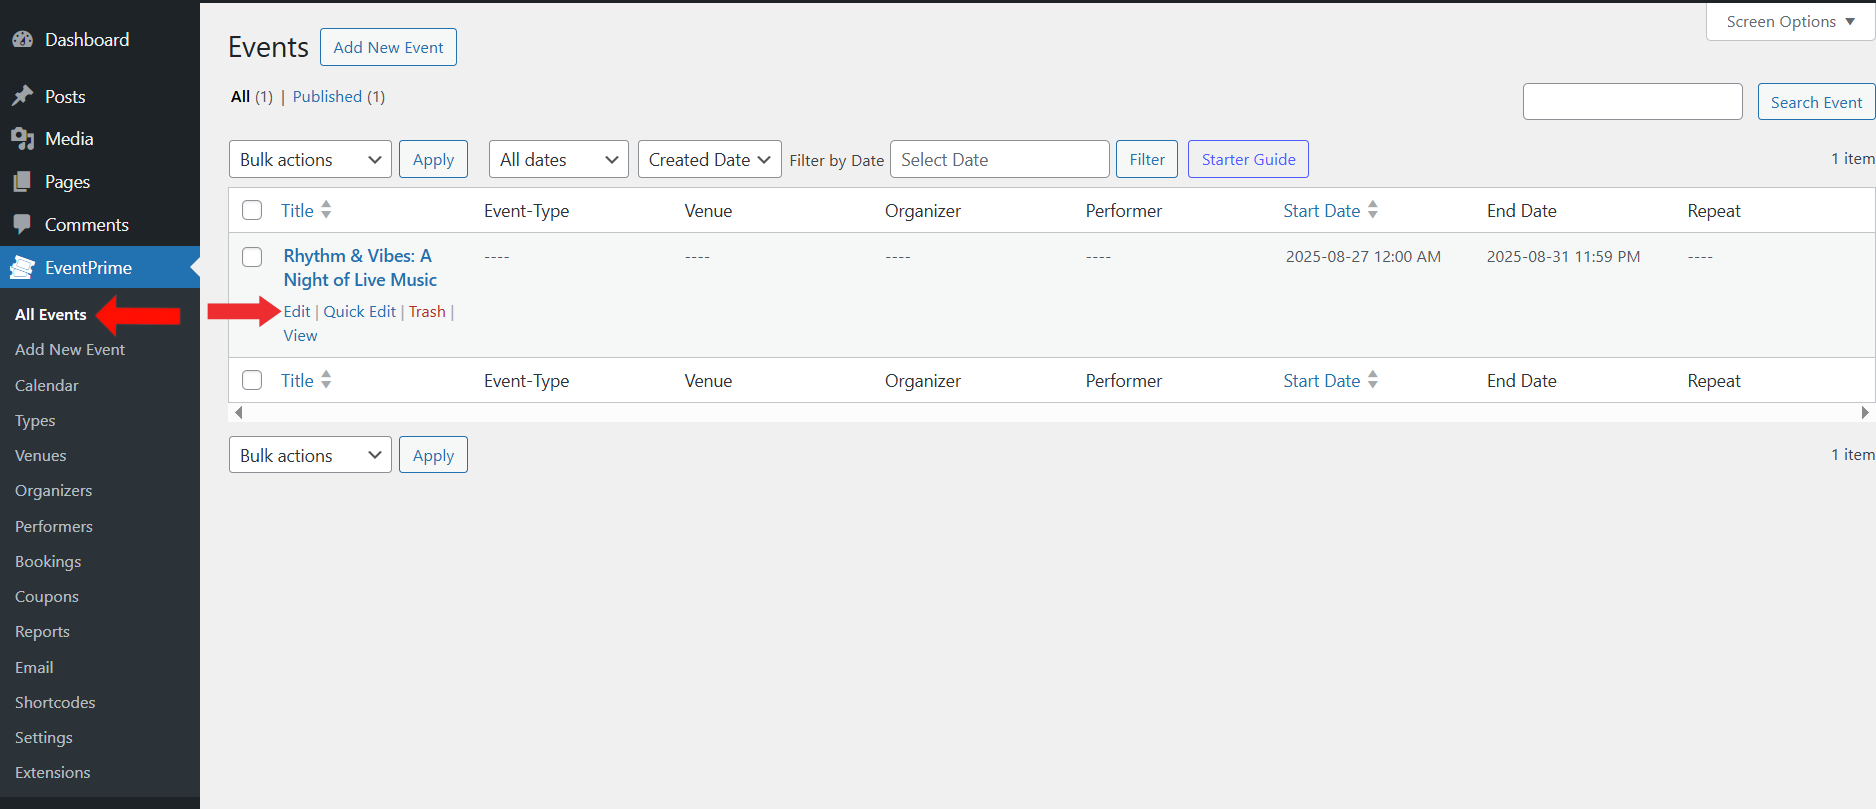
3. Navigate to the EventPrime menu, open the All Events submenu, and click Edit for the Event where you want to add checkout fields.
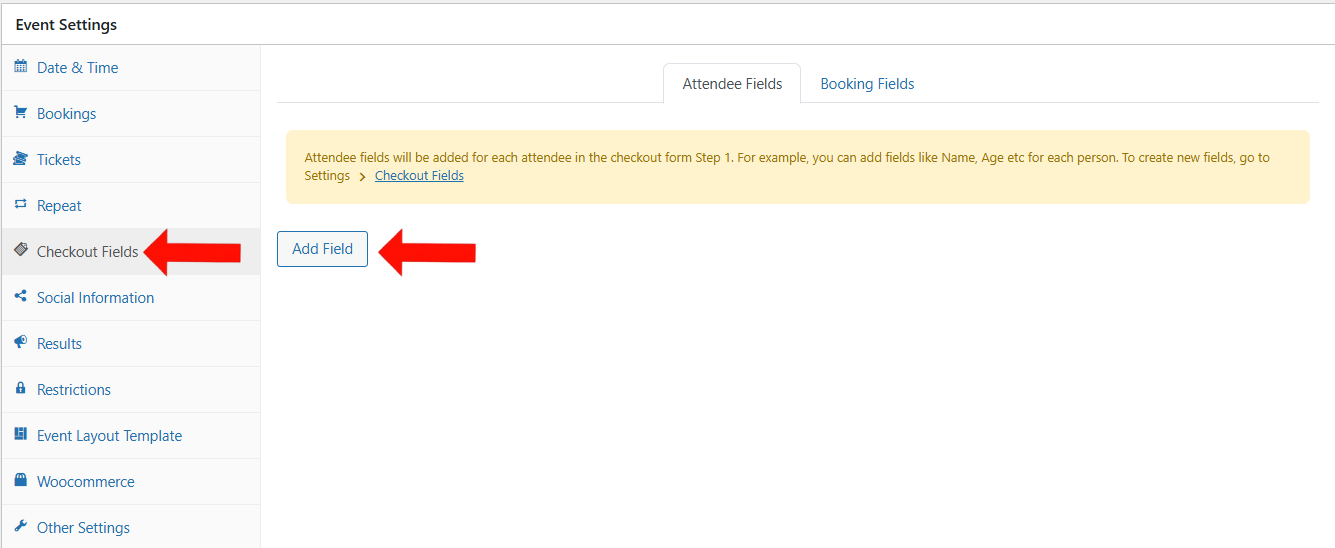
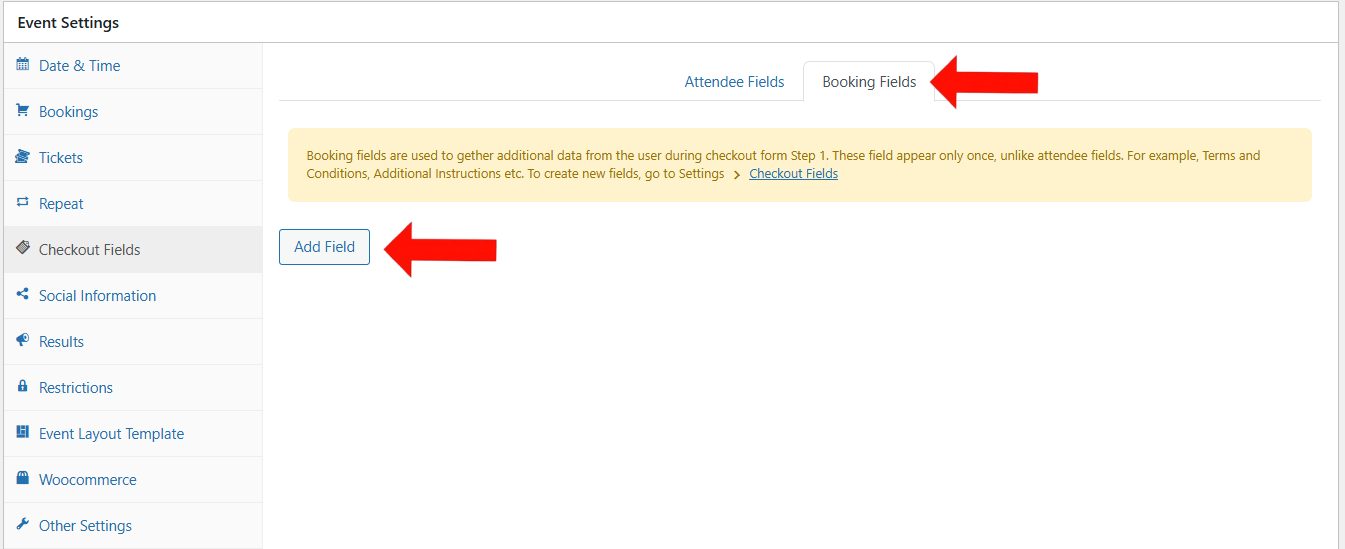
4. On the Edit Event page, open the Event Settings section and go to the Checkout Fields tab. Here, you will see two options:
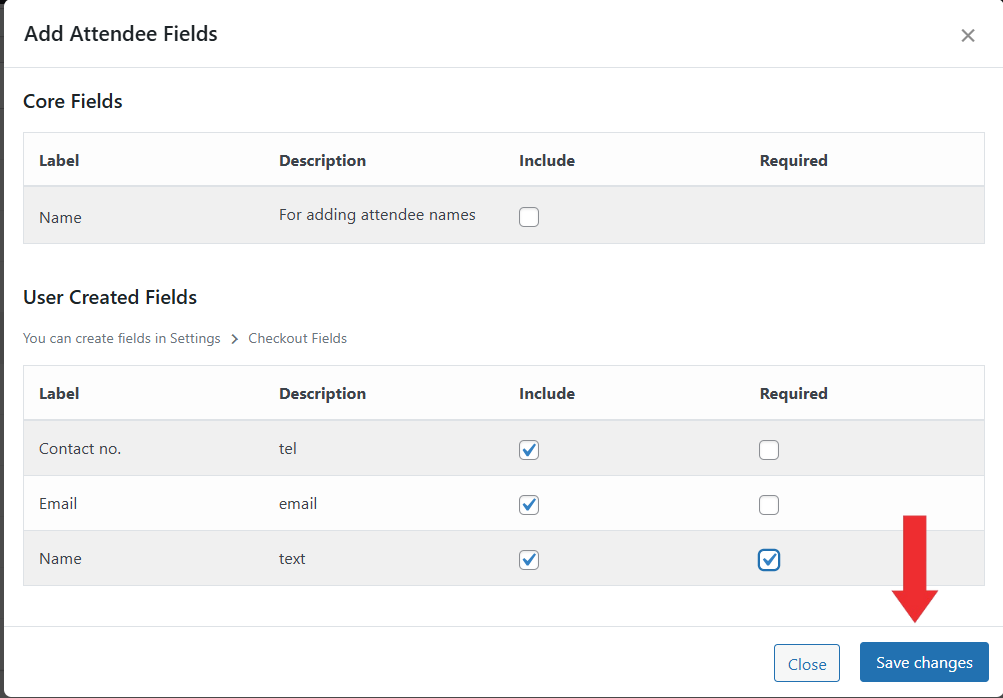
Attendee Fields – Added for each attendee in the checkout form. For example, fields like Name, Age, etc. will appear for every person being registered. You can create new attendee fields by clicking the Add Field button.
Booking Fields – Used to collect additional information from the user during the checkout form. These fields appear only once per booking, not for each attendee. For example, Terms and Conditions acceptance or Additional Instructions.
5. In the Add Attendee Field popup, select from core fields or user-created fields. You can also make fields required by checking the Required box. Click Save Changes to apply.
6. In the Booking Fields tab, click the Add Field button to create a new booking field.
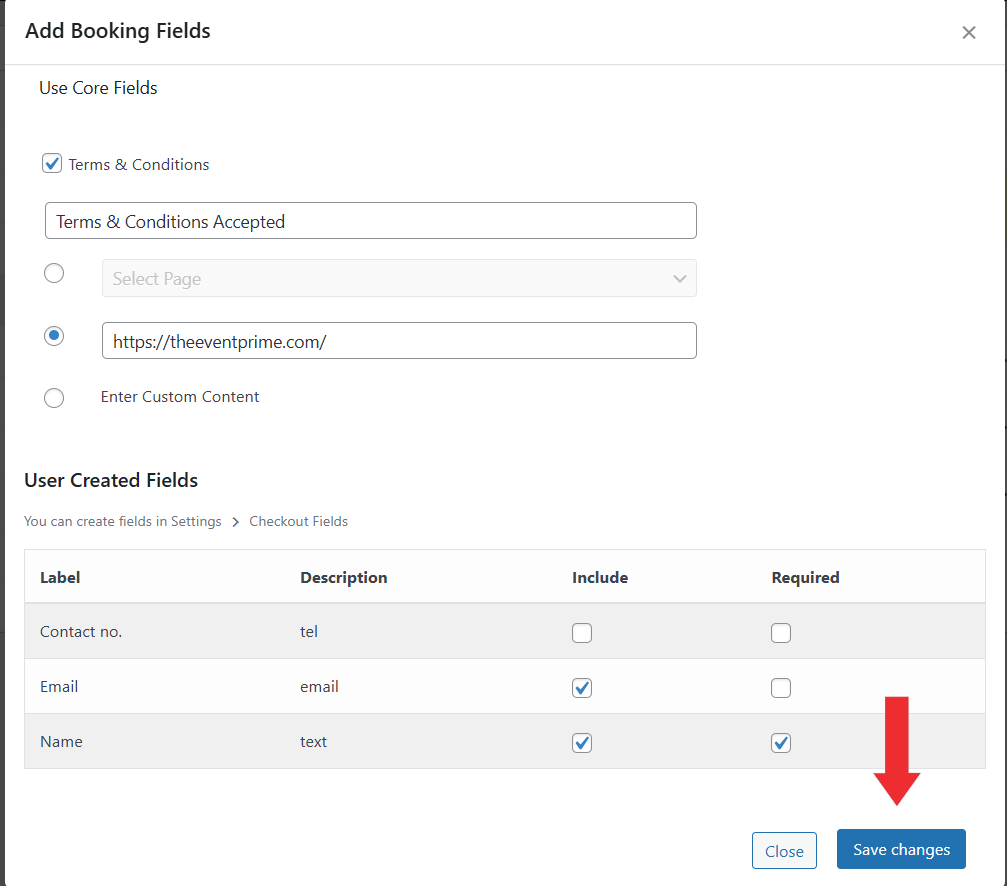
7. In the Add Booking Field popup, you can enable options such as Terms and Conditions. Enter a URL, upload an image, or add custom content where users will be redirected. Select the user created field and click Save Changes.
8. Update Event to apply the checkout field settings to the Event.
Frontend View
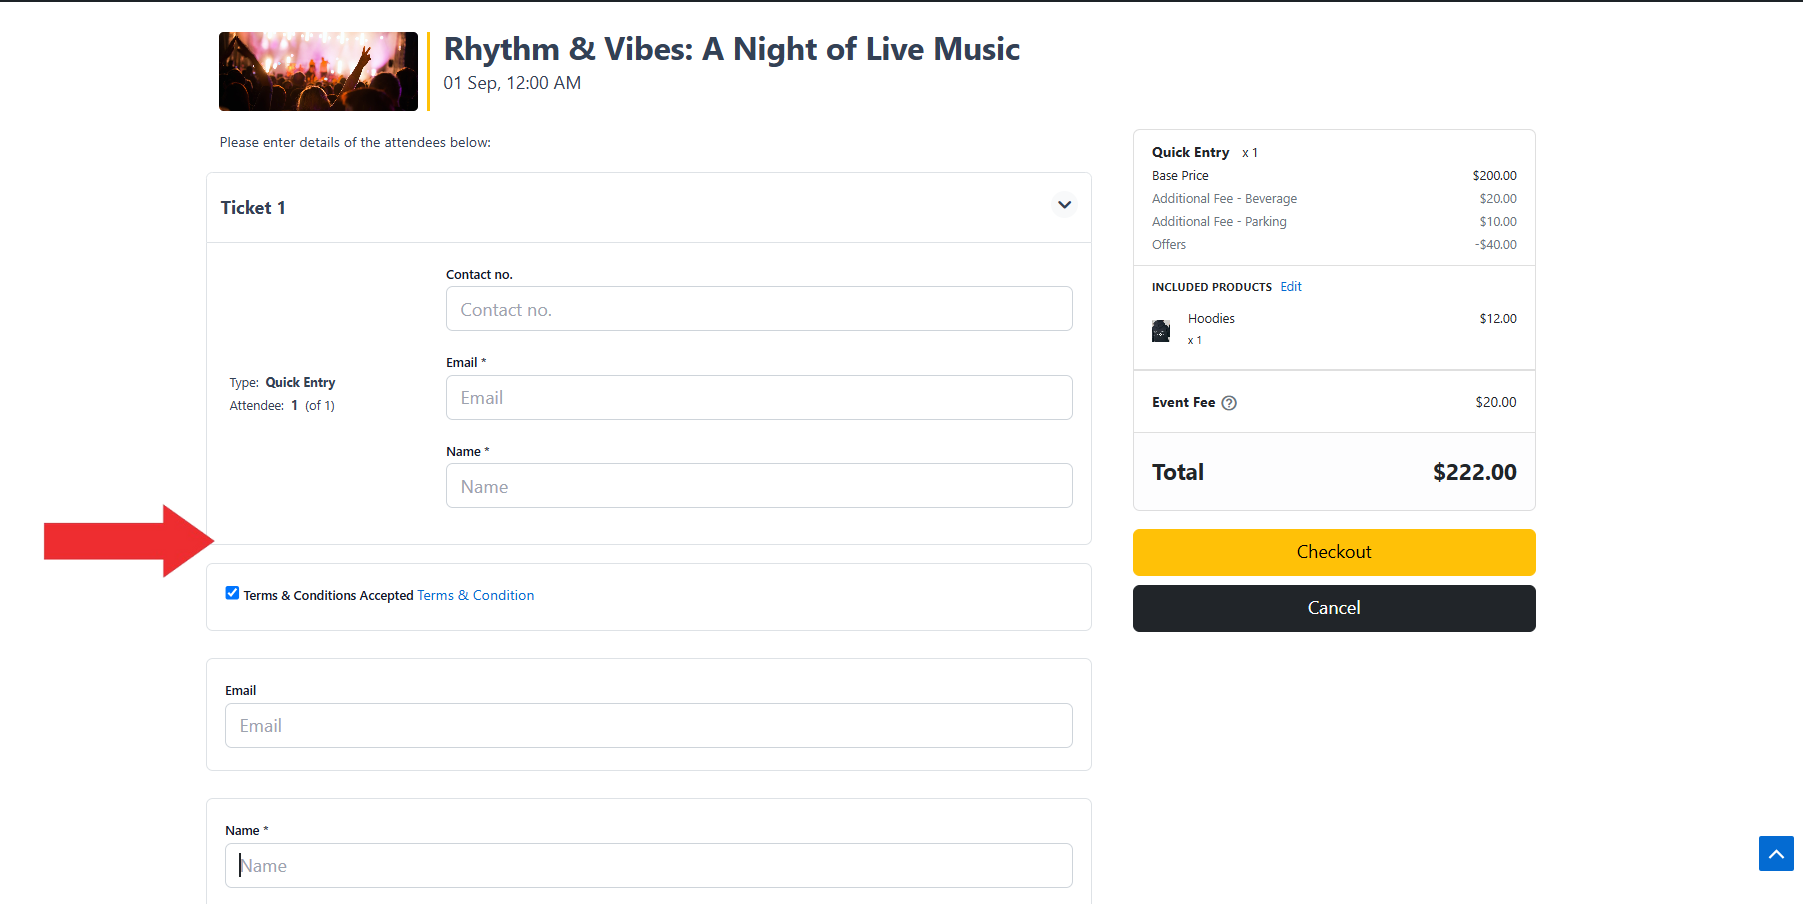
Once checkout fields are configured, users will be required to fill them out during checkout. Attendee fields will appear for each attendee being registered, while booking fields will appear once per booking. This ensures Organizers can gather detailed attendee information and additional booking data effectively.
Conclusion
With the Checkout Fields option in EventPrime, you can add both attendee-specific fields and booking-wide fields to your event checkout process. This provides flexibility for collecting detailed information, ensures smooth registrations, and helps Organizers manage Events more effectively.
Questions, Support & Custom Solutions
- Need more details or can't find what you're looking for? Let us know how we can help! Contact our support team here.
- Looking for a tailor-made solution to meet your specific needs? Our dedicated customization team is here to help! Use this link to share your requirements with us, and we'll collaborate with you to bring your vision to life.
Where are the various Checkout Fields described?
I cannot seem to search for the word dropdown or radio to find this information
For example
Checkout Fields
———————————
Dropdown is for choosing one option of many
Checkbox is for choosing many options from many
Radio is for ??
Thanks for reaching out to us.
Dropdown: Allows the participant to select one option from a list displayed in a dropdown menu. Ideal for long lists while keeping the form compact (e.g., Meal Choice: Clambake).
Radio Button: Allows the participant to select one option, but all options are displayed visibly at once (e.g., Meal Choice: Croquet).
Checkbox: Allows the participant to select multiple options from a set.
In short: both Dropdown and Radio allow only one selection, but Dropdown hides options in a menu, while Radio shows all options at once.
Where are this data stored?
How to view data inserted by attendee?
Thanks for reaching out to us.
To check the data, please go to the Edit Event page. At the top-right corner, under the Summary metabox, click on View next to Attendees.
You’ll find a Download button there — click on it to download and view all data inserted by attendees.
If you have any further questions, please don’t hesitate to reach out to us.
How do I disable the Checkout Registration Form?
Yes, you can disable the Checkout fields by following these steps:
This will disable those fields from appearing during the checkout process.