Overview
EventPrime version 4.1.0.1 includes built-in GDPR compliance tools that give users control over their personal data, while helping administrators manage data collection, consent, and retention transparently. These features ensure your site meets privacy regulations without compromising the Event Booking experience.
How to Use GDPR Tools in EventPrime
1. Enable GDPR Settings from EventPrime Global Settings
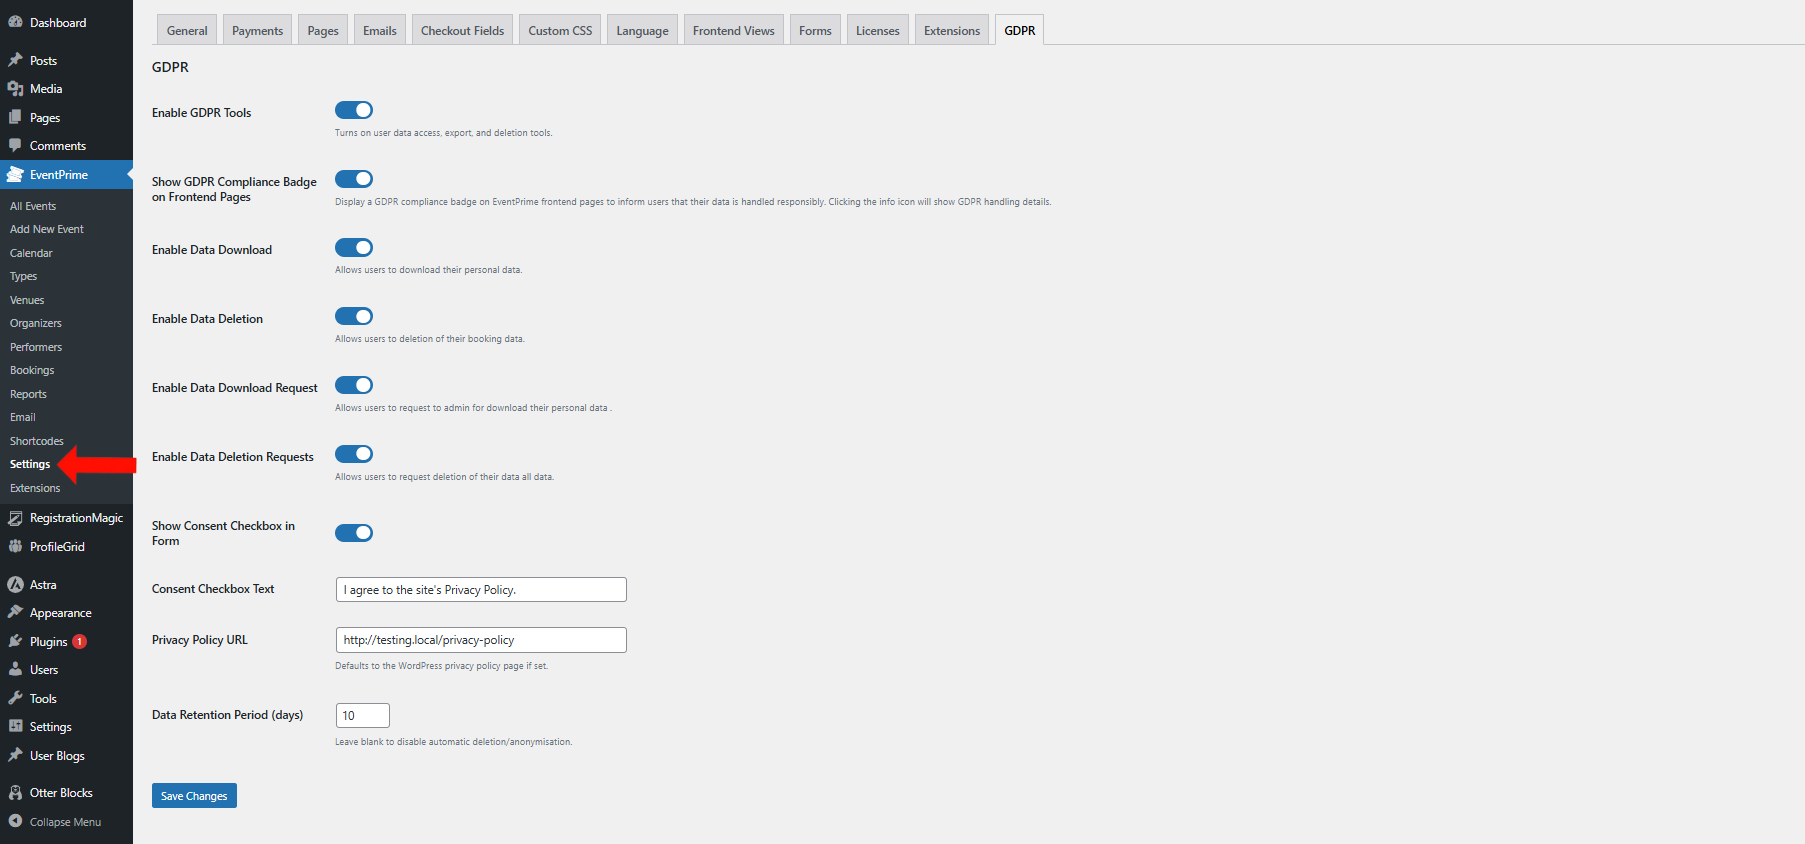
- Navigate to EventPrime menu and select Settings submenu then go to GDPR tab.
- Enable Enable GDPR Tools to activate the compliance system.
Configure available options:
- Enable Data Download – Lets users download their EventPrime data.
- Enable Data Deletion Requests – Enables user-submitted data deletion requests.
- Show Consent Checkbox in Form – Displays a consent checkbox on Booking forms.
- Consent Checkbox Text – Customize the checkbox label.
- Privacy Policy URL – Add your privacy policy page link.
- Data Retention Period (in days) – Set the period after which user data is anonymized. Leave blank to disable.
2. Let Users View, Export, and Delete Their Data via “My Data” Tab on Frontend
After enabling GDPR tools, users will see a My Data tab on the User Profile page with these four options:
- Delete Bookings Data – Instantly removes EventPrime booking data.
- Request Delete All Data – Sends a complete data deletion request via WordPress tools.
- Export Bookings Data – Instantly downloads the user’s EventPrime data.
- Request Export All Data – Submits a full export request using WordPress core tools.
If a user’s data is anonymized or deleted:
- Access to the “My Data” tab is revoked with a message: “You no longer have any personal data stored on this site.”
- They are logged out automatically.
- Booking history is shown as “Deleted User“.

3. Add Consent Checkbox to Booking Forms
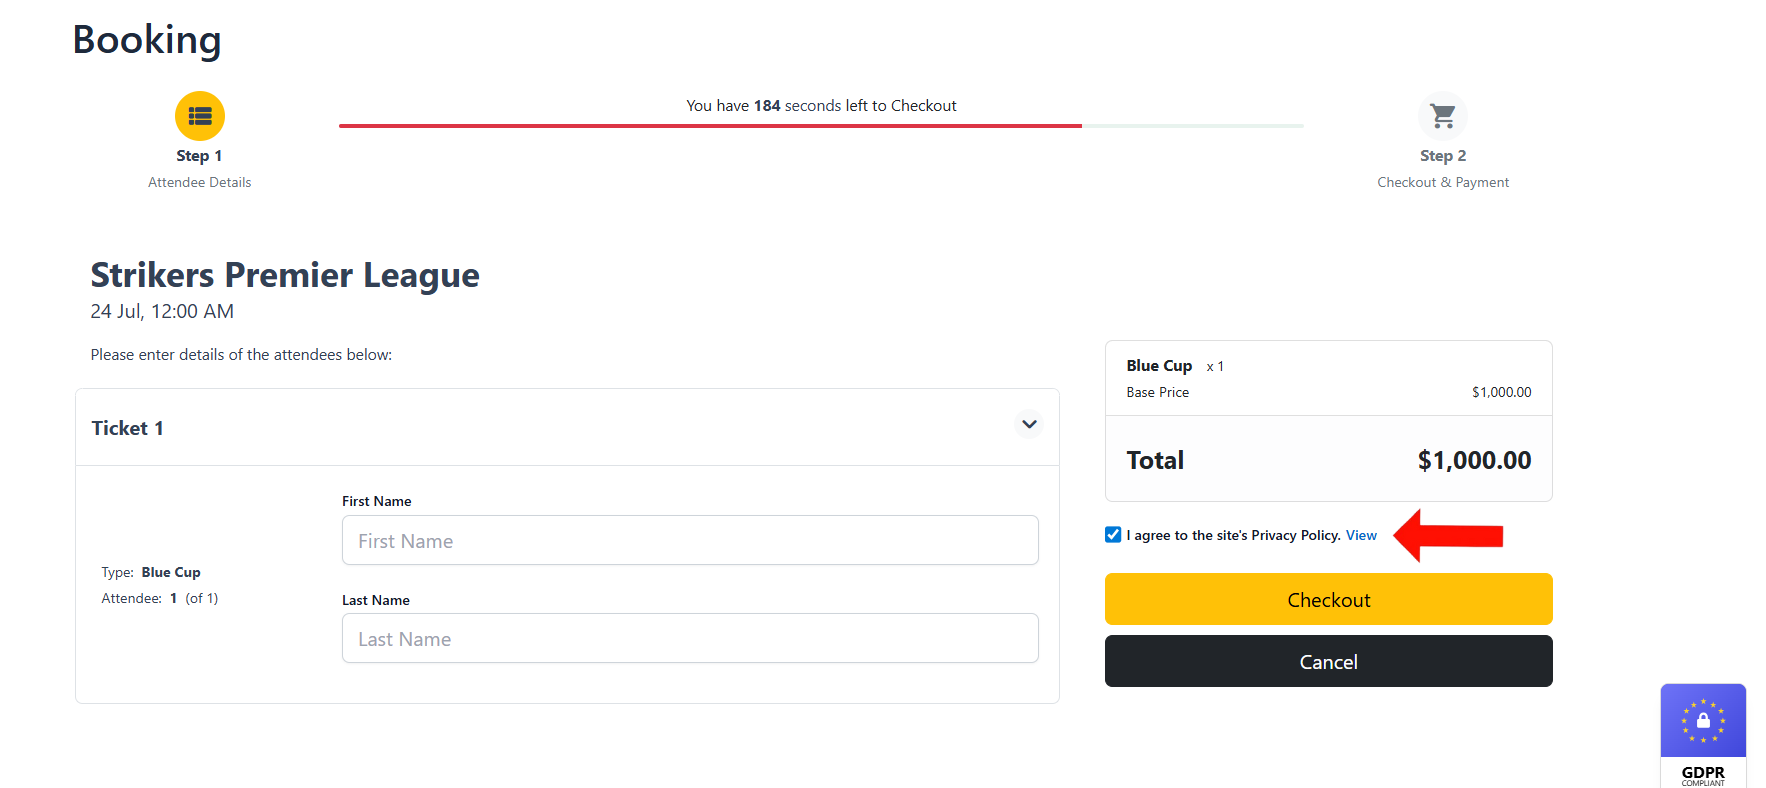
- When enabled, a consent checkbox appears on the EventPrime Booking form.
- The system records both the consent status and the exact timestamp in the Booking metadata.
- Admins can customize the label and privacy policy URL in GDPR settings.
4. Automatic Data Anonymization Feature Based on Retention Period
If a Data Retention Period is set:
- The countdown starts after a user’s last Booking date.
- Once expired, EventPrime automatically:
- Replaces name and email with “Deleted User“.
- Delete associated payment metadata.
- Retain Booking data for reporting, but without personal identifiers.
If the retention field is blank, anonymization will not occur.
5. Practical Example: What Happens When a User Deletes Their Data
Before Anonymization (Sample booking data):
{
"user_id": 542,
"name": "Lukas Müller",
"email": "lukas.mueller@example.de",
"event": "GDPR Training",
"payment_id": "PAY123456",
"status": "confirmed"
}
After Anonymization:
{
"user_id": 542,
"name": "Deleted User",
"email": "",
"event": "GDPR Training",
"payment_id": "",
"status": "confirmed"
}
6. Tips for Site Administrators to Ensure Full GDPR Compliance
- Use WordPress’s built-in tools under the Tools menu to handle full-site data requests:
- Export Personal Data lets you send users their stored data.
- Erase Personal Data allows you to delete user data across all plugins.
- These tools work alongside EventPrime’s GDPR features and help manage requests beyond just EventPrime.
- To test data anonymization before using it live, set a short Data Retention Period (e.g., 1–2 days) from EventPrime menu and selecting Settings submenu then navigating GDPR tab, create a test Booking, and wait for the set period to pass.
- After the retention period expires, EventPrime will anonymize the user’s data by replacing their name and email with Deleted User and removing any stored payment details.
- The retention countdown resets after every new booking. Anonymization is based on the user’s last Booking date.
- Ensure your WordPress cron jobs are working, as automated anonymization relies on scheduled tasks to run properly.
7. Notes and Edge Cases
- Bookings made by deleted users: These appear as created by “Deleted User” in EventPrime reports.
- WooCommerce Integration: If using WooCommerce, ensure you manage consent through both plugins. WooCommerce’s GDPR settings do not overlap with EventPrime’s consent logs.
- Consent Logs: Consent status and timestamps are stored in the Booking metadata. These logs are not exported by default in WordPress GDPR tools but remain visible to admins.
8. Enable the GDPR Compliance Badge and Info Modal on Frontend Pages
EventPrime includes a GDPR Compliance Badge to help you communicate your site’s commitment to data privacy.
To enable the badge:
- Navigate to EventPrime menu and select Settings submenu then go to GDPR tab.
- Toggle the Show GDPR Compliance Badge on Frontend Pages option to enable it.
Once enabled:
- A small badge labeled GDPR Compliant appears on the bottom-right corner of the site.
- Clicking it opens an information modal that explains:
- How personal data is collected and handled
- Your privacy policy summary
- A direct link to the full Privacy Policy page
This badge serves as a trust element to increase user confidence. It does not block or manage cookies.
Conclusion
EventPrime’s GDPR compliance tools offer a robust, user-focused approach to data privacy. From consent collection and cookie banners to data export, deletion requests, and automatic anonymization, every feature is designed to meet regulatory standards without disrupting your Event Booking experience.
Questions, Support & Custom Solutions
- Need more details or can't find what you're looking for? Let us know how we can help! Contact our support team here.
- Looking for a tailor-made solution to meet your specific needs? Our dedicated customization team is here to help! Use this link to share your requirements with us, and we'll collaborate with you to bring your vision to life.