
Overview
The Mailchimp Integration extension in EventPrime allows you to automatically subscribe users to your Mailchimp lists during Event Bookings. You can create lists, map user data, and manage multiple subscription as per your requirement. This helps improve Event communication and grow your email marketing efforts effectively.
Prerequisite
Make sure you have EventPrime and the Mailchimp Integration extension installed and activated on your WordPress site.
If the extension is not yet installed, get it from here: Get Mailchimp Integration Extension
Steps to Use the Mailchimp Integration Extension in EventPrime
1. Obtaining Mailchimp API Key for Integration
- Go to https://mailchimp.com/
- Create a new account or log in to your existing Mailchimp account.
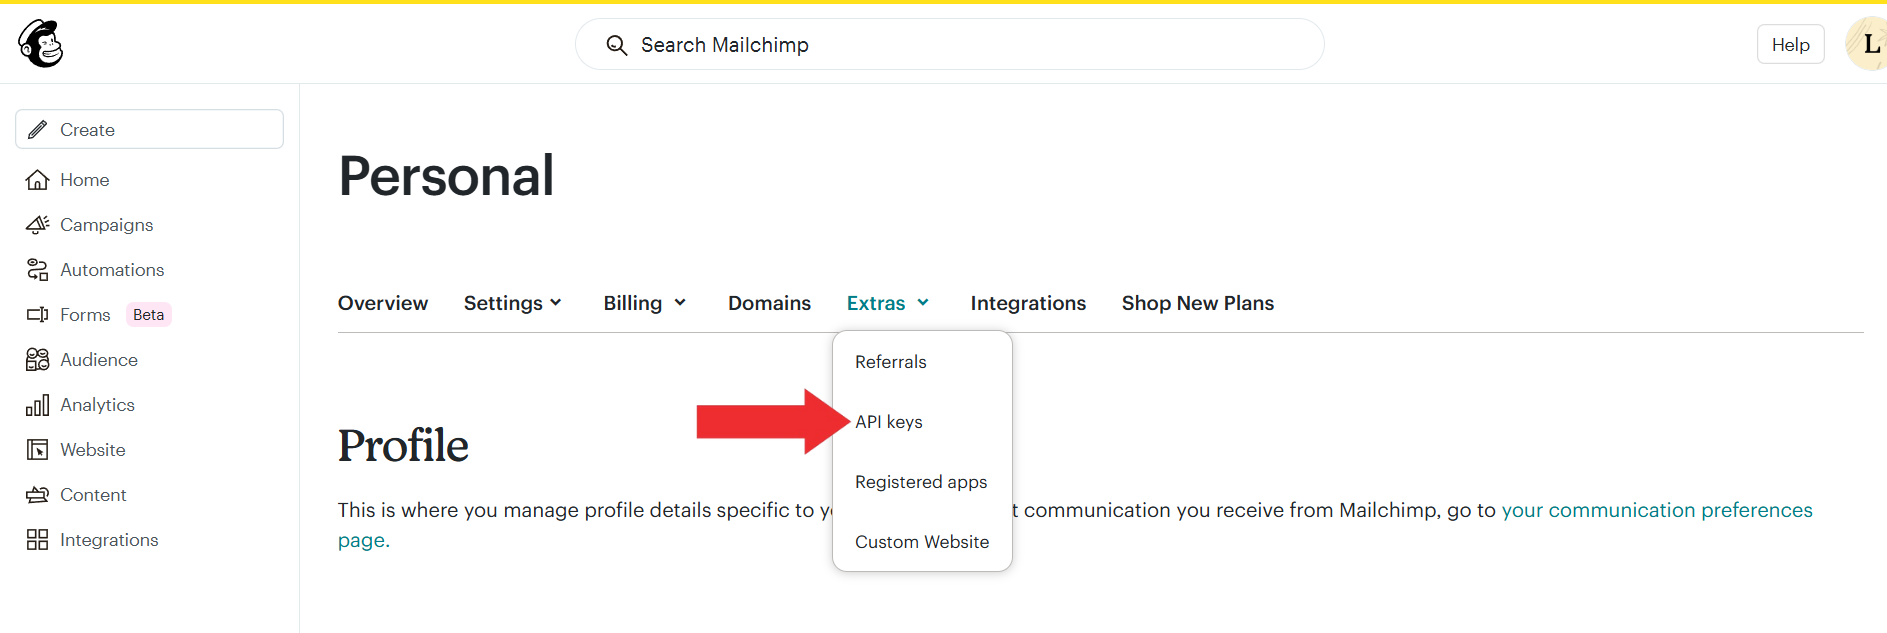
- Once logged in, click the profile icon in the top-right corner and select Profile from the dropdown menu.

- In Profile section, click the Extras tab.
- Select API keys from the dropdown menu.
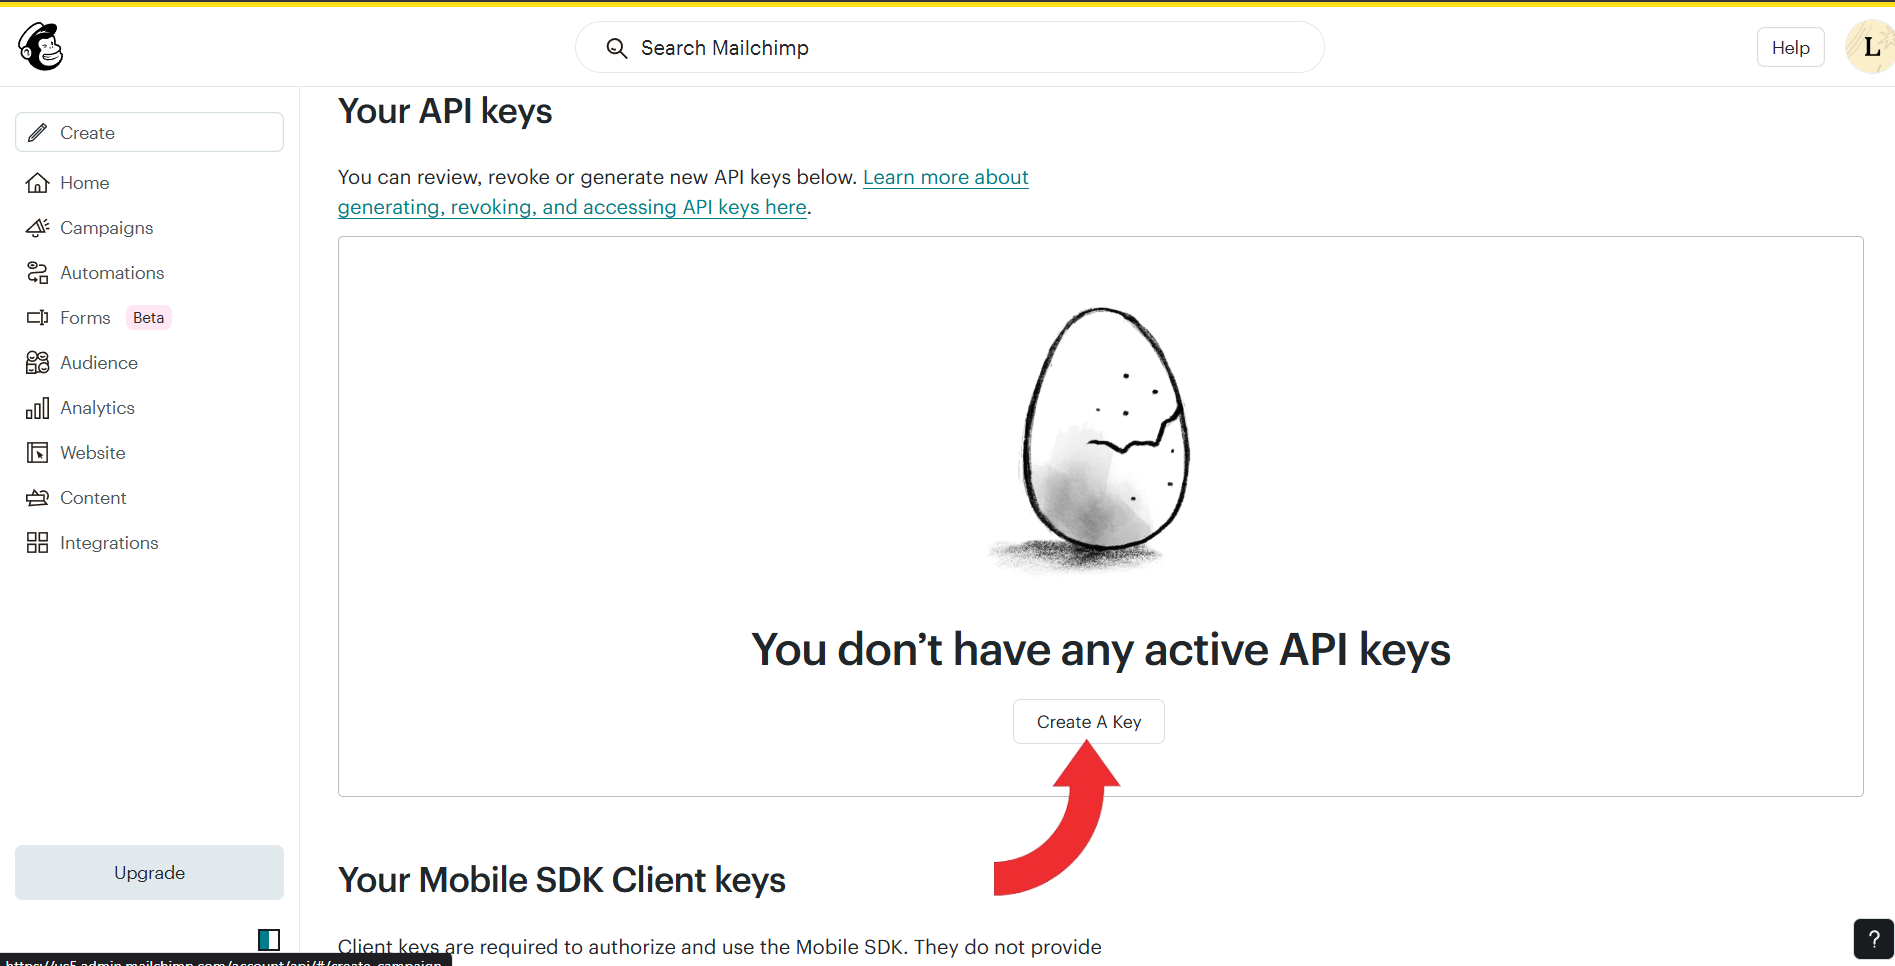
- On the API Keys page, scroll down and click Create A Key button.
- Enter a name for your API key and click the Generate Key button to create the key.
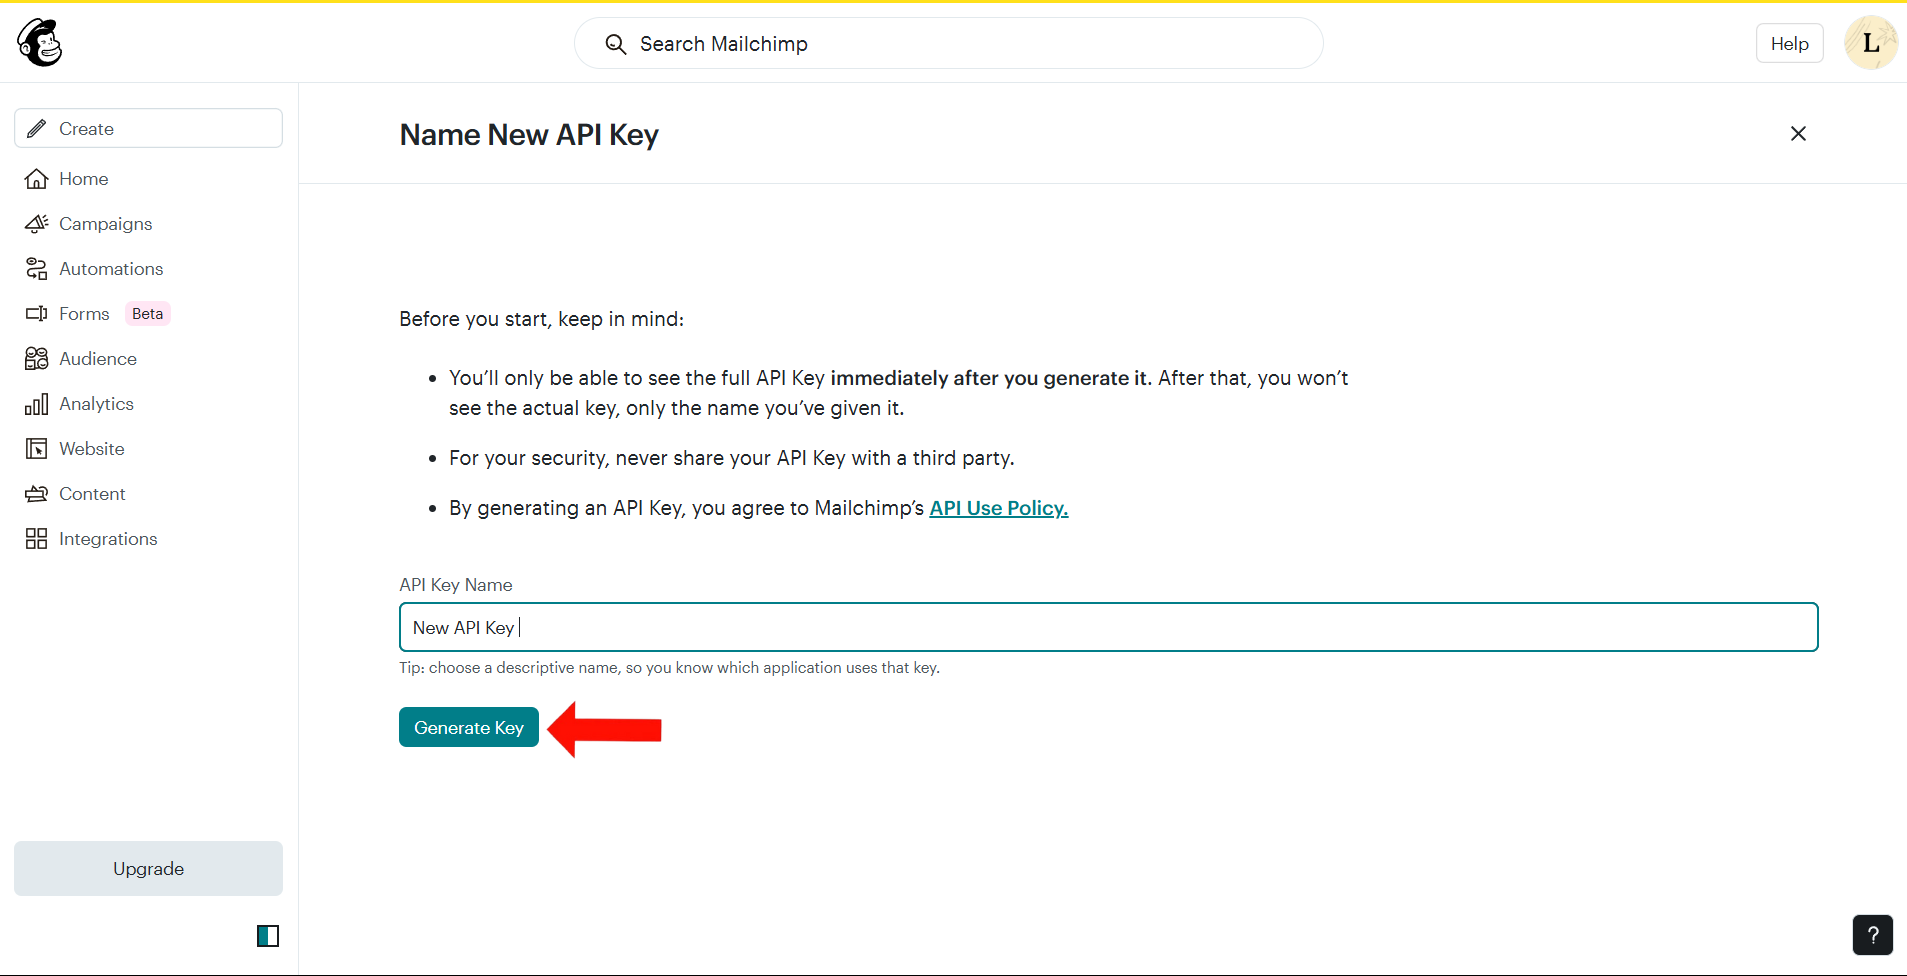
Copy and save the generated API key securely—you’ll need this to connect Mailchimp with EventPrime.
2. Access the Mailchimp Integration Settings in EventPrime
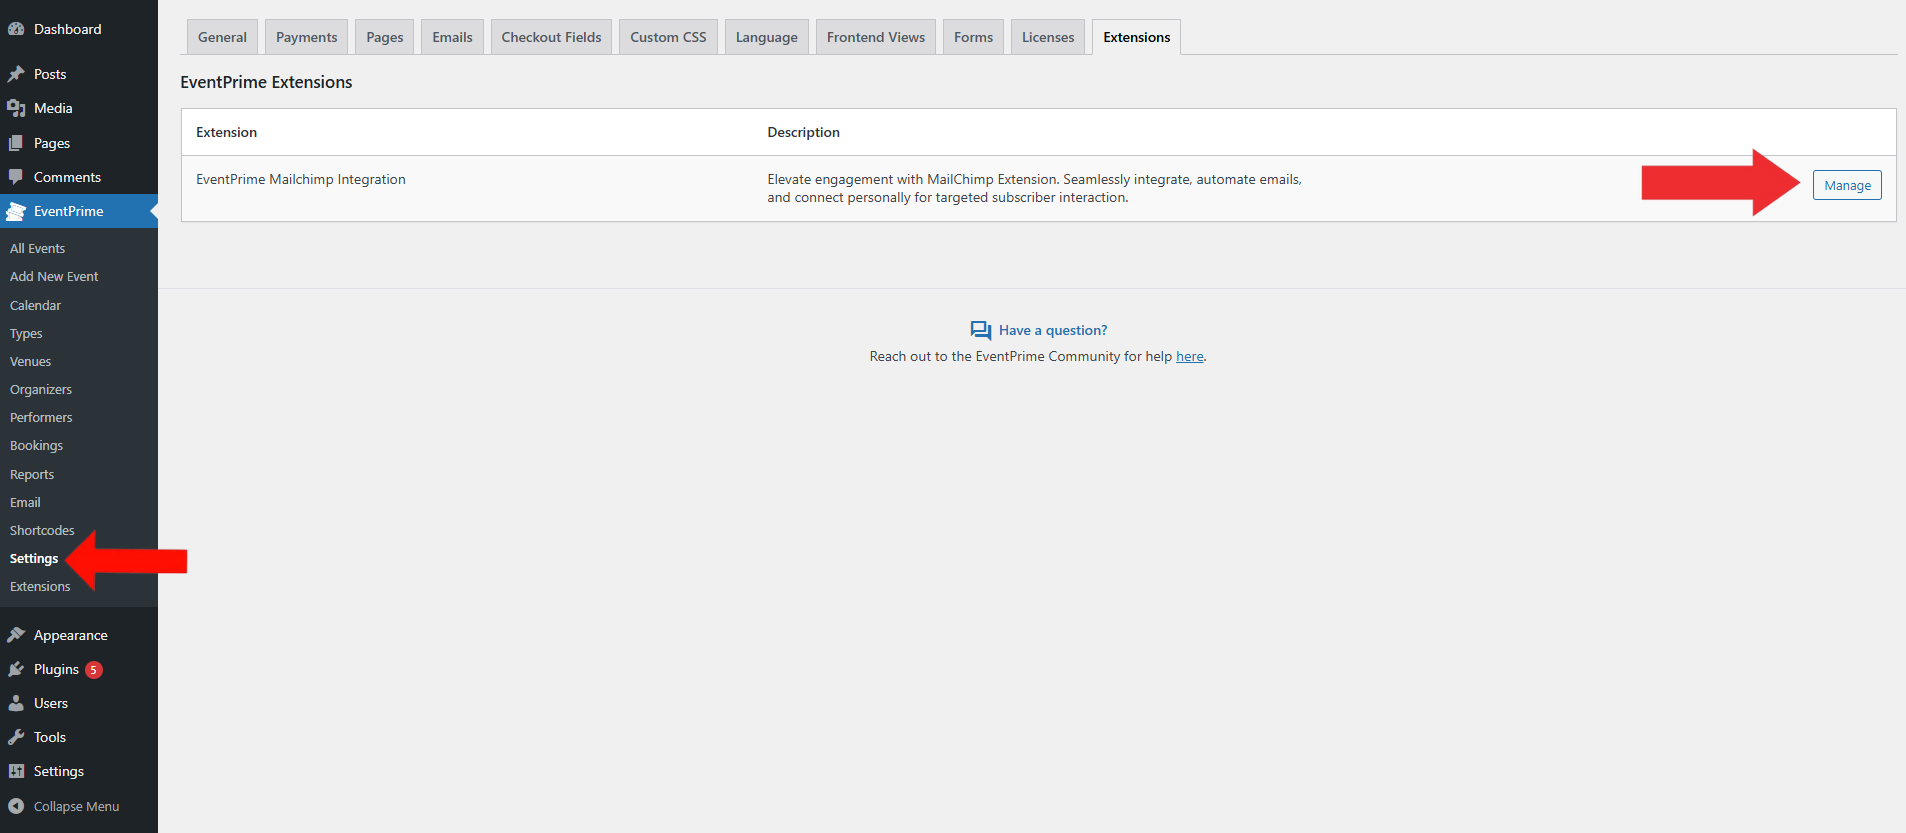
- Navigate to EventPrime menu, and select Settings submenu.
- Go to Extensions tab, and click Manage button for EventPrime Mailchimp Integration.
3. Enable the Mailchimp Integration and Enter the API Key
On the Mailchimp Integration Settings page,
- Toggle the Allow Mailchimp Integration option to enable the integration.
- Enter the API key you copied and click Save Changes to save your settings.

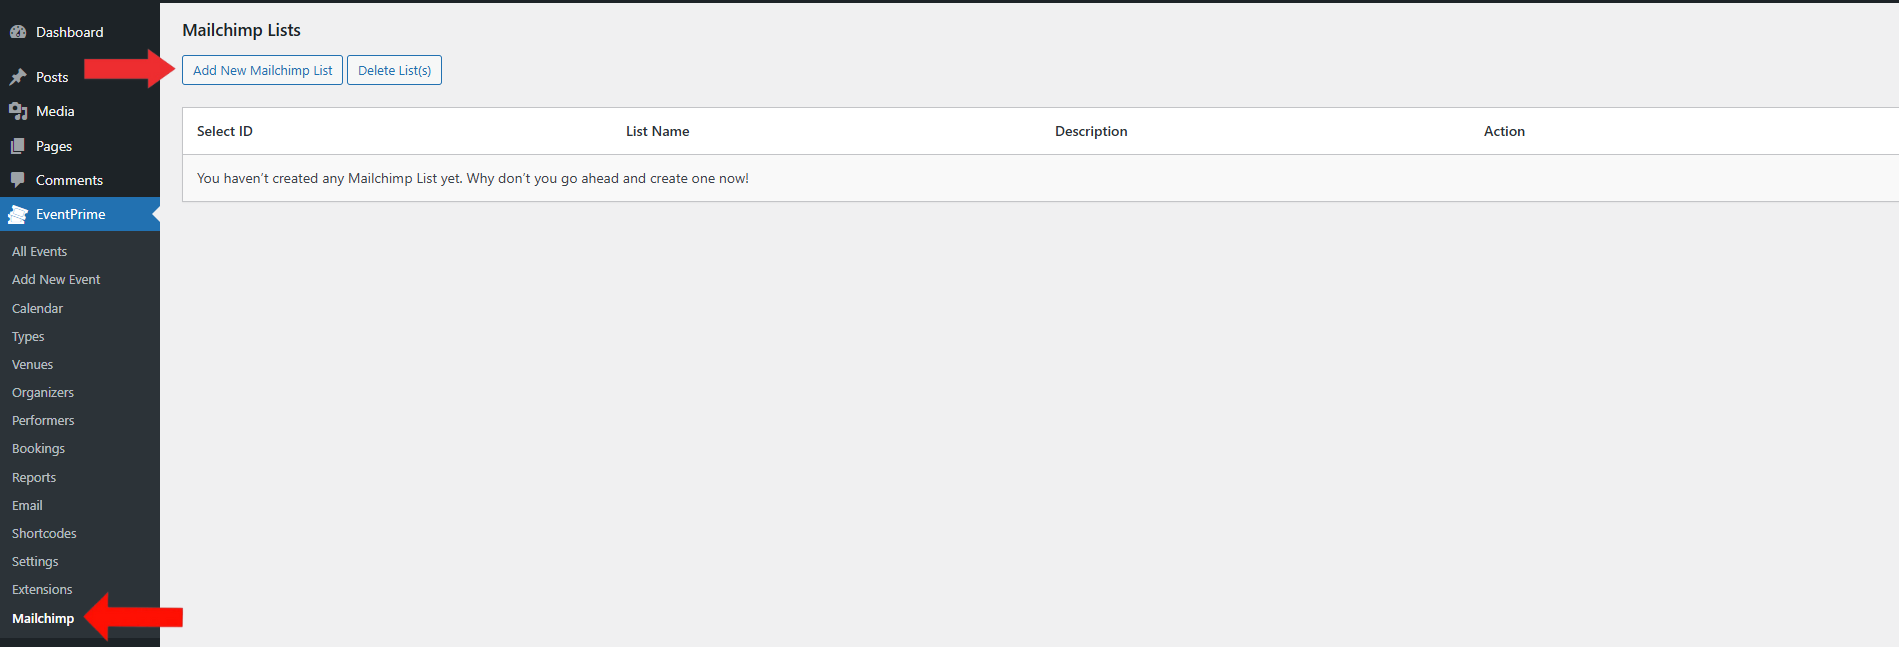
4. Access the Mailchimp Submenu to View, Edit, or Create Mailing Lists
- Navigate to EventPrime menu, and select Mailchimp submenu.
- Here, you’ll find all the Mailchimp lists you’ve created, along with options to edit or delete them.
- Click the Add New Mailchimp List button to create a new mailing list.
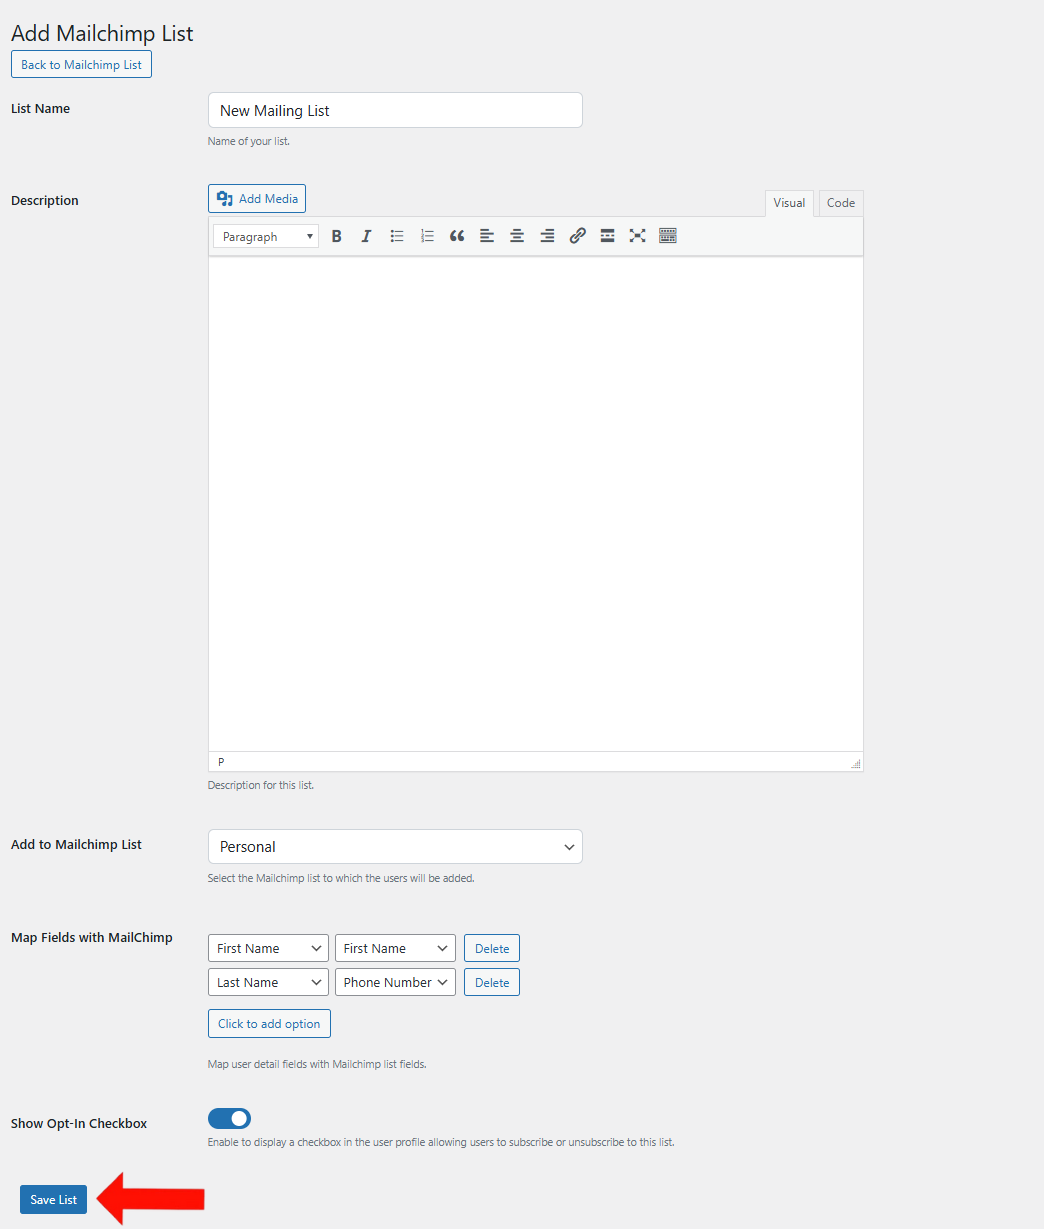
5. Add and Configure a New Mailchimp List for User Subscription
On the Add New Mailing List page enter the following details:
- List Name: Enter a name for your mailing list.
- Description: Write a short description for your mailing list.
- Add to Mailing List: Choose the Mailchimp list to which users will be added.
- Map Fields with Mailchimp: Link EventPrime fields (like First Name, Last Name, Phone Number) with Mailchimp fields. Use Click to Add Option to map more fields if needed.
- Show Opt-In Checkbox: Toggle this on to allow users to manage their subscription from their profile.
Once completed, click the Save List button to save your mailing list.
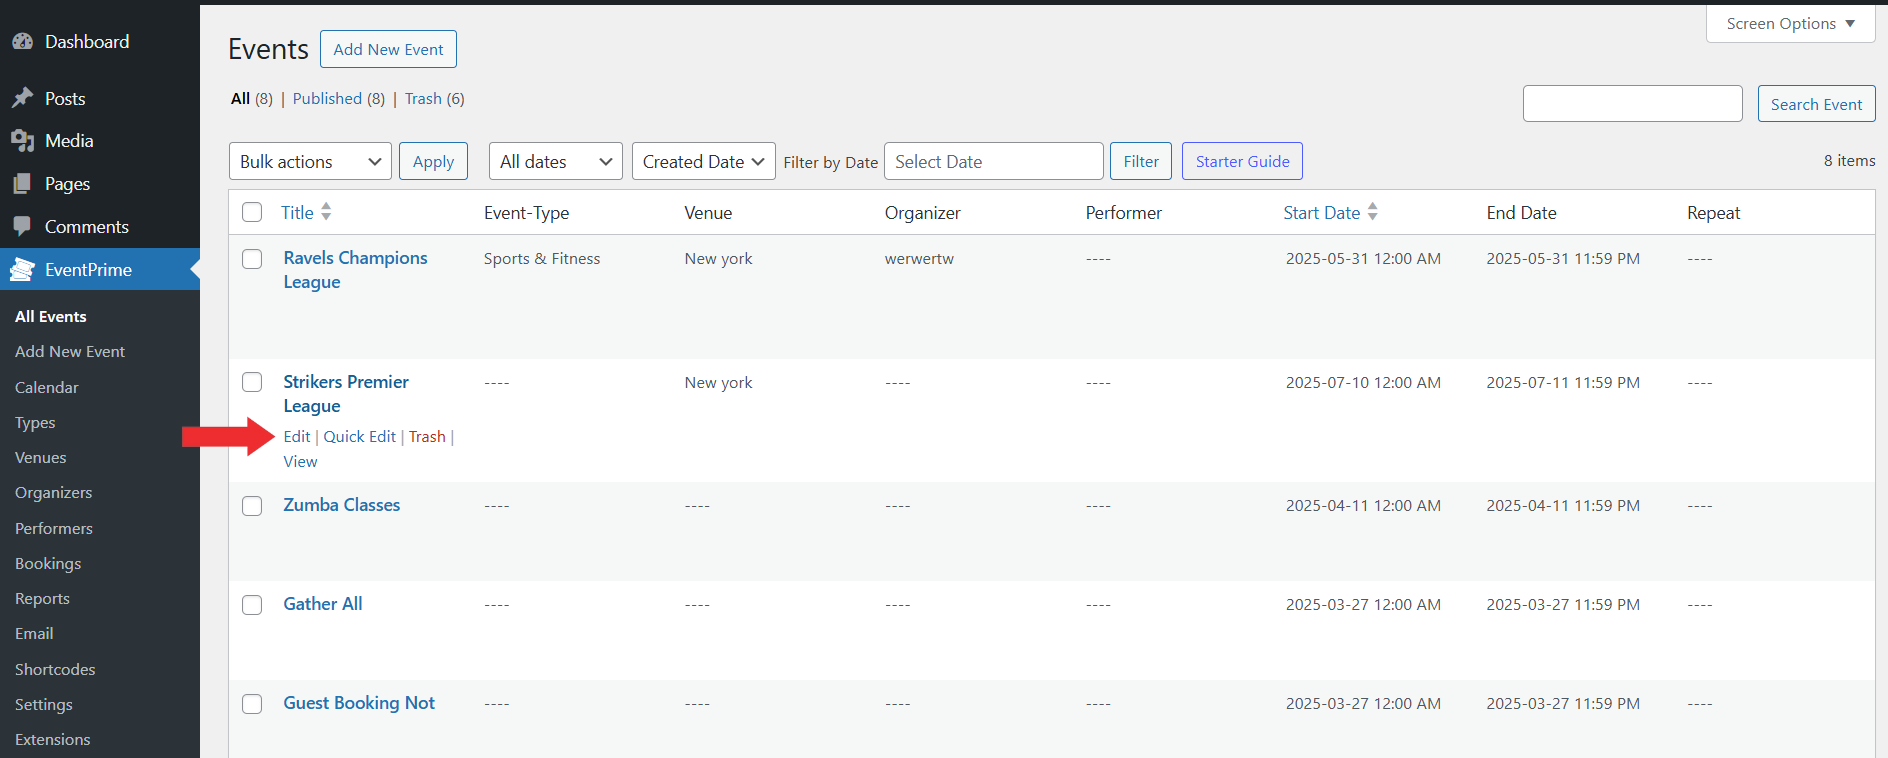
6. Assign the Mailchimp List to a Specific Event
- Navigate to EventPrime menu, and select All Events submenu.
- In the list of Events, click the Edit button for the Event you want to link with Mailchimp.
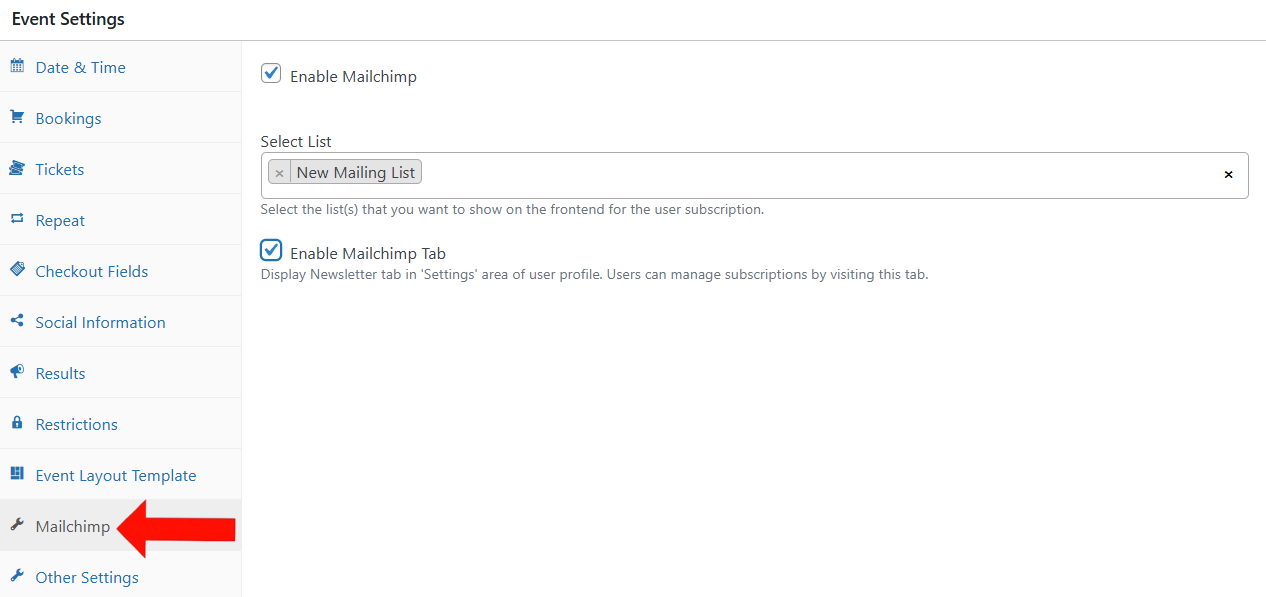
7. Enable Mailchimp for the Event
- On the Edit Event page, go to Event Settings section and click Mailchimp tab.
- Check the Enable Mailchimp checkbox to allow Mailchimp subscriptions for this Event.
- Under Select List, choose the Mailchimp list you created earlier to be linked with this Event.
- Check the Enable Mailchimp Tab checkbox to display the My Subscription section in the user’s profile area so users can view or unsubscribe from mailing lists.
- Update the Event to apply this changes.
Frontend View
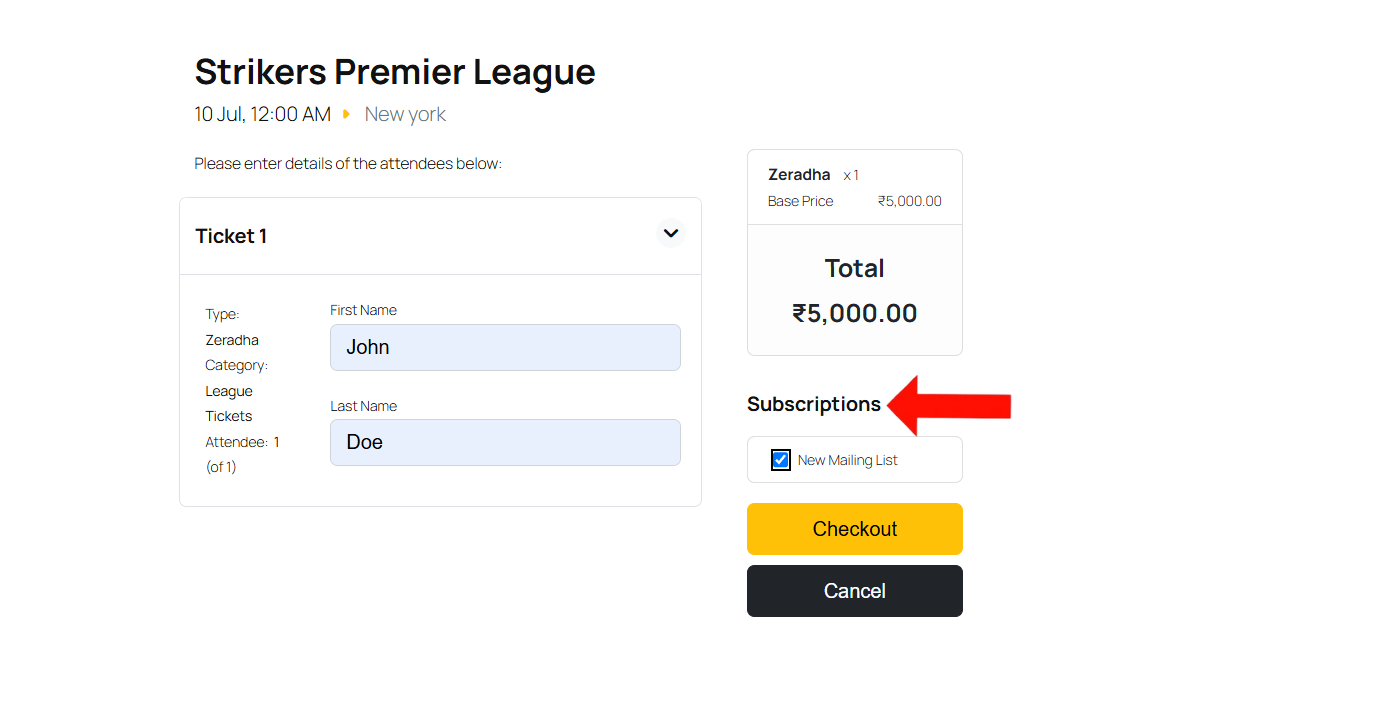
During the Event checkout process, users will see a Subscriptions section on the right side of the Event Booking page. Here, they can opt in by selecting the checkbox next to the mailing list associated with the Event.
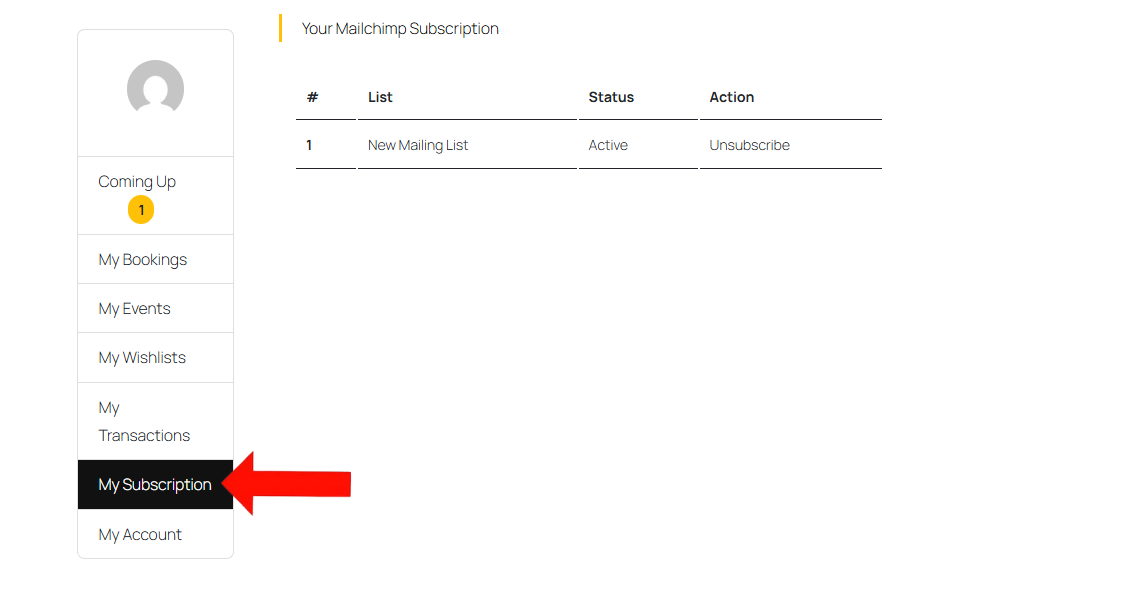
After Booking, users can manage their subscriptions by going to the My Subscription section from User Profile page. This section displays the list name, current subscription status, and provides an Unsubscribe button, allowing users to opt out anytime.
Conclusion
The Mailchimp Integration in EventPrime helps you stay connected with your audience by linking your Events to Mailchimp lists. You can create and attach mailing lists to specific Events, and give users the option to subscribe during checkout. It also lets users to manage their subscriptions from their profile making it a simple way to grow your email audience.
Questions, Support & Custom Solutions
- Need more details or can't find what you're looking for? Let us know how we can help! Contact our support team here.
- Looking for a tailor-made solution to meet your specific needs? Our dedicated customization team is here to help! Use this link to share your requirements with us, and we'll collaborate with you to bring your vision to life.