
Overview
The Advanced Checkout Fields extension in EventPrime lets you add custom fields to the booking form, such as radio buttons, checkboxes, dropdowns, and text areas. This allows for more flexible and Event specific data collection from attendees.
Steps to Add Advanced Checkout Fields in EventPrime
1. Install and activate the Advanced Checkout Fields extension for EventPrime.
2. Navigate to the EventPrime menu in your WordPress dashboard and click on Settings submenu.
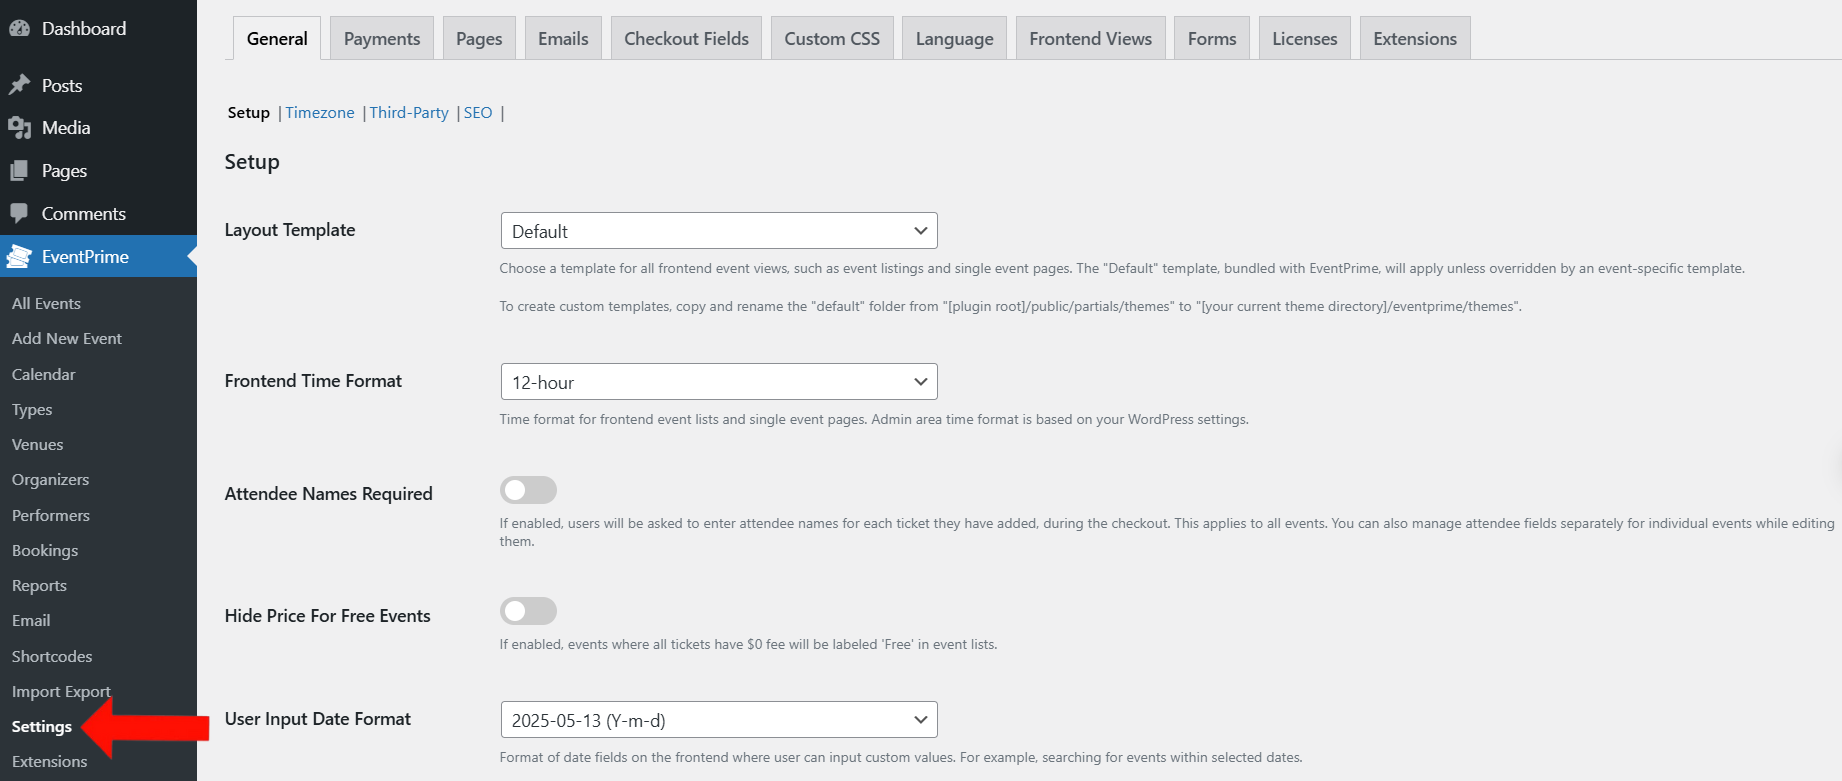
3. Go to the Checkout Fields tab and click on Add New Field button.

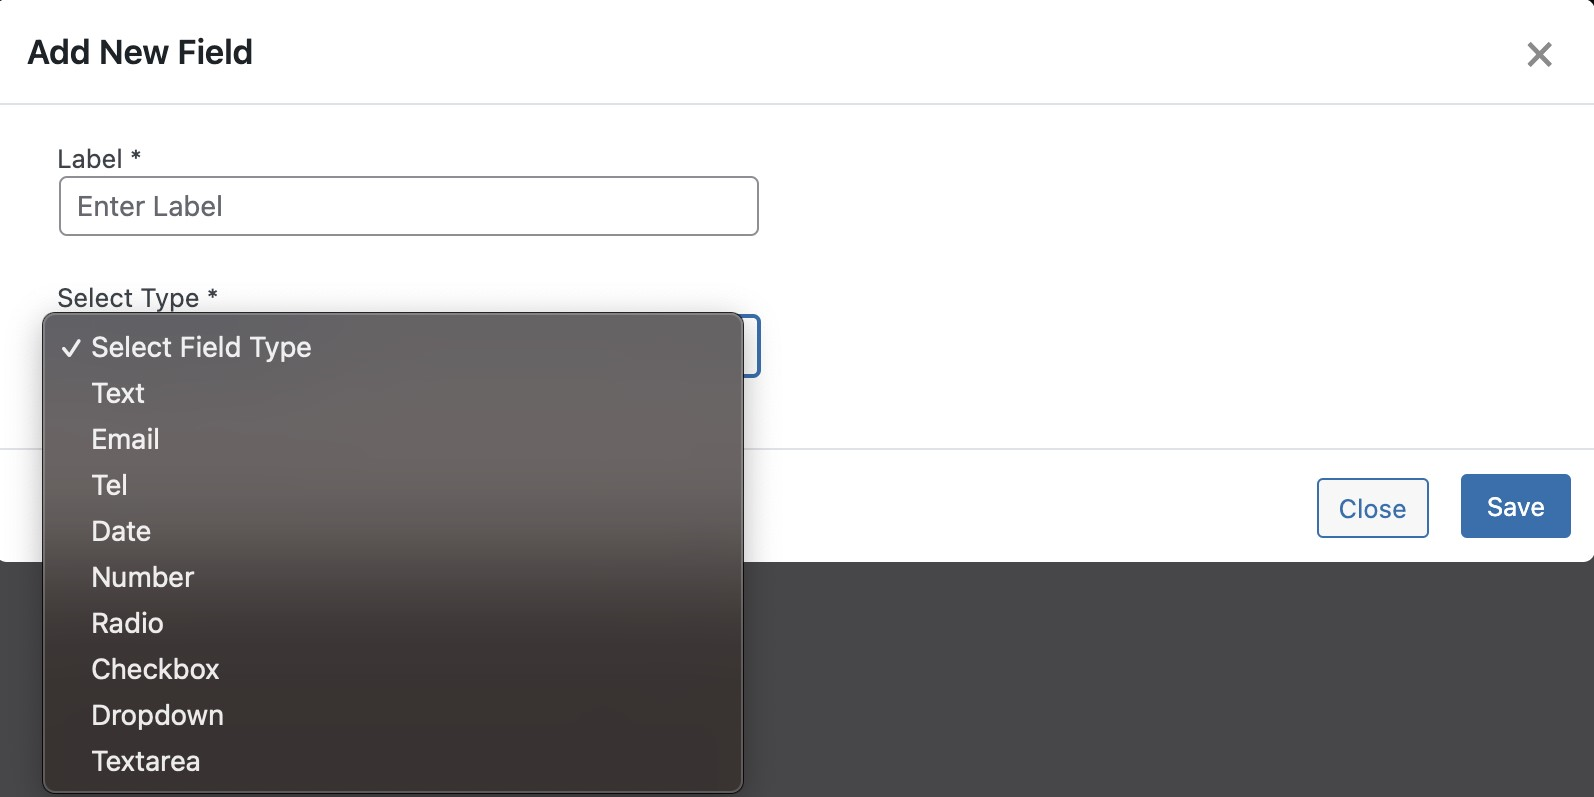
4. In the Add New Field form, enter a Label name for the field. Then, click on Select Type to choose the type of information you want to collect from attendees.

5. Here, you will find four new field types – radio–button, checkbox, dropdown, and textarea. Select the field type and save the changes.
6. To assign the custom field to a specific Event:
- Go to the All Events submenu under the EventPrime menu.
- Click Edit for the Event you want to add custom Checkout Fields.
- On the Edit Event page, go to Event Settings and open the Checkout Fields tab
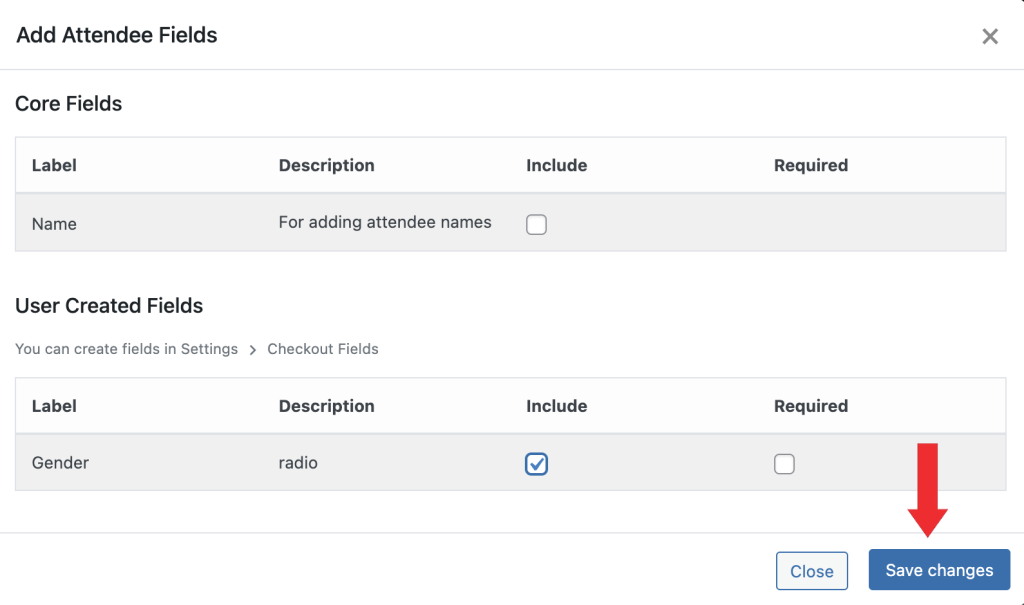
- Click on Add Field button. In the Add Attendee Fields form, find your created field under User Created Fields.
- Check the box next to the field to enable it.
- Click on Save Changes button after selecting fields, then Update the Event to apply the setting.
Frontend View
Once enabled, the advanced field(s) will display on the Event’s checkout form, allowing attendees to input relevant responses during booking.

Conclusion
The Advanced Checkout Fields extension in EventPrime allows Organizers to collect Event-specific data through custom fields, streamlining the booking process and improving attendee input.
Questions, Support & Custom Solutions
- Need more details or can't find what you're looking for? Let us know how we can help! Contact our support team here.
- Looking for a tailor-made solution to meet your specific needs? Our dedicated customization team is here to help! Use this link to share your requirements with us, and we'll collaborate with you to bring your vision to life.
How can I export these fields in bulk. The export is not including these additional fields. I can see them if I click into each booking which is not practical.
Thanks for reaching out to us.
To assist you better, could you please confirm whether you’re referring to booking fields or attendee fields for the export?
If you have any further questions, please don’t hesitate to reach out to us.
Booking fields
As of now, booking fields are visible when viewing individual bookings. And EventPrime allows for bulk export of the attendee fields. We highly encourage you to write to our support here for further details:http://theeventprime.com/support/
How can I disable the checkout fields.
I do not want to ask for the name on each ticket.
The user can skip this screen, but i want it to not show.
Thanks for reaching out to us.
You can hide the attendee name fields at checkout using custom CSS. You may add custom CSS by navigating to the “Events -> Settings” sub-menu select the “Custom CSS” tab.
If you have any further questions, please don’t hesitate to reach out to us.
still no news about the feature to re-order fields ?
Thanks for reaching out to us.
To address your concern, when adding checkout fields, you have the flexibility to create and arrange the fields as per your preference. We recommend creating the fields first that you require the least at the bottom, followed by the fields you need above them, and continuing this process until all necessary fields are added. This way, the most important fields can be positioned appropriately towards the top for better visibility and usability.
Our team has taken note of your request to reorder checkout fields and we would like to share that we will be incorporating the requested feature soon with our upcoming releases.
If you have any further questions, please don’t hesitate to reach out to us.
It is not possible to influence the arrangement of the fields. This is extremely inappropriate! The least important fields are at the top, while the name, for example, is at the bottom. The width or number of fields in a row that cannot be influenced is the lesser evil. In any case, the result looks very unprofessional! Ich hoffe, dass ich vielleicht etwas übersehen habe …
Hello,
Thank you for reaching out!
We would like to inform you that the sequence of checkout fields displayed under the “Event Settings” meta-box on the “Edit Event” page corresponds directly to their creation order under the “Checkout Fields” tab in the “Events -> Settings” sub-menu.
That being said, we would like to share that we have taken note of the requested feature to order the checkout fields and we will conduct a detailed assessment of your request for a possible inclusion in the system. We will mention the feature in the change log on our plugin page at WordPress.Org, once it’s available.
If you have any further questions, please don’t hesitate to contact us.
Always happy to help!
To Reorder the fields.
go into the database table “xx_eventprime_checkout_fields” and order by id High to Low.
This is the order of display on your website. change the ID number to gain the order you want. You will have to re assign any field that you modify. Hope that helps.
Thanks for update.
We are pleased to inform you that we have this feature in our pipeline and plan to add it in our upcoming releases. This will allow you to easily reorder fields directly from the backend without the need to modify the database.